
In the first part of this How to Get Started with Turbo360 series, I explained how to configure a Service Principal to enable secure access. Now, I want to move one step further. Specifically, I will focus on the module I am most curious to explore: Cost Analyzer, Turbo360’s Azure Cost Management tool.
With that in mind, this post shifts the focus from connectivity to cost visibility and governance. More importantly, it explores how Cost Analyzer can help me better understand, monitor, and control Azure Integration Services spending in day‑to‑day scenarios.
📝 One-Minute Brief
Managing Azure Integration Services costs can become challenging without proper visibility and tooling. In this second part of the Turbo360 getting‑started series, the focus shifts to Cost Analyzer, showing how to configure it and start tracking, analyzing, and optimizing Azure spending. The article explains how Turbo360 helps break down costs across subscriptions and services, providing actionable insights that support cost governance, transparency, and smarter operational decisions.
Introduction to the Cost Analyzer module
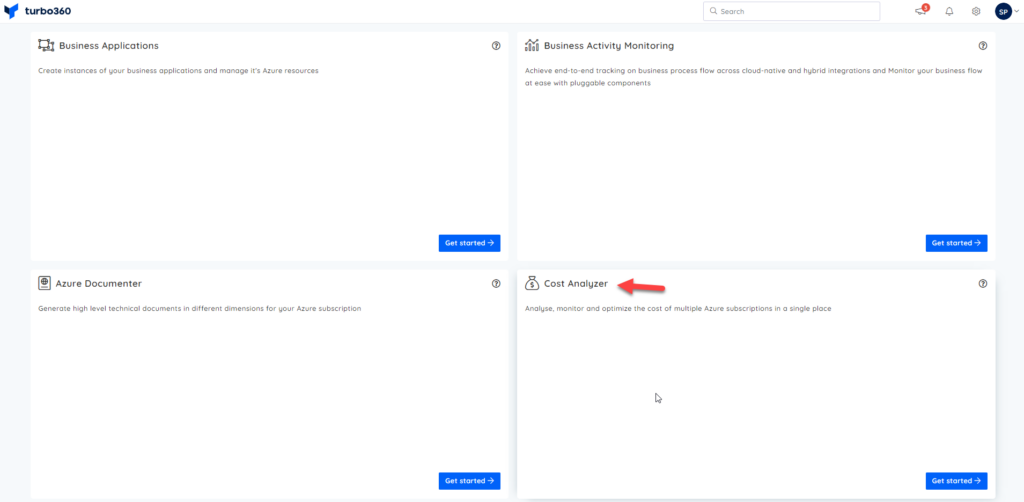
Turbo360 is composed of 4 principal modules:
- Cost Analyzer – The Turbo360 Azure Cost Management tool is the one we are going to address here.
- Business Application – The Turbo360 Azure Monitoring tool
- Azure Documenter – The Turbo360 Azure Documentation tool
- and Business Activity Monitoring – that is the Turbo360 Azure Distributed Tracing Tool
The Turbo360 Azure Cost Management module is designed to help users manage, monitor, and optimize their cloud spending on Microsoft Azure. Here are the key features and aspects typically associated with such a cost management tool:
- Key Features
- Cost Monitoring:
- Provides real-time insights into your Azure spending.
- Tracks and monitors spending across different services, departments, and projects.
- Generates alerts for unexpected spending spikes or anomalies.
- Budgeting:
- Allows budgets to be set for different departments, projects, or services.
- Sends notifications when budgets are close to being exceeded.
- Helps forecast future expenses based on current usage patterns.
- Cost Optimization:
- Identifies underutilized resources and suggests optimization strategies.
- Recommends reserved instances or savings plans to reduce costs.
- Provides insights into potential savings by right-sizing resources.
- Reporting:
- Generates detailed cost reports and analytics.
- Customizable reports to match organizational requirements.
- Provides historical data analysis to identify trends.
- Resource Tagging:
- Uses tagging to categorize and track resources.
- Helps in allocating costs to specific business units or projects.
- Improves resource management and accountability.
- Integration:
- Integrates with other financial and management tools.
- Supports API access for custom integration with internal systems.
- Works seamlessly with Azure’s native cost management tools.
- Cost Monitoring:
- Benefits
- Cost Control:
- Helps organizations maintain control over their cloud spending.
- Prevents budget overruns and financial surprises.
- Enables proactive cost management through alerts and notifications.
- Visibility:
- Provides clear visibility into where and how money is being spent.
- It helps identify cost drivers and make informed decisions.
- Facilitates detailed financial planning and analysis.
- Efficiency:
- Streamlines the process of cost management and reporting.
- Saves time and effort through automation and detailed insights.
- Enhances operational efficiency by eliminating wasteful spending.
- Strategic Decision Making:
- Supports strategic decisions by providing comprehensive financial data.
- Helps in planning future budgets and investments in cloud infrastructure.
- Aligns cloud spending with business goals and objectives.
- Cost Control:
In summary, Turbo360 Azure Cost Management offers a comprehensive approach to managing and optimizing Azure cloud spending. Specifically, it equips organizations with essential tools for monitoring, reporting, and cost optimization. As a result, teams gain better visibility into their cloud usage and can make informed decisions. Ultimately, this ensures that organizations use cloud resources efficiently and keep costs under control while staying within budget.
How to get started with Cost Analyzer
To get started with Azure Cost Management, we need to:
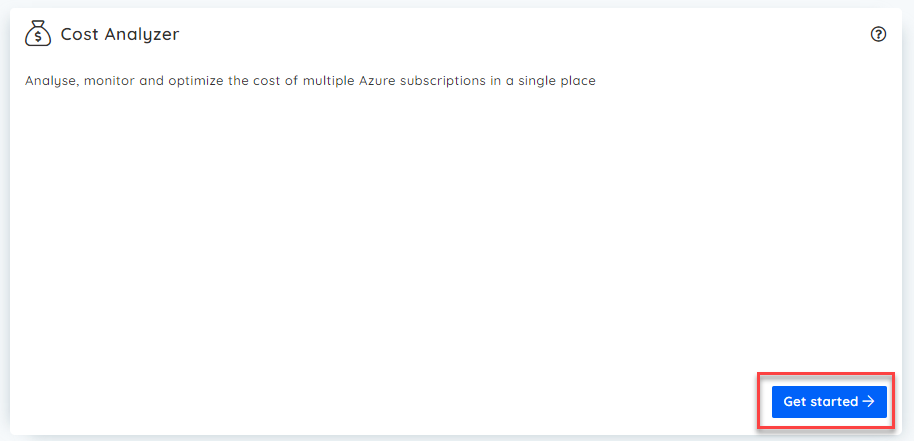
- On the Turbo360 home page, click on the Get started -> button inside the Cost Analyzer panel
- In the Set up Cost Analyzer window, the first step is the Cost Management Group. There, we need to:
- On the Name property, set a name for the Cost Management Group.
- And on the Description, place a short description of that Cost Management Group. This is optional.
- Then click Next ->.
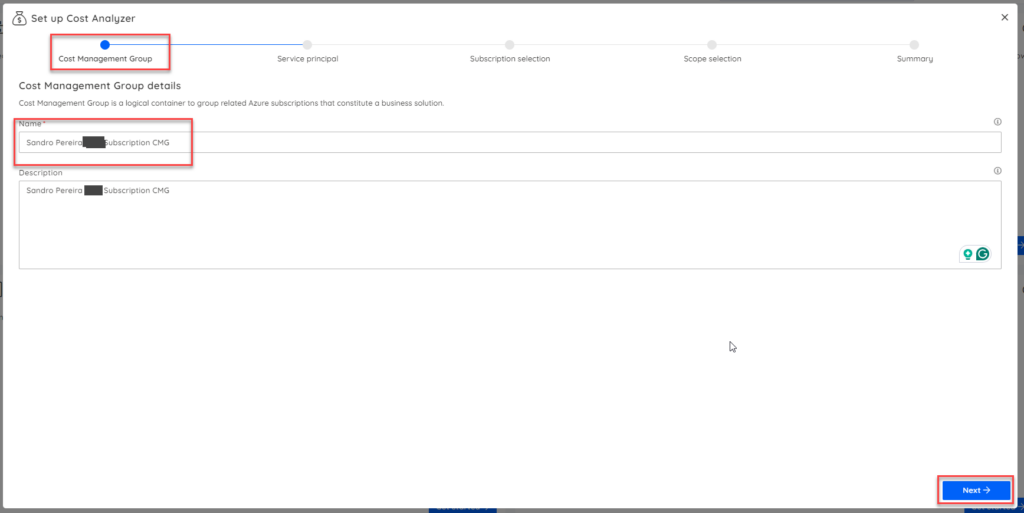
Note: A Cost Management Group acts as a virtual container for the resources you want to analyze and manage from a cost perspective. Additionally, a Cost Management Group can include multiple sub‑groups, also known as child Cost Management Groups. As a result, this hierarchical structure helps you organize resources more effectively and build a clear, scalable cost‑management strategy across your environment.
- The second step in the Set up Cost Analyzer window is the Service principal. There, we need to:
- From the Select a service principal combo box, select the existing service principal (we created it in the previous blog post).
- Click Next ->.

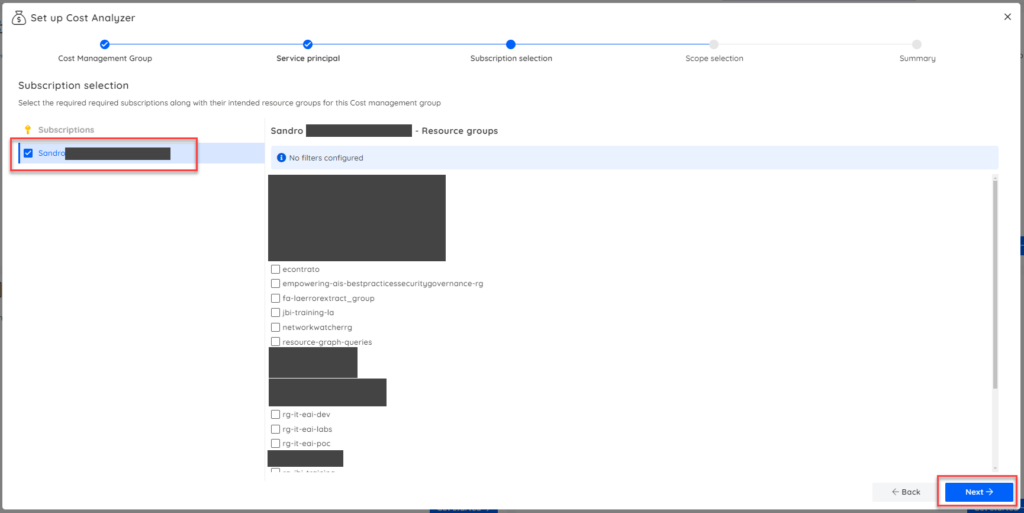
- The third step in the Set up Cost Analyzer window is the Subscription selection. There, we need to:
- On the Subscriptions panel, select your subscription.
- Leave it without filters on the <subscription-name> – Resource groups panel.
- This means it will use all resource groups.
- If you want to select just a subset of resource groups to be managed by this Cost Management Group, then select them here – you are applying filters.
- Click Next ->.
- The fourth step in the Set up Cost Analyzer window is the Scope selection. There, we need to:
- Leave the default settings
- Click Next ->.

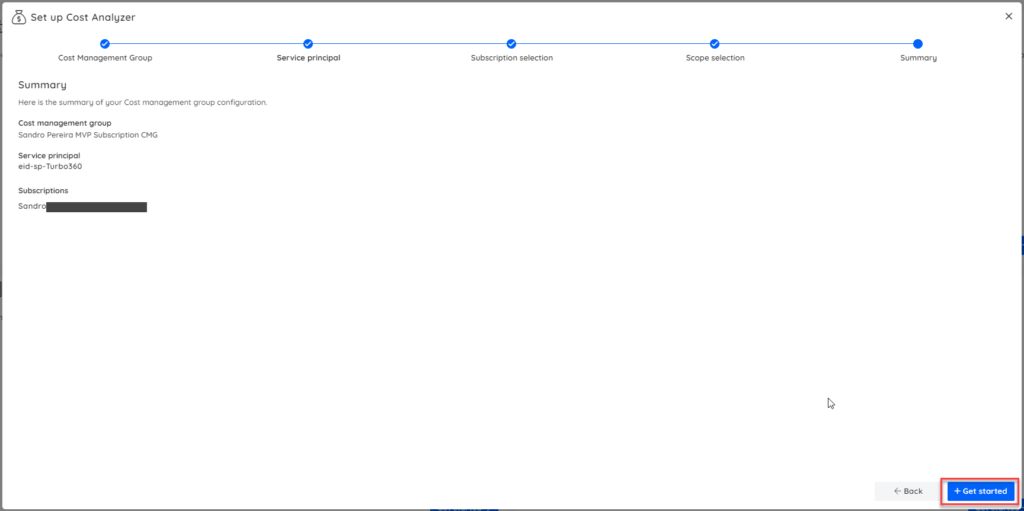
- Finally, the last step in the Set up Cost Analyzer window is the Summary. There, we need to:
- Validate if all settings meet our requirements.
- Click + Get started.
- After that, you will be redirected to the Cost Management Group we created above.
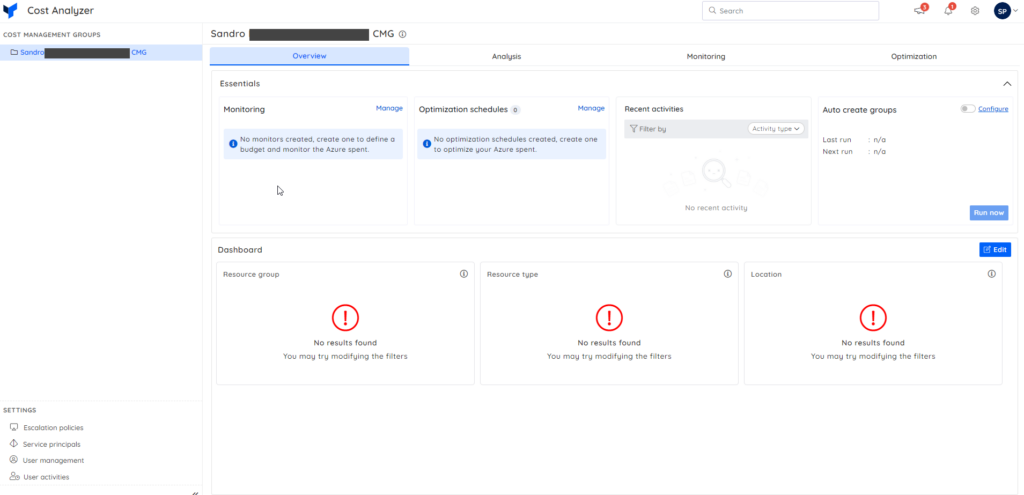
Initially, you won’t see any data in the dashboard. This happens because the tool still needs time to import and process the information. You might start seeing partial data after about an hour. However, for more accurate and useful insights, you should ideally wait 24 hours before analyzing the results.
Now, inside this Cost Management Group we have created, we can create one or more child Cost Management Groups. Here, we are going to create two:
- One call Manual. In future posts, we will manually create our custom nodes and map data to meet our needs, like the Integration Team or the Database Team, because sometimes we don’t have tags in place to archive what we need.
- and another called Subscription analyzes.
To do that, we need to:
- On the Cost Management Group three-view, on the root node Sandro Pereira MSDN Subscription CMG, click on the More options button
- Then select the New Cost Management group option.

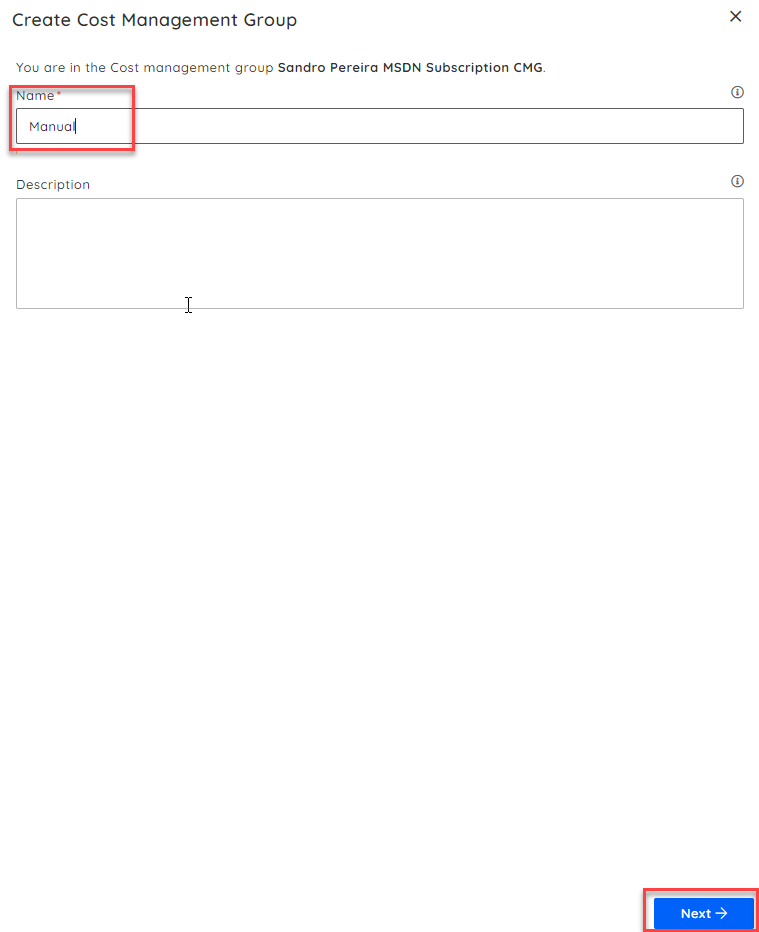
- On the Create Cost Management Group panel
- On the Name property, set the name for your child’s Cost Management Group, in our case, Manual.
- Click Next ->.
- On the Create Cost Management Group second panel, select our subscription and click Save.

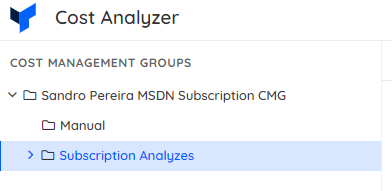
- Now, repeat the same steps and create the Subscription analyzes child Cost Management Group. In the end, we should have this.
- Now, click the Subscription analyzes child under Cost Management Group. On the right panel, go to Auto create groups and click Configure.
- Basically, this will generate a sub-tree for this node based on some rules.
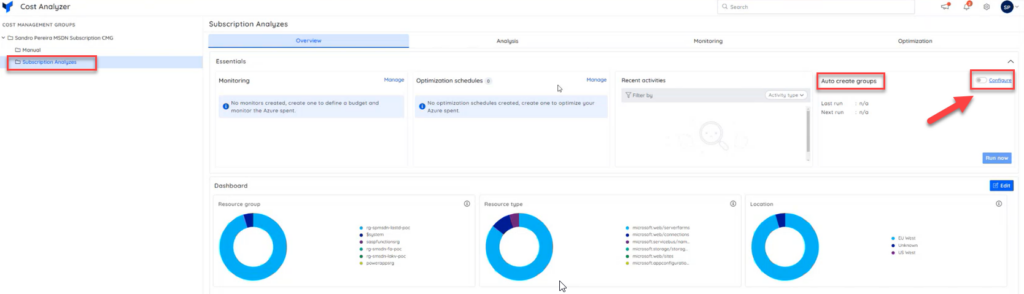
Note that data is already starting to appear while we are still configuring the module.
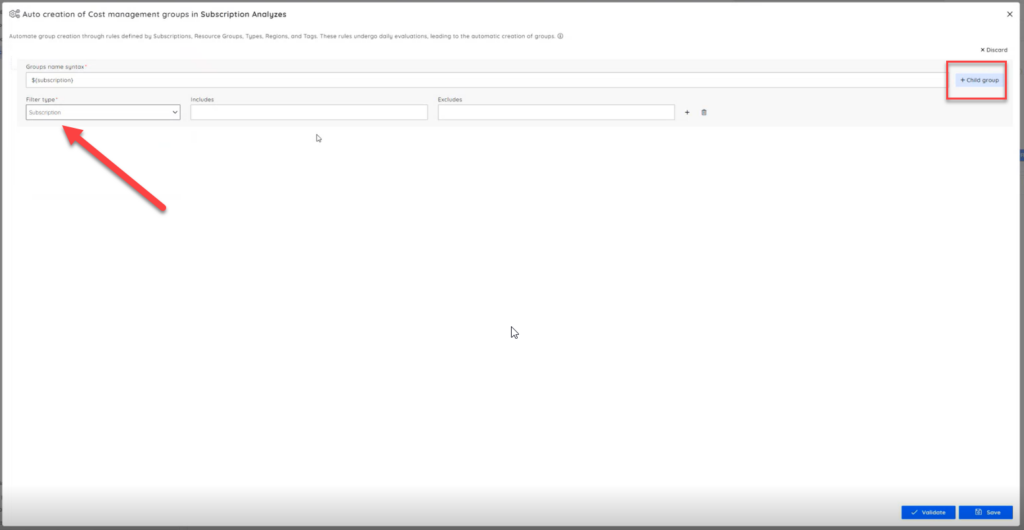
- On the Auto creation of Cost management groups in Subscription Analyzes window, click on the + Group rule button.
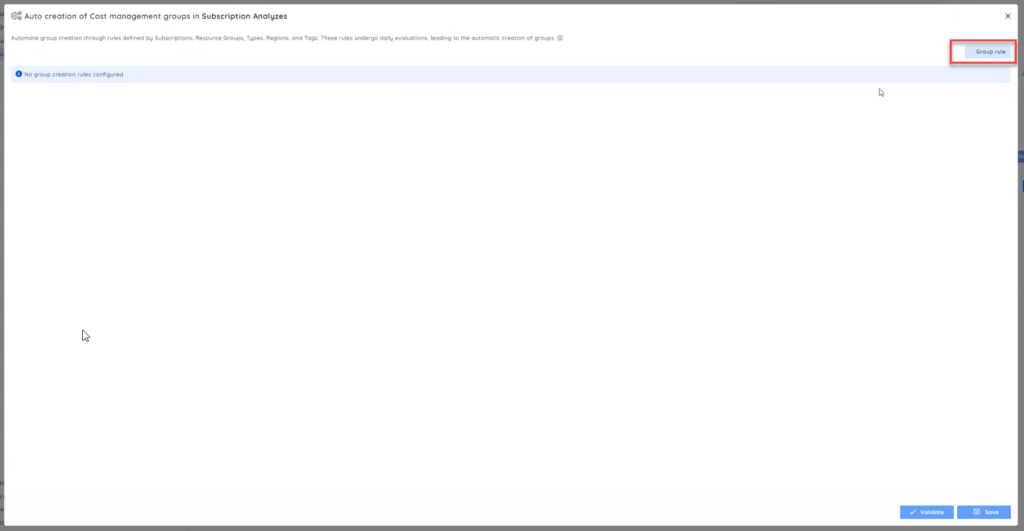
- This first rule creates a child node for each subscription (however, here, we only use one subscription).
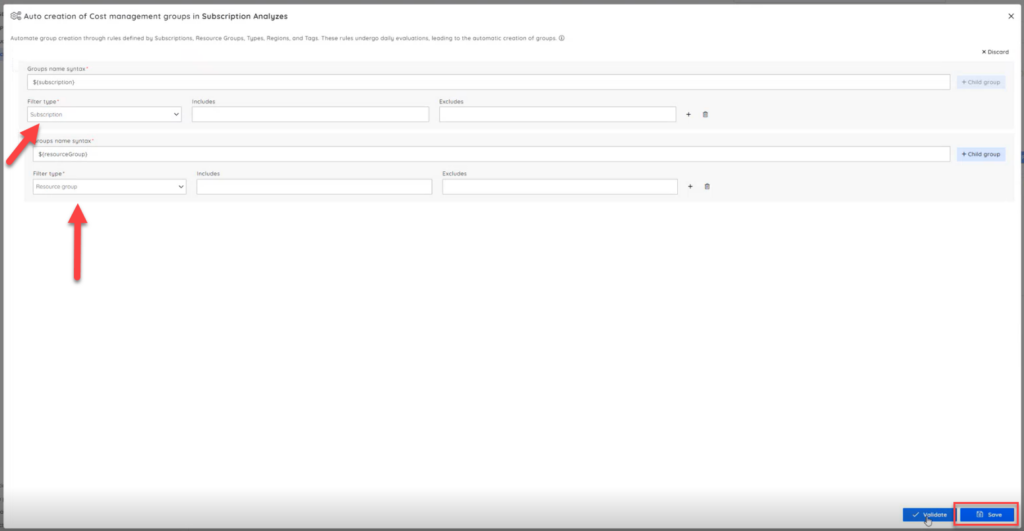
- Go ahead and click the + Group rule button again.
- This second condition creates a pair for each parent and child in each resource group within the subscription. This will give you an easy way to see the costs.
- Click Save.
- On the Save auto creation of groups configuration window, click Continue.
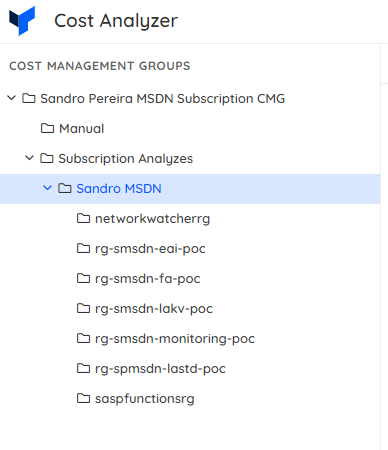
- This will automatically create this tree for you:
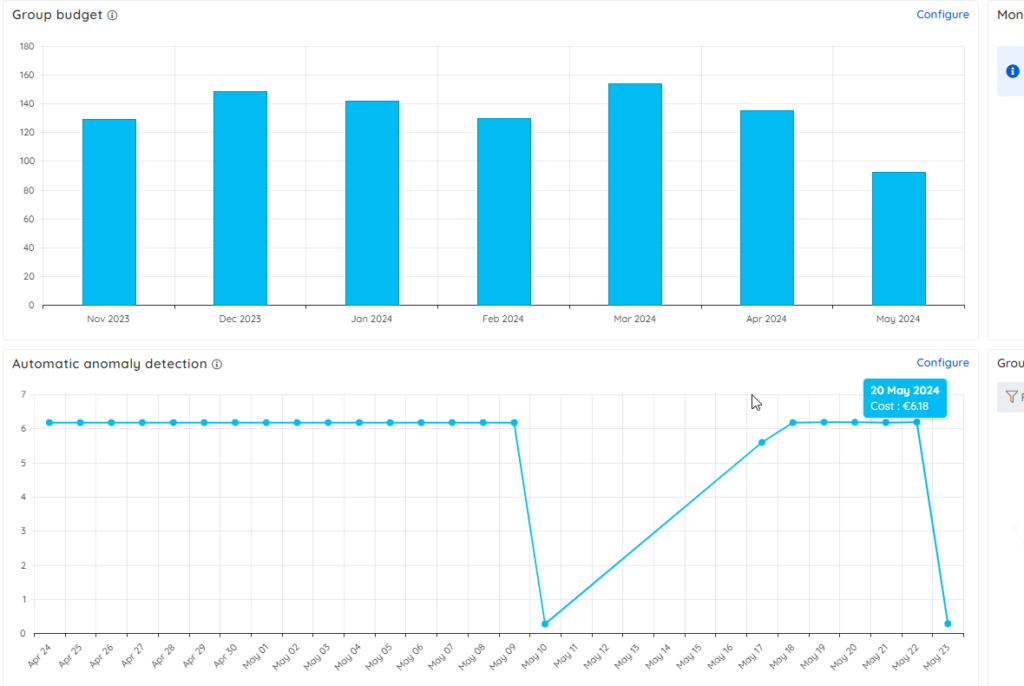
We’ve now defined the default configuration. Once the system imports all the data, we can start exploring it in more detail. However, even at this stage, some information is already available.
For example, if you select a specific resource or navigate to the group level and open the Analysis or Monitoring tabs, you’ll notice that the tool has already imported partial data. As a result, you can immediately start reviewing initial insights while the remaining data continues to load.
But I will leave this for another blog post.
Hope you find this helpful! If you enjoyed the content or found it useful and wish to support our efforts to create more, you can contribute towards purchasing a Star Wars Lego for my son!

