
I collaborated with the teams behind these products to obtain an extended free license. I did this mainly for two reasons.
First, some of my clients already use these tools, and I want to become more familiar with them. Second, other clients often ask for my recommendations or opinions. To act as a responsible adviser, I believe I need hands‑on experience with the tools myself.
I won’t explain in detail what these products do or why you should buy them. I don’t intend to act as a seller. Instead, I will focus on my day‑to‑day user experience. I will share whether the tools help me, feel easy to use, and serve a real purpose. However, in each post, I will still provide a short introduction to the tool or the specific feature I discuss.
One thing I will never cover is pricing. Once again, my goal is not to sell a product.
And to start this journey, I chose the Turbo360 tool. It is from a very good friend of mine, and he quickly provided me with a free extended license to use for myself.
📝 One-Minute Brief
Getting started with Turbo360 requires secure access to Azure resources, and configuring a Service Principal is a critical first step. This guide walks through the foundational concepts behind Azure Service Principals and explains how to prepare and configure one for Turbo360. By setting up the correct identities and permissions, you enable Turbo360 to monitor, govern, and manage Azure Integration Services securely and efficiently from day one.
What is Turbo360?
Turbo360, previously known as Serverless360, is a cloud management platform designed to simplify and optimize the management of serverless applications and cloud-native services. The platform primarily focuses on Azure services but now also supports Power Platform and offers a range of tools for monitoring, managing, automating, and troubleshooting serverless architectures and microservices, as well as cost management and analysis.
Turbo360 provides several key features that help organizations manage and operate serverless applications more effectively:
- Monitoring: Turbo360 provides comprehensive monitoring for serverless components, including Azure Functions, Logic Apps, and Event Grid. As a result, users can quickly identify issues and react before problems escalate.
- Unified Management: Through a centralized interface, Turbo360 lets users manage multiple Azure resources in one place. For example, teams can resubmit failed messages, manage Logic Apps, and control Event Grid subscriptions without switching tools.
- Diagnostics and Troubleshooting: Turbo360 includes detailed diagnostic capabilities. These tools help teams track message flows, analyze error patterns, and review logs, which significantly speeds up issue resolution.
- Automation: Turbo360 automates routine operational tasks. Consequently, it reduces manual effort and lowers the risk of human error. This automation covers monitoring, alerting, and predefined response actions.
- Security and Compliance: Turbo360 strengthens security by enforcing robust access controls and auditing capabilities. In addition, it supports compliance requirements, helping protect sensitive data and meet regulatory standards.
- Collaboration and Reporting: Turbo360 improves team collaboration by offering shared dashboards, detailed reports, and customizable notifications. Therefore, teams remain informed and can work together more efficiently.
- Cost Management: Turbo360 also helps organizations monitor, control, and optimize cloud spending, particularly across Azure environments.
Overall, Turbo360 simplifies the operational complexity of managing serverless applications. It enables organizations to adopt and scale serverless technologies more easily while maintaining performance, reliability, and strong security.
Configure a Service Principal in Turbo360
When I first sign in to Turbo360 by accessing the following URL:
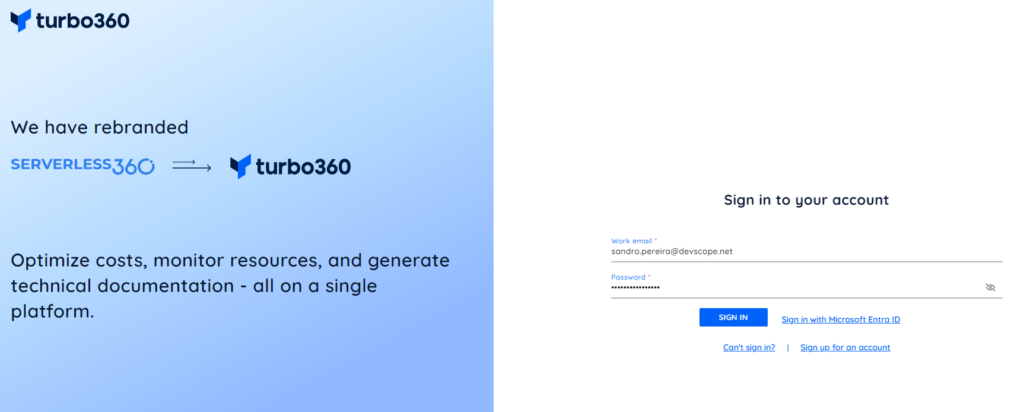
One thing I knew for sure was the first task I wanted to tackle: connecting Turbo360 to my Azure subscription (or subscriptions).
Honestly, I found the Turbo360 documentation hard to locate and somewhat outdated. In addition, the information felt disconnected. When I evaluate or consider purchasing a tool, I expect the initial setup steps to be clear and easy to follow. Those first moments strongly shape the overall experience.
For that reason, I would rate this onboarding experience a 7 out of 10. While it gets the job done, I hope Turbo360 continues to improve and streamline this part of the journey.
In order to connect both, we need to have:
- App registration: When you register an app in Azure AD, you create an identity for it. This app registration includes the Application ID and various settings that define its behavior and permissions.
- And a service principal: To grant the registered app access to resources, a service principal is created in the Azure AD tenant. This service principal serves as a security identity and is assigned the necessary roles and permissions to access Azure resources.
So, in order to connect Turbo360 with your Azure Subscription, you need to do the following steps:
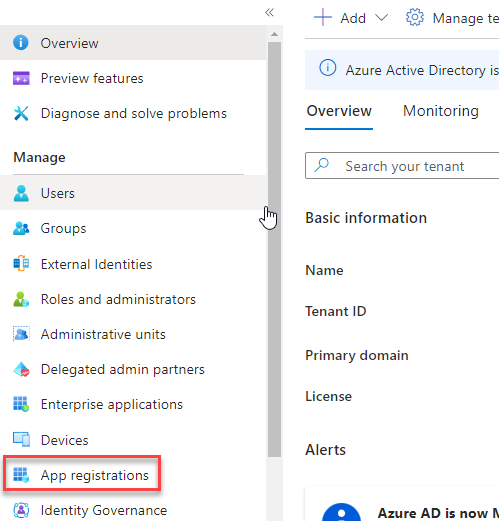
- Search for Microsoft Entra ID on the Azure Portal, then click Microsoft Entra ID.

- On the Microsoft Entra ID page, click the App registration option under the Manage section.
- And then click + New registration.

- On the Register an application from:
- Provide a Name for the Service Principal. In my case, appr-turbo360.
- On the Supported account types, select Accounts in this organization directory only.
- Under Redirect URI (optional), select Web for the type of application that needs to be created and enter the URI to which the access token is sent.
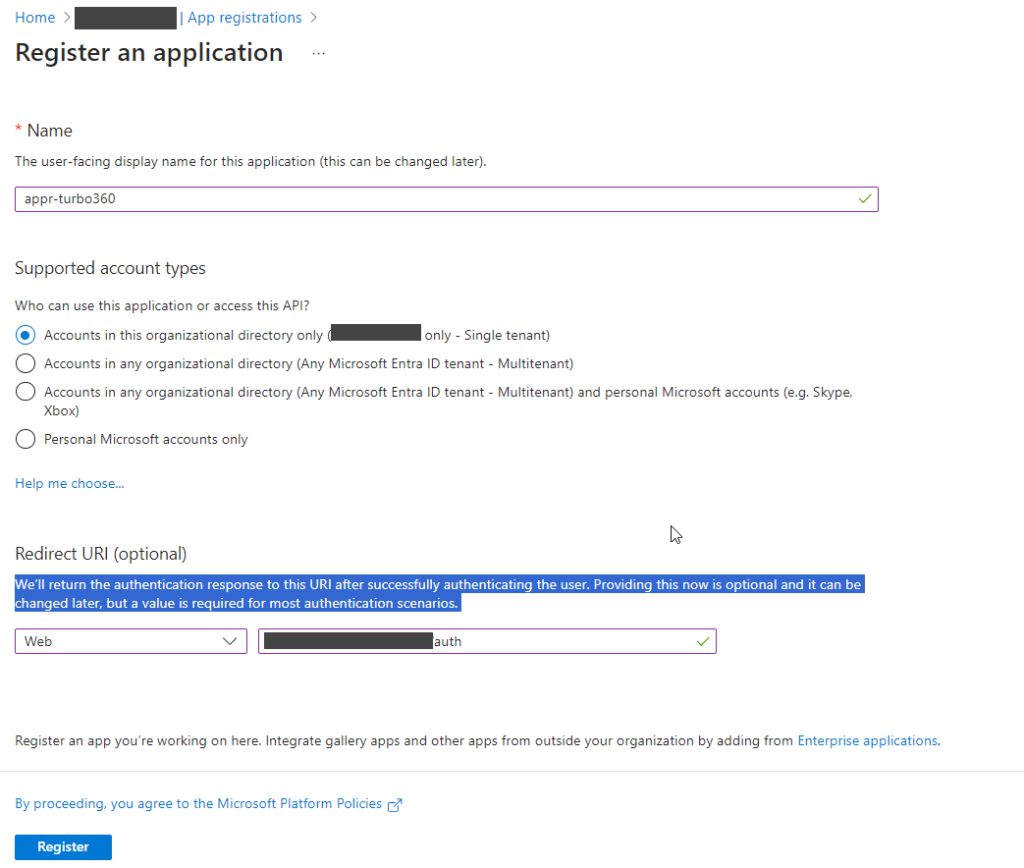
- Finally, click on the Register button.
- After the App registration is created, click on the Certificates & secrets option under the Manage section on the App registration page. And then click + New client secret.
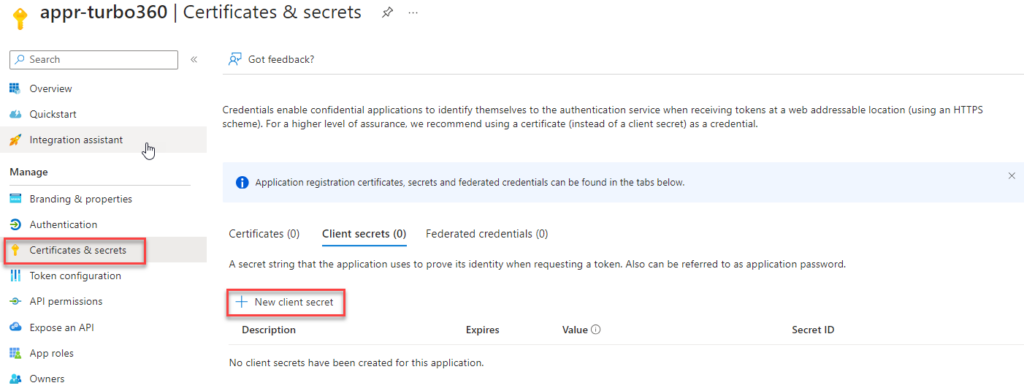
- On the Add a client secret panel, provide the Description and Expiry time, and click Add.
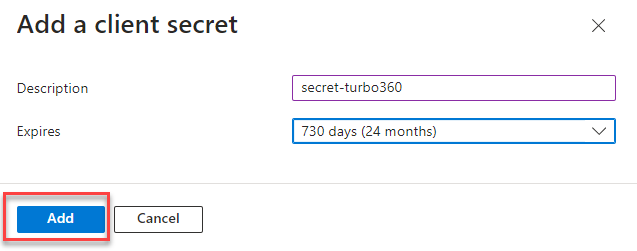
Note: Don’t leave this page, or at least copy the secret value before you leave this page. You will need it to configure Turbo360.
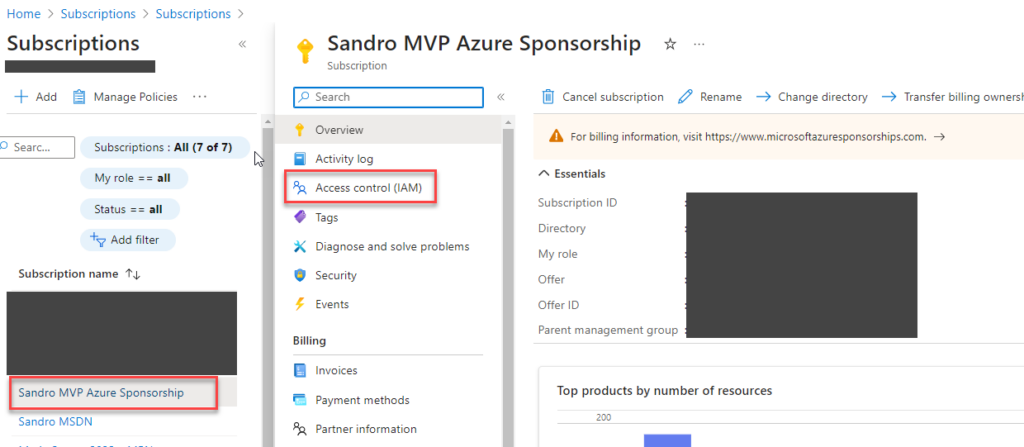
- Now, open a new table with the Azure Portal, search for Subscription, and click Subscription.
- Select your subscription from the list, then on the Subscription page, select the Access control (IAM) option.
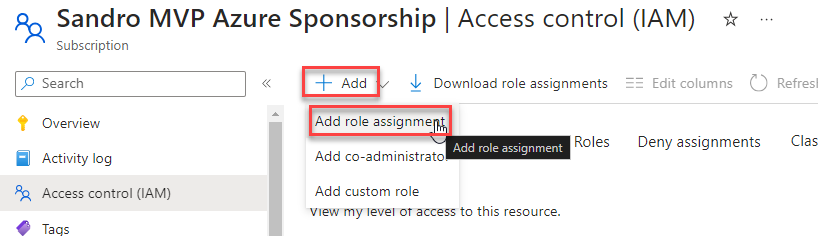
- On the Access control (IAM) page, click + Add and then Add role assignment.
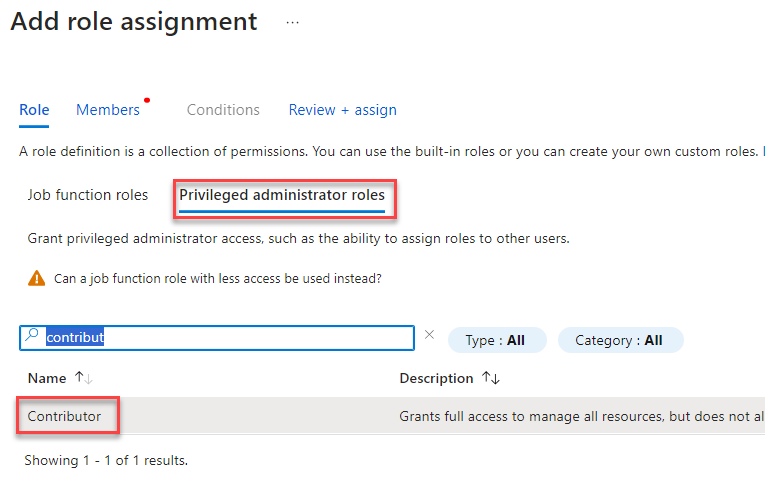
- In the Add role assignment wizard, on the Role section, select the tab Privileged administrator roles, select the Contributor role, and click Next.
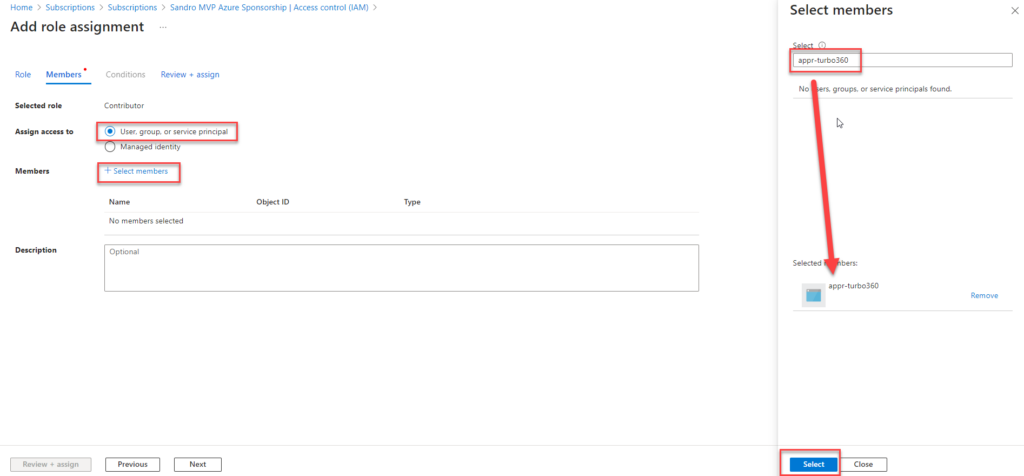
- In the Member section, perform the following configuration:
- On the Assign access to property, select User, group, or service principal.
- On the Member property, click on + Select members:
- On the Select members panel, search for the app registration you created above, select it, and then click the Select button.
- Then click Review + assign, then click Review + assign again.
Note: Turbo360 can manage and monitor Azure resources. To access those resources and perform operations on them, the Service Principal requires Contributor permissions on the Azure subscription. Without Contributor access, users can only view the resources listed in Turbo360. In that case, they cannot monitor those resources or execute any actions.
To complete the connectivity setup, we must associate the Azure App Registration with Turbo360. To do this, open the Turbo360 portal and follow these steps:
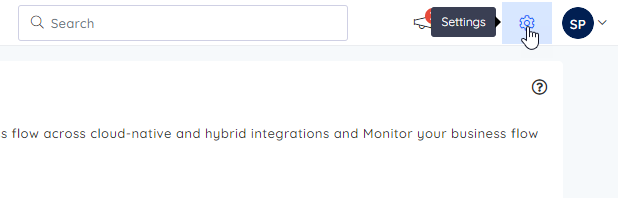
- In the top right corner, click on Settings.
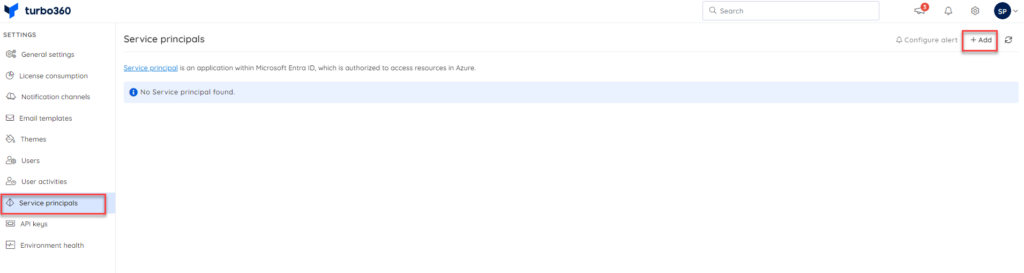
- On the Settings page, click on the Service principals tab, and then, in the top right corner, click on + Add.
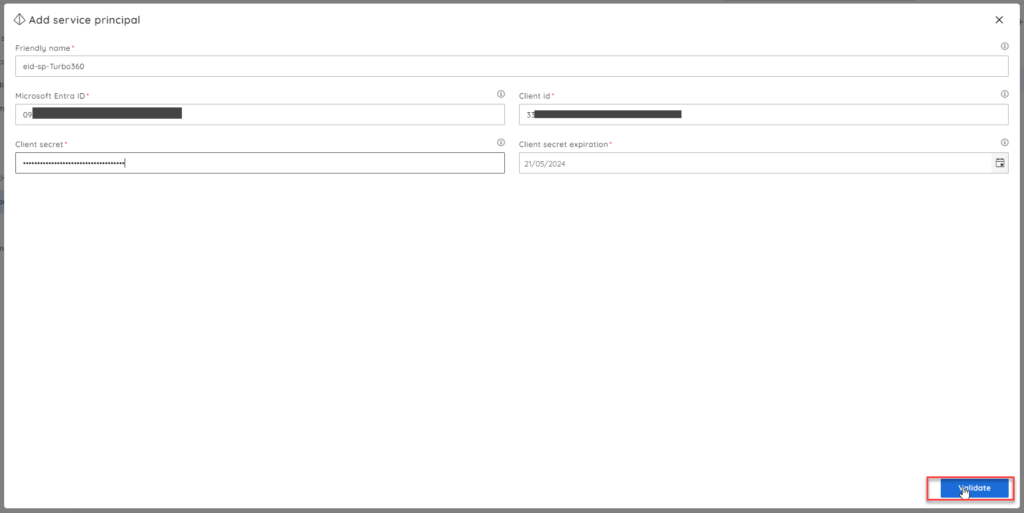
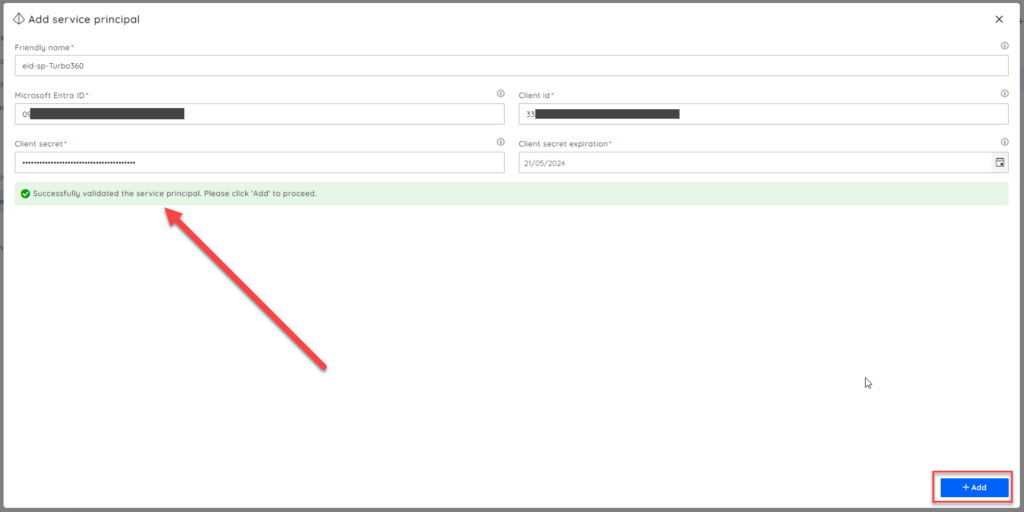
- Now, on the Add service principal window, we need to provide the following information:
- On the Friendly name property, give a name to be used to easily identify the service principal associated with Turbo360.
- On the Microsoft Entra ID property, provide the Directory (tenant) ID that you can find on the Overview page of the App registration you created above.
- On the Client ID property, provide the Application (client) ID that you can also find on the Overview page of the App registration you created above.
- On the Client secret property, copy the client secret Value we created above for that App registration.
- Finally, on the Client secret expiration property, set the date when the client secret we have created in the App registration will expire.
Note: You can view client secret values only at the moment you create them. Therefore, make sure you save the secret immediately before leaving the page.
- Then click Validate.
- If it successfully validates that configuration, a success message is presented. Click + Add if that’s the case. Otherwise, you have to review your settings.
And there you go, we have our task completed:
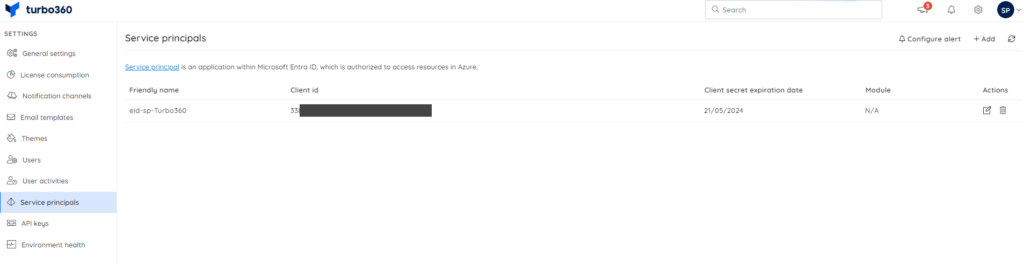
We can now start playing with some of the tool’s capabilities, but we will leave that for another blog post.
Feedback
I found this task quite simple once I understood the required steps. In practice, completing it takes around 10 to 15 minutes. Overall, I would rate the Turbo360 configuration experience an 8 out of 10.
I didn’t give it a higher score because the tool lacks a guided startup wizard. A simple wizard that walks users through the mandatory initial configuration would greatly improve the onboarding experience. That addition would make the process smoother and more user‑friendly.
See you on my next Get Started with Turbo360 blog post.
Hope you find this helpful! If you enjoyed the content or found it useful and wish to support our efforts to create more, you can contribute towards purchasing a Star Wars Lego for my son!

