
For DevOps‑savvy users, this task feels simple and straightforward. However, many developers still find it unfamiliar and challenging. That’s exactly where this guide helps clarify the process.
This guide addresses common challenges that arise when working with DevOps and Visual Studio. It focuses on scenarios such as reuploading a new version of a project to a DevOps repository or starting work on a project whose source code already lives in DevOps.
In this scenario, we worked on a project offline because we initially lacked access to DevOps. After several weeks, that access became available, and we now need to update the project code in DevOps.
📝 One-Minute Brief
Clone an Azure DevOps repository directly inside Visual Studio using built‑in source control features, simplifying onboarding and speeding up your local development setup.
Now that we have identified the “issue”. To solve it (at least one way to do it), we have to:
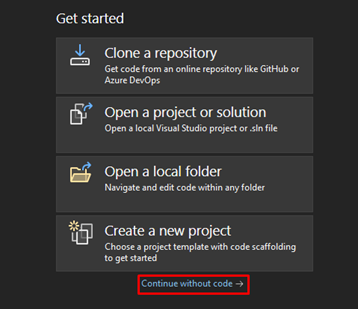
- Open your Visual Studio, and on the Get started window, select the option Continue without code.
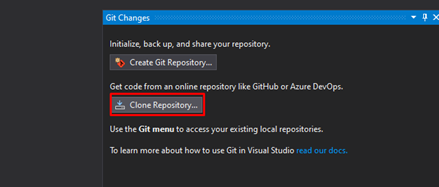
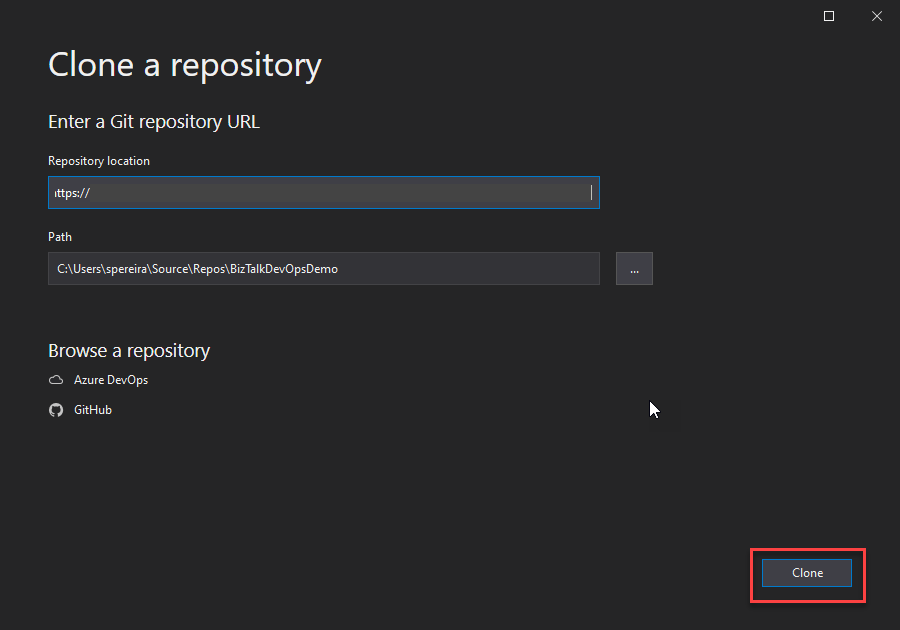
- Once the main Visual Studio opens, open or access the Git Changes window panel and select the Clone Repository… option.
- A new window titled Clone a repository will open.

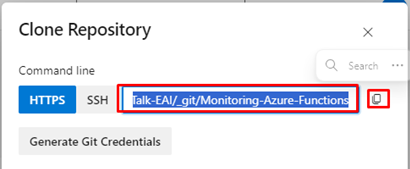
- Now, from our DevOps portal, access the solution repository and click on the Clone button.
- Copy the generated HTTPS URL.

- This will open a panel with several options, including the Git repository URL that we need.
- Paste the copied Git repository URL into the Clone a repository window inside Visual Studio for the Repository location property.
- Make sure you specify a correct local path.
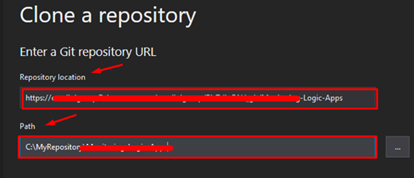
- Next, click Clone.
If you want, you can close Visual Studio now.
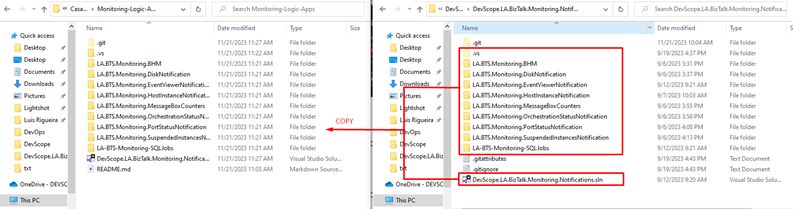
Now that we have the repo cloned on our machine, we can update the files with our changes.
- Transfer the solution files with the changes. You can simply copy and paste all your solutions into the location we set up to have the repo clone; you can and should exclude the Git-related files.
- You will notice that the new repository already has some files there.
Now that we have replaced/updated the old files present in DevOps with the new ones containing all our changes, we need to sync them to the DevOps repo. To do that, we need to:
- Open the Visual Studio solution you just copied. It is now located in the new folder we created as a repository.
- Once Visual Studio opens, open or access the Git Changes window panel.

- On the Git changes window:
- In the text window, enter a descriptive message for the changes you are making.
- Then, click on the arrow next to Commit All to open a dropdown menu.
- And finally, choose the Commit All and Push option.
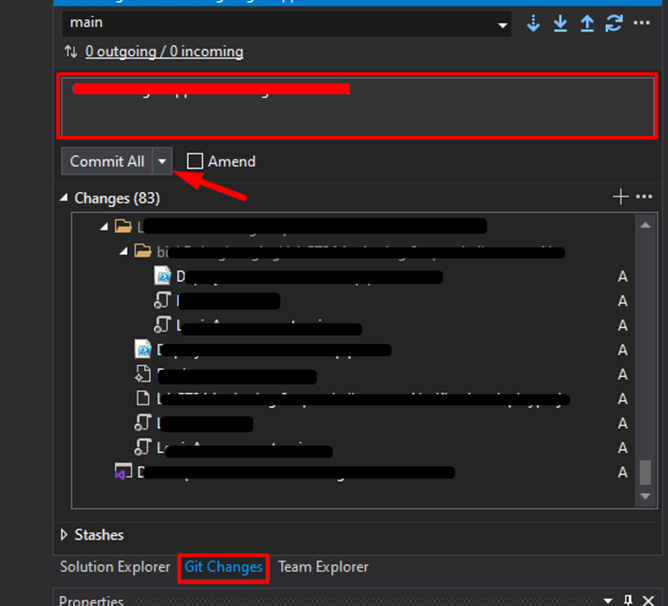
- The project will now be successfully pushed into the new DevOps repository.
Hope you find this Developer Tip helpful! If you enjoyed the content or found it useful and wish to support our efforts to create more, you can contribute towards purchasing a Star Wars Lego for Sandro’s son!

