
I’ve been wanting to explore the integration capabilities with DocuSign for some time now, but for some reason, I kept putting it off. Or because I didn’t have free time available, or because I was doing other stuff. Until now!
And one of the reasons why I want to explore these capabilities is the fact that nowadays, we have people entering DevScope from all over the place, and we do follow a welcome process where they need to sign some documents like work conduct or work ethic, reception manual, and so on. Do these need to be manually signed these days? That means that new remote employees need to print the papers, sign, scan, and send them back? Is there a better way?
📝 One-Minute Brief
One-Minute Brief (TL;DR):
But first, what is DocuSign? And how can we use it?
DocuSign is a cloud-based electronic signature platform that allows users to sign, send, and manage electronic documents securely. It is a software service that enables users to sign documents electronically and send them for signature to others quickly and efficiently. The platform is designed to be easy to use and accessible from anywhere, on any device.
DocuSign is used by individuals, businesses, and organizations of all sizes across many industries, including finance, real estate, healthcare, and more. The platform streamlines the document signing process and eliminates the need for physical documents and manual signatures, which can be time-consuming and costly. It also offers additional features like document storage, workflow automation, and advanced analytics. Overall, DocuSign helps to simplify the document signing process, increase efficiency, and reduce costs.
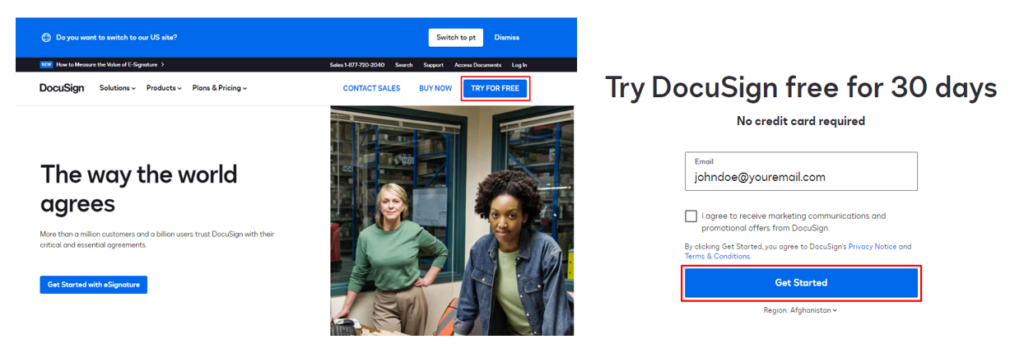
So, what we need to do first is to create a 30-day free account (No credit card required) on DocuSign and understand how DocuSign works.
- Access the DocuSign website: https://www.docusign.com/ and click on TRY FOR FREE.
- Enter your email and click Get Started.
- And then, you just need to follow the steps and create your name and your password.
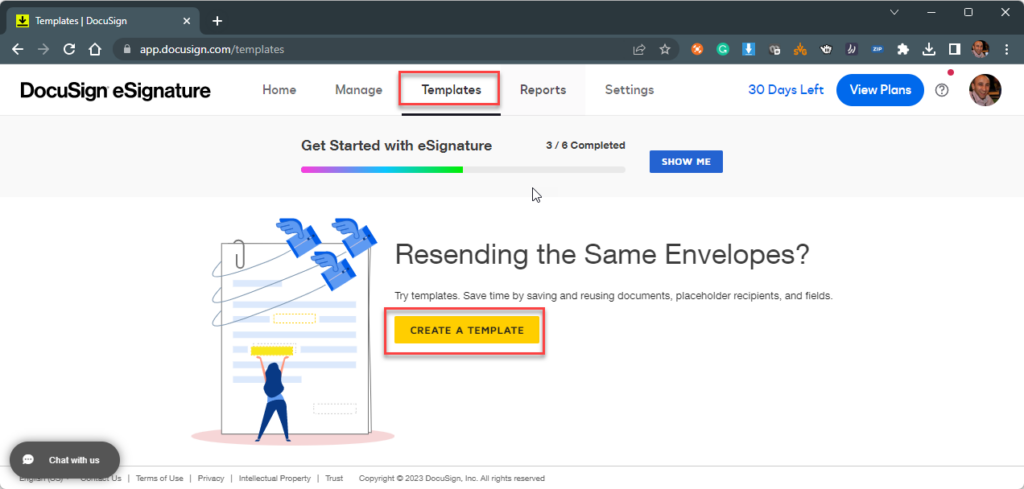
The second thing we will do is create a document template. For that, we need to:
- On the top menu, click on the Templates option and then click Create a template.
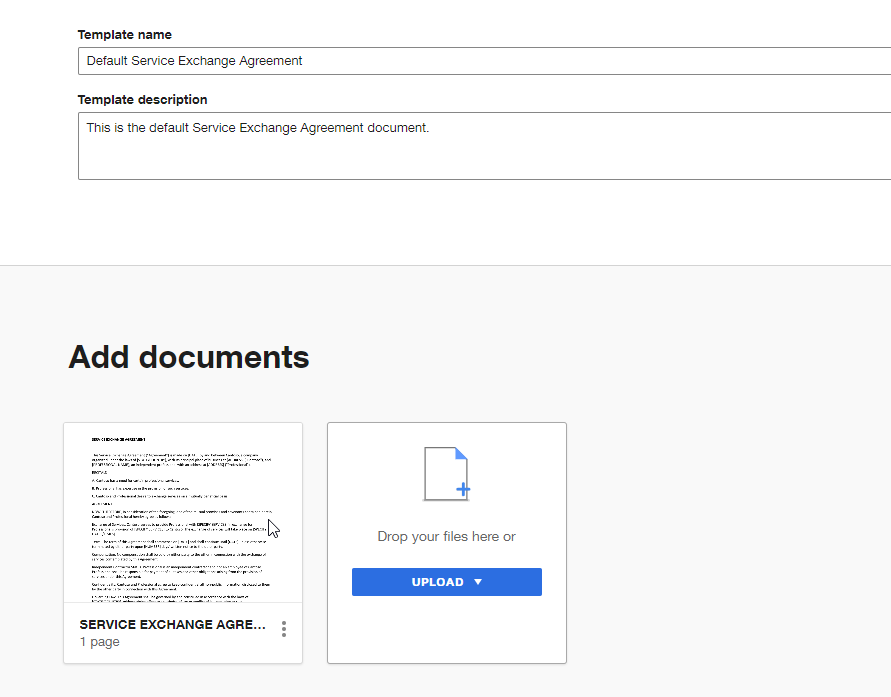
- On the Create a template page, we need to:
- On the Template name option, provide a name to your template, for example, Default Service Exchange Agreement.
- On the Template description option, provide a short description of your document template.
- On the Add documents, select Upload or drag and drop the document to that area.
- Click Save and Close.
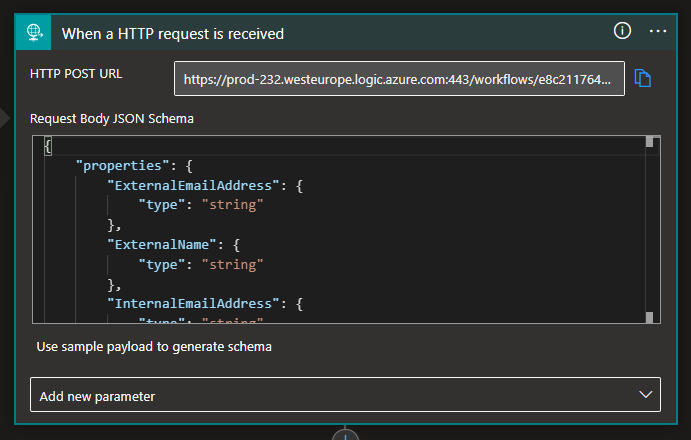
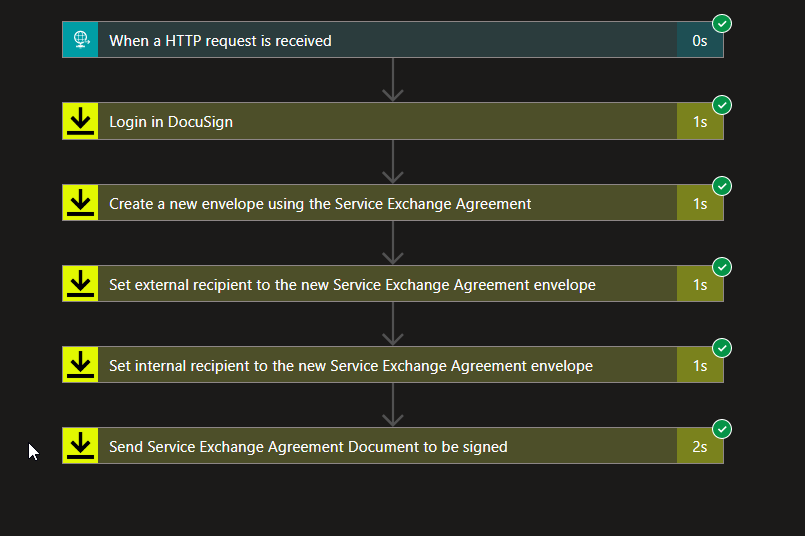
So knowing this, let’s proceed to the Logic App, and here we will be creating a Logic App Consumption with the name LA-SendEmailToSignWithDocuSign-POC. To simplify the process, I’m going to abstract the source system or application that will trigger the Logic App to send the document to be signed. That could be anything, but in our case, we will be using a Request – When a HTTP request is received trigger. To do that, we need to:
- On the Search connectors and triggers box, select the Built-in and then Request connector, and then the When a HTTP request is received trigger.
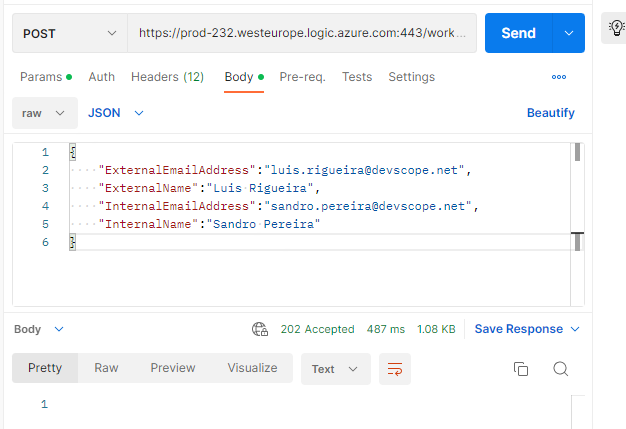
- On the When a HTTP request is received trigger, provide the following Body JSON Schema.
{
  "properties": {
    "ExternalEmailAddress": {
      "type": "string"
    },
    "ExternalName": {
      "type": "string"
    },
    "InternalEmailAddress": {
      "type": "string"
    },
    "InternalName": {
      "type": "string"
    }
  },
  "type": "object"
}
- Click on + New step to add a new action. From the search textbox, type DocuSign and then select DocuSign – Logic action.
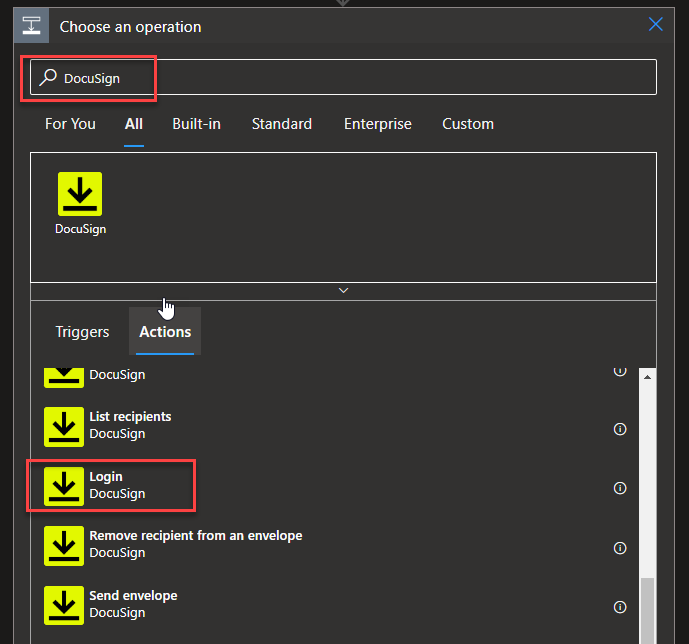
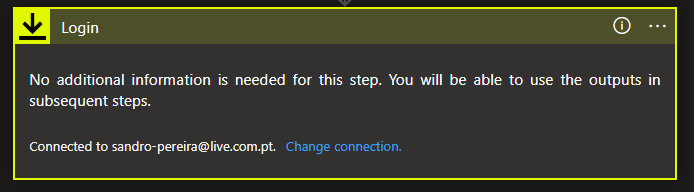
- The first action we need to take is to sign in with the account we created earlier in this tutorial.
- Once you sign in, we need to click on + New step to add a new action. From the search textbox, type DocuSign and then select DocuSign – Create envelope using Template action.
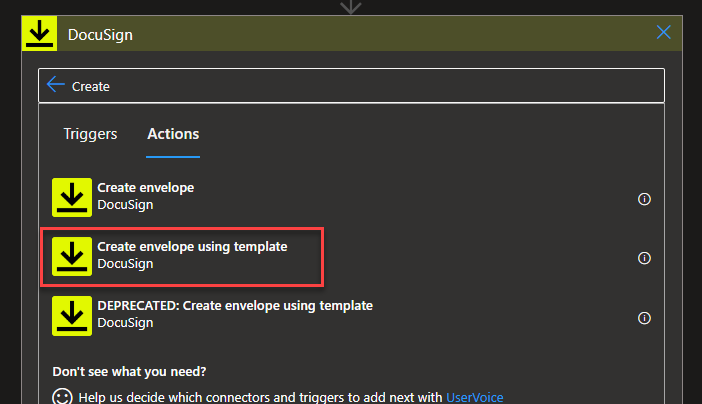
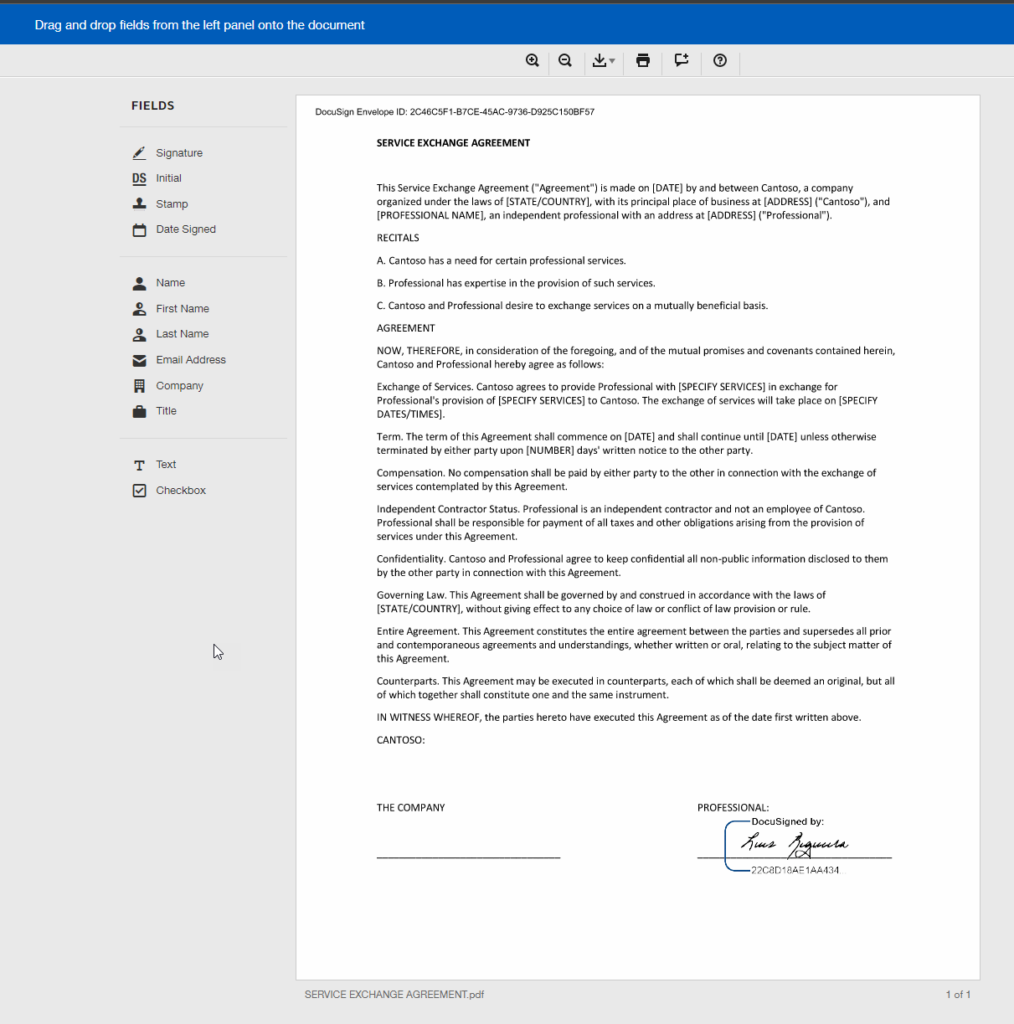
Note: In DocuSign, an “envelope” refers to a single package of one or more documents that are sent for signature to one or more recipients. It is the equivalent of a physical envelope that contains all the necessary documents for signature.
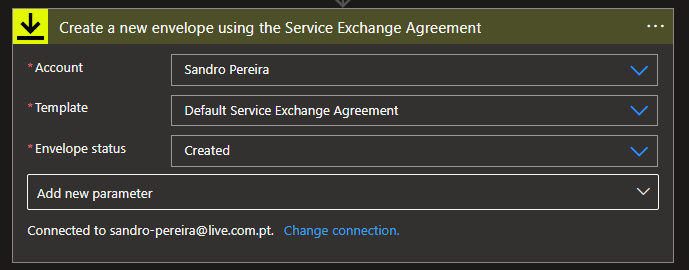
- On the Create envelope using Template action, we need to:
- On the Account property from the combo box, select the account to use.
- On the Account property from the combo box, select the account to use, in our case, the Default Service Exchange Agreement.
- On the Envelope Status property from the combo box, select the Created option.
- Click on + New step to add a new action. From the search textbox, type DocuSign and then select DocuSign – Add recipient to an envelope (V2) action.
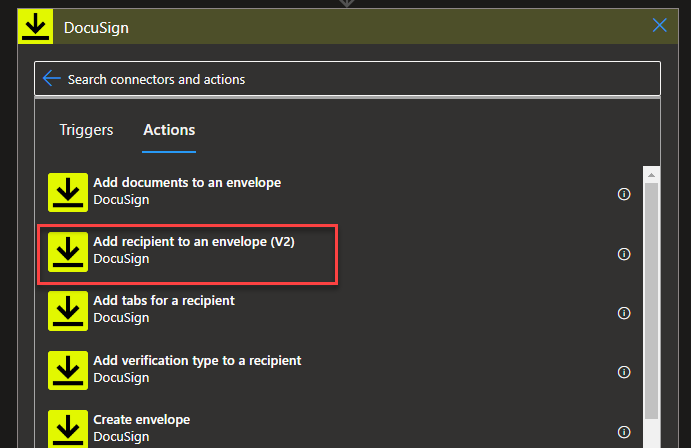
- On the Add recipient to an envelope (V2) action, we need to:
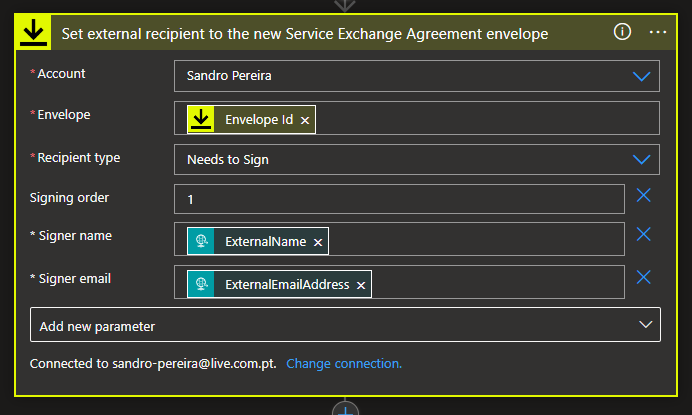
- On the Account property from the combo box, select the account to use.
- On the Envelope property, select the value to be the Envelope Id from the Create envelope using Template action.
- On the Recipient type property from the combo box, select the Needs to Sign option.
- Type Add new parameter and select the Signer name, Signer email, and Signing order properties.
- On the Signing order property, type 1.
- On the Siginer name property, select the value to be the ExternalName from the When a HTTP request is received trigger.
- On the Siginer email property, select the value to be the ExternalEmailAddress from the When a HTTP request is received trigger.
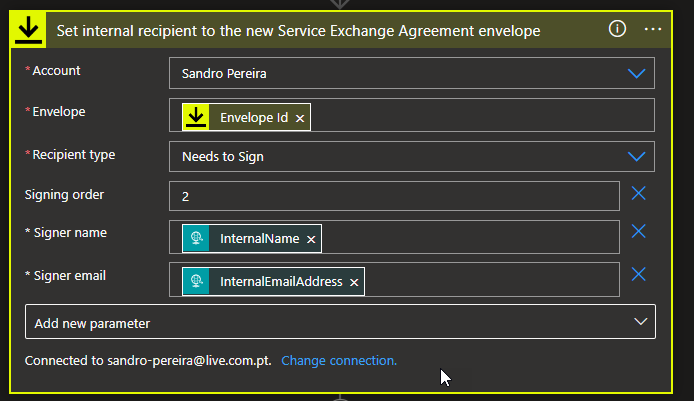
- Add the same action once again, but this time with the following configurations:
- On the Account property from the combo box, select the account to use.
- On the Envelope property, select the value to be the Envelope ID from the Create envelope using Template action.
- On the Recipient type property from the combo box, select the Needs to Sign option.
- Type Add new parameter and select the Signer name, Signer email, and Signing order properties.
- On the Signing order property, type 2.
- On the Siginer name property, select the value to be the InternallName from the When a HTTP request is received trigger.
- On the Siginer email property, select the value to be the InternalEmailAddress from the When a HTTP request is received trigger.
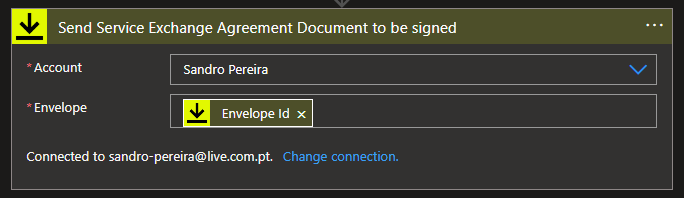
- To finalize, we need to click on + New step to add a new action. From the search textbox, type DocuSign and then select DocuSign – Send envelope action.
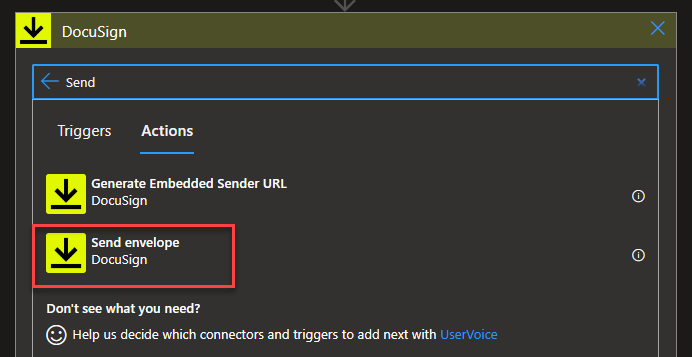
- On the Send envelope action, we need to:
- On the Account property from the combo box, select the account to use.
- On the Envelope property, select the value to be the Envelope ID from the Create envelope using Template action.
- And go ahead and save your workflow.
Now, if we go ahead and test our Logic App using Postman using the below payload:
We will see that our Logic App was correctly processed.
That means that:
- Luis Rigueira, that is the first recipient, got an email from DocuSign with a document to sign.
- And only when Luis signs the document, as a second recipient, do I receive the email to sign.
- Note: I don’t need to implement this logic in my Logic App workflow since DocuSign will handle that internal logic.
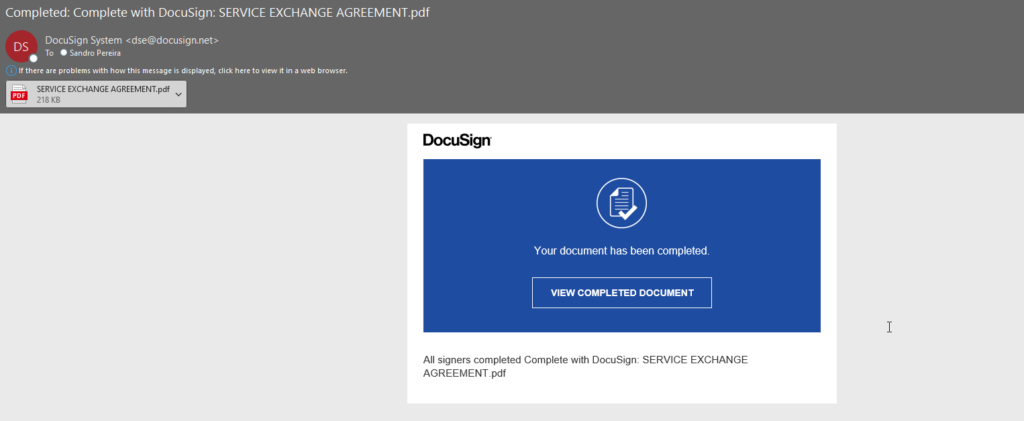
- Once both have signed, we will also receive an email notification that the document is signed by both parties.
- Note: once again, I do not need to implement that logic since DocuSign will handle that for me.
Let me say, I was surprised by how excellent and efficient DocuSign is! Quite simple to use, and truly a great experience.
Now, this is the part where I need your imagination because here, we are probably not using a real-case scenario; We are creating a proof of concept. Nevertheless, I think this can indeed be a good approach for real-case implementation! But probably in most cases, this trigger of the Logic App can occur when a user is created on the Active Directory or in CRM. From a SharePoint list, from an Onboarding application, well, the sky is the limit for your imagination.
Credits
Once again, a big thanks to my team member, Luis Rigueira, for participating in this proof-of-concept!
Hope you find this helpful! So, if you liked the content or found it helpful and want to help me write more content, you can buy (or help buy) my son a Star Wars Lego!

