
Unfortunately, Logic Apps still don’t provide a native connector for RabbitMQ. As a result, this integration becomes slightly more complex. However, we can overcome this limitation by creating an Azure Function that uses the RabbitMQ trigger.
With this approach, Azure Functions integrate with RabbitMQ through triggers and bindings. In addition, the Azure Functions RabbitMQ extension lets you send and receive messages directly by using the RabbitMQ API.
Therefore, we can create an Azure Function that triggers when a message enters a queue. From there, the function routes the message directly to a Logic App for further processing.
📝 One-Minute Brief
Consuming RabbitMQ messages directly from Logic Apps is not supported out of the box. This article shows how to use an Azure Function with a RabbitMQ trigger to consume messages and forward them to a Logic App, enabling seamless integration with RabbitMQ‑based systems.
And what does this Azure Function do?
This Azure Function is triggered by a RabbitMQ message in a specified queue. When a message arrives, the function is executed and performs the following steps:
- Logs an information message indicating that the function has been triggered.
- Prepares the payload for a request by creating an object with a “Message” property containing the content of the RabbitMQ message.
- Serializes the payload object into a JSON string.
- Creates an HTTP request with the JSON payload as the content and sets the content type to “application/json“.
- Defines the URL of a Logic App that will receive the HTTP request.
- Sends the HTTP request to the Logic App using the URL and payload.
- Check the response status of the request.
- If the request is successful (status code in the 2xx range), it logs an information message indicating that the request was sent to the Logic App successfully.
- If the request fails (status code outside the 2xx range), it logs an error message indicating the failure and includes the response’s status code.
In summary, this Azure Function acts as a bridge between a RabbitMQ queue and a Logic App. It receives messages from RabbitMQ, sends them as JSON payloads to a specified Logic App endpoint via an HTTP request, and logs the request’s success or failure.
Create Azure Function Project
To create the Azure Function, we need to:
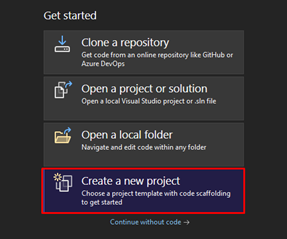
- In Visual Studio 2022, click on Create a new project.
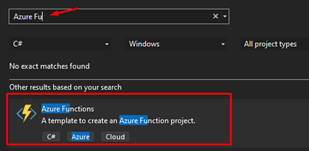
- On the project template, choose Azure Functions.
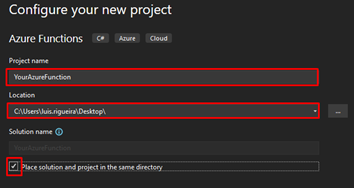
- On the Configure your new project panel, give your Azure Function a name that makes sense to you and your coworkers. Do not forget to start using proper names from day one! Choose the location of your Azure Function.
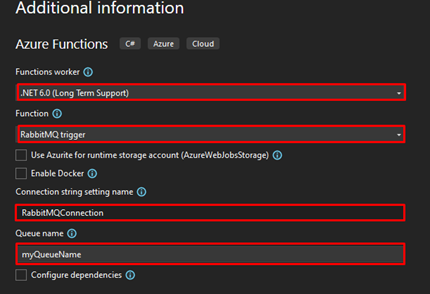
- Click next, and now you need to configure some fields:
- On the Function worker, choose .NET 6.0 (Long Term Support).
- On Function, select the RabbitMQ trigger.
- On the Connection string setting name, you can name the connection string as RabbitMQConnection.
- In the Queue name, add the name of the queue you created previously.
- Click on Create. After the project is created, use the following code you can find on GitHub here:
Add these NuGet packages to the solution.
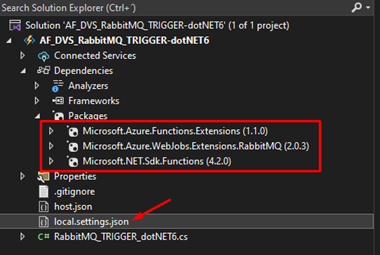
Next on the file local.settings.json is where you will store the connection string that will make it possible to connect with RabbitMQ, and to do that, this is how the file should look:
{
   "IsEncrypted": false,
   "Values": {
      "AzureWebJobsStorage": "UseDevelopmentStorage=true",
      "RabbitMQConnection": "amqp://user:acbdef@111.000.111.000:5672/my-vhost-v2"
   }
}
Notice that you need to apply the proper configuration to the RabbitMQConnection keyword.
- amqp://user:acbdef@111.000.111.000:5672/my-vhost-v2 is just an example; only the password and IP are fictional, as you should have your own.
Where can I download it?
You can download the complete Azure Functions source code here:
Hope you find this helpful! So, if you liked the content or found it helpful and want to help me write more content, you can buy (or help buy) my son a Star Wars Lego!

Big thanks to my team member Luís Rigueira for helping me realize and implement this idea.
