Welcome once again to another Power Automate Best practices, Tips, and Tricks. In my previous blog posts, I talked about some of the most essential best practices you should have while working with the Power Automate:
And some tips and tricks:
- #4 Copy to my clipboard
- #5 Using Scopes
- #6 Error handling… configure run after settings
- #7 Delete notes
- #8 Learn from failures
- #9 Expressions nightmare
Today I’m going to do a follow-up on my last tip and speak about the brand new Expression Editor available on Power Automate. This feature is still in preview and I would like to thank my dear Kent Weare for calling my attention to its existence

#10 The new Expression Editor
First of all, you have to be aware that this feature is still in preview, and like other preview features, or what the Power Automate team calls Experimental Features, they might change, break, or disappear at any time. But I have to say that is way better than the existing one!!
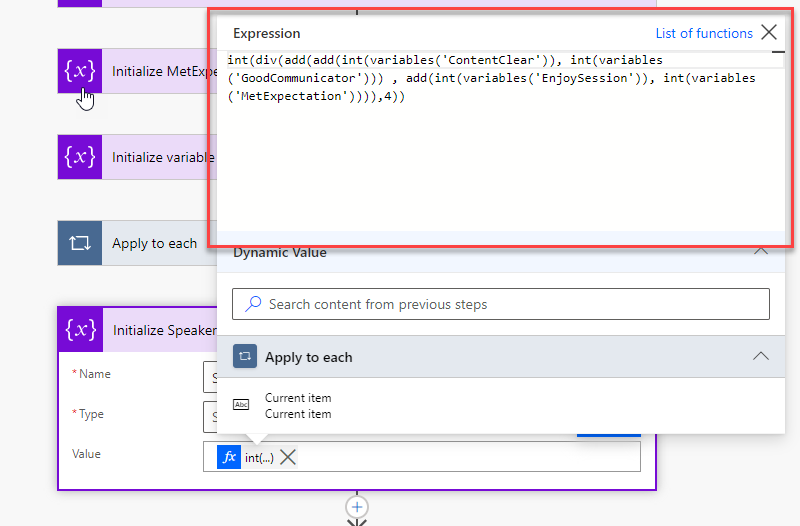
Look at the size of the Expression editor compare with the current one:
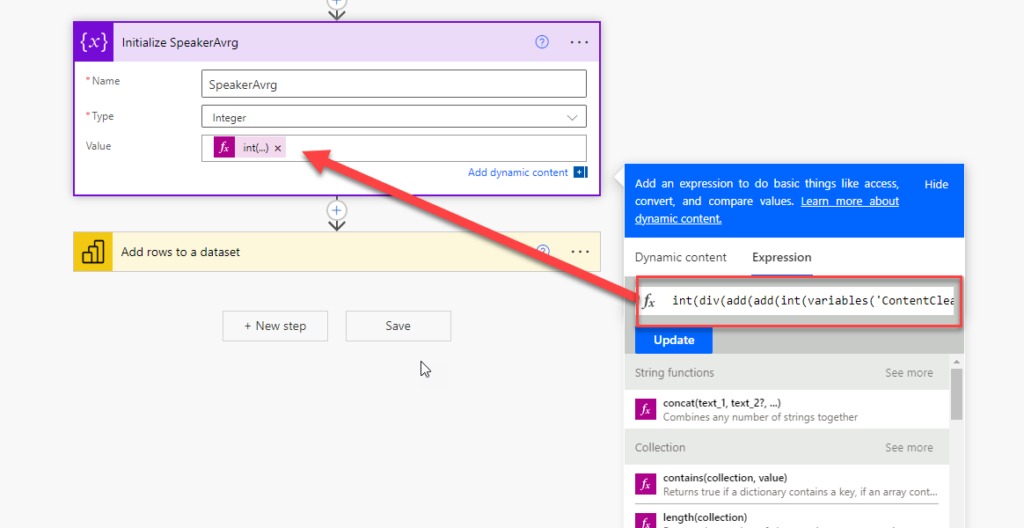
Just with this small improvement, tell me if this new editor will not improve:
- The readability of your expressions
- Your productivity while developing and troubleshooting/diagnosing your Power Automate flows
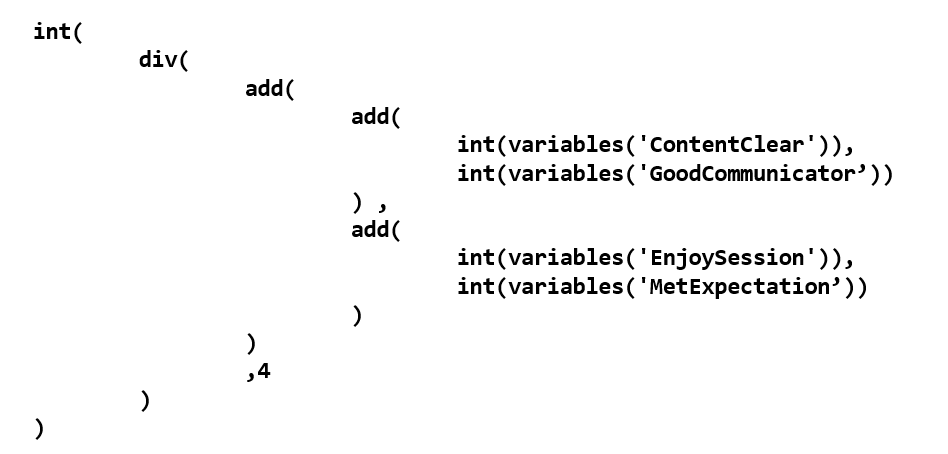
I mention in the previous post that using the current Expression editor, we should use the notepad++ to easily ident our formulas to become easy to read and consequently easier to build them correctly. I even present the following sample:
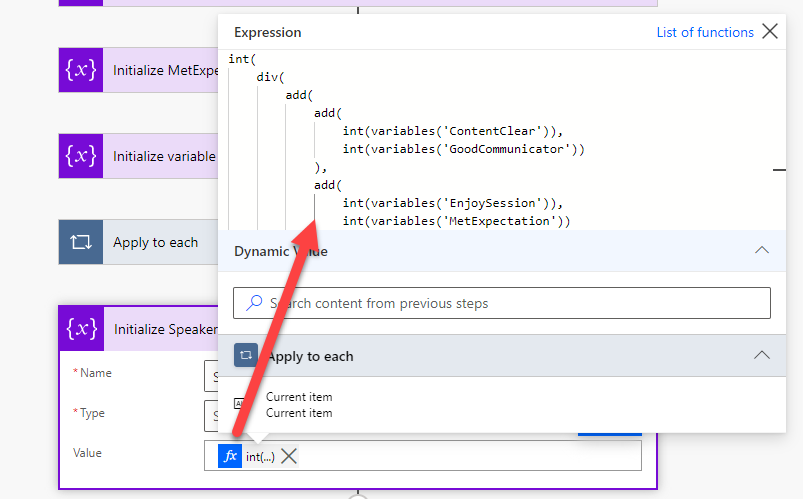
Guess what? You don’t need any more to create your complex expression in one line with the new Expression Editor! You can actually ident them in the way you want them! This is awesome!
But unfortunately, not all is perfect! And here is a list of, in my opinion, are the main pitfalls of this new Expression Editor:
- Still, the result of an Expression is translated to the Power Automate Action as a small rectangular, this time a blue rectangular with the name of the first operation and 3 dots inside brackets.
- This doesn’t improve the readability of our Power Automate flows

- The process of adding a new expression feels a little weird because once we finish our expression, there isn’t an OK or Save button. To actually save, say ok or submit that expression you need to click outside the Expression Editor or click on the Close button (X).
- For me, this behavior is weird and means that if you decide not to “submit/save” that expression, instead you want to cancel, you need to delete everything that is inside the text editor, or after you close the editor you remove the expression from the action.
- I would prefer to have an OK/UPDATE button like what exists in the current editor.
- The Expression editor despite being bigger is not resizable which means that you need to scroll if expressions indented on the editor become large.
- Finally, the list of functions available was removed from the editor itself. Now we have a link to Microsoft docs that contains the list of available functions.
- I would prefer to have it on the editor like exist in the current editor.
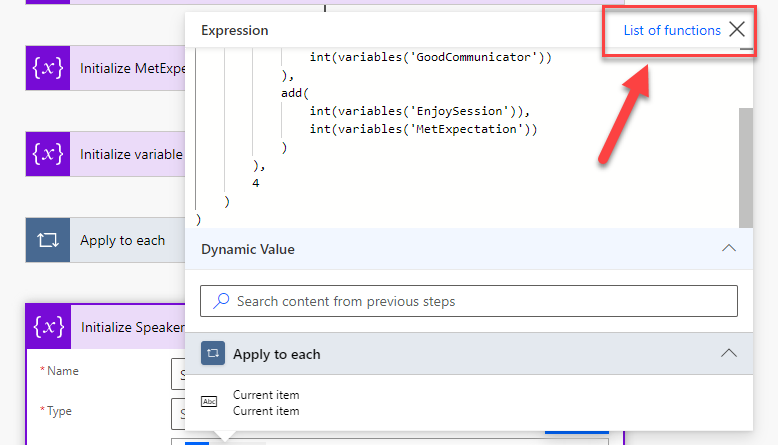
But in resume, I like better this new Expression editor.
How to activate the Experimental Features?
You are not able to see the new Expression Editor? This is because for you to have access to this Experimental Feature you need to activate the Experimental Features. To do that you need to:
- On the top right corner of your Power Automate portal, click on Settings and then click on View all Power Automate settings option.
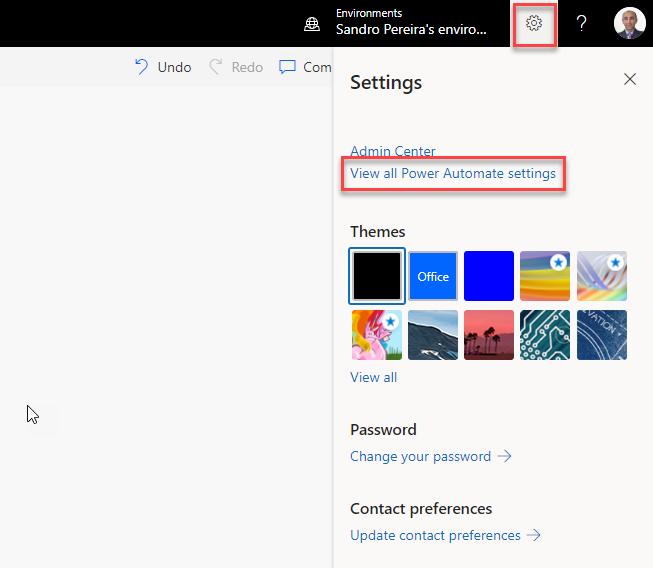
- This will pop up a Setting panel where you be able to turn on the Experimental Features.
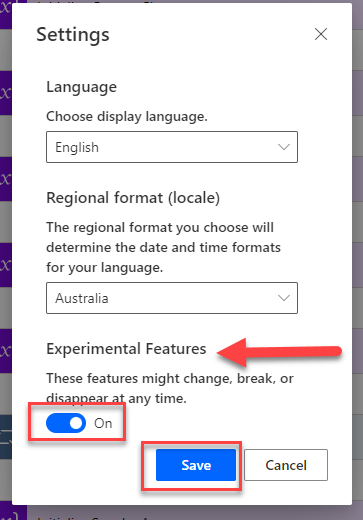
- After you enable it, click Save.
You can now enjoy the new Expression Editor!
Stay tuned for the following Power Automate Best practices, Tips, and Tricks.


