Microsoft Integration Product team announced yesterday on their monthly webcast (which you can see here) some of the new features that are now available in Logic Apps, like:
- “Run” any trigger now.
- HTTP Webhook in Designer.
- SQL Azure Connector now supports Stored Procedures.
- Azure Functions Integration and a few other features.
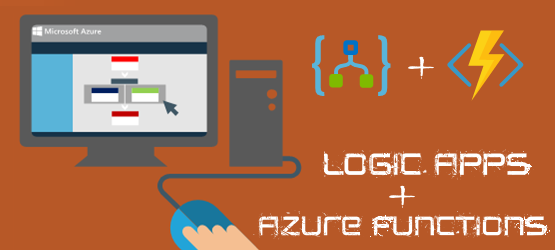
In this, my first blog post about Logic Apps, I will discuss the last feature: the new Azure Functions Integration.

At Build, a new Azure feature called Azure Functions was announced, which allows you to run small snippets of code in the cloud. You can learn more about it here: https://azure.microsoft.com/en-us/services/functions/. So let’s explore this new feature and see how we can use it inside our Logic Apps.
📝 One-Minute Brief
This post introduces a Hello World scenario using Azure Logic Apps and Azure Functions. It demonstrates how to call an Azure Function from a Logic App to add dynamic behavior, helping readers understand how to extend Logic Apps with custom code.
Get started with Azure Functions
To get started using Azure Functions, currently in Preview, you can access to https://functions.azure.com/, and you just need to fill:
- Your Azure Subscription from the combo box.
- Give a Name to the Function App.
- And select your desired Region.

- And then click the Create + Get started button.
This will create your Function App and will redirect you to your Azure portal subscription.

Let’s leave this window open for now because we will create our function through the Logic App design and get to your Azure Portal subscription.
Create your Hello World Logic App
For this exercise, I intend to create a very basic Logic App that will run once a day, be with me this is a simple Hello World, but instead of writing a static message “Hello world” I want to provide a more dynamic behavior and find out the day of the week that this Logic App is being executed and write “Hello World! this is #LogicApps, and I hope you have a great Friday” … or Saturday, Sunday, Monday, …
For that, I will call an Azure Function to get the day of the week and then post on my Twitter account.
To accomplish that, we need:
- On the Azure Portal, click on the Logic Apps option and click Add to create a new Logic App.

- If it is not present, you can find it by clicking + New > Web + Mobile > Logic App.

Note: I will create everything from scratch, including creating a:
- Free App Service Plan: represents a set of features and capacity that you can share across multiple apps in Azure App Service, including Web Apps, Mobile Apps, Logic Apps, or API Apps. These plans support different pricing tiers (Free, Shared, Basic, Standard, and Premium), where each tier has its own capabilities and capacity.
- and Resource group: are logical containers that allow you to group individual resources, such as virtual machines, storage accounts, websites, and databases, so they can be managed together.
So, to do this we need to:
- In the Create logic app panel, we need to give it:
- A Name, for example, MyDynamicHelloWorldLApp.
- And select the desired Subscription (if you have more than one).

- Set a Resource Group or create a new one by selecting the + New option, and give a resource group name in the “New resource group name” text field

- And finally, define the App Service Plan by choosing an existing plan or adding a new one by
- Clicking App Service Plan > Create New and then we need to:

- Set an App Service Plan name, for example, MyFreeLogicAppServicePlan.
- Select your desired Location
- And then click Price tier > View All > F1 Free.

- Click Select and then OK.
- Finally, on the Create Logic app panel, click Create for the deployment process to start.
We have to wait a few seconds for the deployment process to finish, once finished we will be notified in the notification area.

Now, if we refresh the Logic Apps page, we will see and have access to the new Logic App we were building.

Note: if we click on “…” you can pin this Logic App to your dashboard.
To edit and create the logic flow of your Logic App, you just need to click on the Logic App name to open the Logic Apps Designer.

To accomplish the goal that we described at the beginning of this post, we need to:
- When your access to the Logic Apps Designer a search box is presented where you can search for available connectors or triggers (API) management by Microsoft (default option) or inside your subscription. From the Show Microsoft management APIs option, click on the Recurrence trigger.

- That will enable our Logic App to run periodically based on frequency and interval, in this case:
- Frequency: Day
- Interval: 1

Note: Recurrence trigger do not have anything in the inputs object the common properties for all triggers are sufficient to define a basic recurring trigger.
- Select the plus sign, and then choose Add an action.

- When you select Add an Action, again, the search box will be presented, where all the connectors with their available actions are listed. But now, in the search box, you can also select the option: Show Azure Functions in my subscription.

- This will present all the Azure Functions that you can use inside your Logic App.
- And also the ability to create new WebHook Node JS Functions
- From the search box, select Show Azure Functions in my subscription and then Create New Function.

- On the Configure Function Inputs, and because we don’t have or need to send any input (in this case), you can type an empty JSON message: “{}” and click Next.

- On the Function Authoring.
- Set the Function name as GetHelloWorldTwitterMsg.
- And paste the following code in the Code text box;
module.exports = function (context, data) {
    var d = new Date();
    var weekday = new Array(7);
    weekday[0]=  "Sunday";
    weekday[1] = "Monday";
    weekday[2] = "Tuesday";
    weekday[3] = "Wednesday";
    weekday[4] = "Thursday";
    weekday[5] = "Friday";
    weekday[6] = "Saturday";
    var n = weekday[d.getDay()];

  // Response of the function to be used later.
  context.res = {
                body: 'Hello World! this is #LogicApps and I hope you have a great ' + n
  };

  context.done();
};
- Click Create.

- Once again, select the plus sign, and then choose the Add an action option.
- From the search box, type Twitter and select the Twitter – Post a new tweet action.

- The first step is to sign in to Twitter and authorize Azure AppService Logic Apps to use your account.


- After you authorize the Logic App to use your account, you can now configure the text to be posted on your Twitter account.
- On Post a new tweet, click on the TWEET TEXT text box, and the outputs from the GetHelloWorldTwitterMsg function will be presented.
- Select “Body” output to be the tweet text to be posted on your Twitter.

- Finally, you can select “Save”, on the Logic Apps Designer menu, to make your logic app live.
If you now check your Twitter account, you will see a new tweet:

Manager and Testing your Azure Functions
If you access your Azure Function app page that we had accessed at the beginning of this post, and refresh it, you will see the new Function that we have created inside our Logic App

Here we are also able to “debug” and try the function code to check if everything is ok.

Special thanks to my colleague André Silva, who got curious about what I was doing, spent a little of his time with me, and helped me with the JavaScript code.
Hope you find this helpful! If you liked the content or found it useful and would like to support me in writing more, consider buying (or helping to buy) a Star Wars Lego set for my son.


Hi Sandro,
Thank you for this great write-up. Is there any way to use complex schemas with multiple references? Right now, it allows you to add schema files manually to integration account for use within Logic Apps. But uploading one file at a time for complex schema is tedious.