The next posts will focus on installing the BizTalk prerequisites and performing the necessary configuration on the BizTalk Server machine.
Before installing BizTalk Server or its prerequisites, make sure you have installed the latest critical Windows updates from Microsoft.
📝 One-Minute Brief
This article explains how to install and configure the SMTP Server feature for BizTalk Server 2013 R2. Although optional, SMTP is required if you plan to use the BizTalk SMTP adapter for email notifications and message delivery. The guide walks through enabling the feature and configuring it correctly.
Install and configure the SMTP Server Feature (optional)
Again, in the previous step, BizTalk Server 2013 R2: Installation and Configuration – Enable Internet Information Services (Part 2), I mentioned that we should install the SMTP Server feature. Why?
If you wish to configure BAM Alerts, you must have configured the SQL Server Database Mail feature (we will see how to accomplish that afterward), and I will intend to configure these features using your local SMTP Server.
Note: This type of configuration is optional and you don’t need to install the local SMTP Server, you can and you should configure SQL Server Database Mail feature using an external SMTP.
If you didn’t previously install SMTP Server, then you should follow these steps:
- Start by running the Server Manager, if it is not already open, from either:
- On the Windows taskbar, click the Server Manager button.
- On the Start screen, click the Server Manager.
- Under the Manage menu, select Add Roles and Features (or press Add roles and features under the Dashboard panel).
- On the Before You Begin screen, click Next.
- On the Installation Type screen, select Role-based or Feature-based Installation and click Next.
- On the Server Selection screen, select the appropriate server, leave the default options, and click Next.
- On the Server Roles screen, click Next.
- On the Features screen, select SMTP Server and click Next.
- If prompted, click Add Features, and then click Next.
- On the Confirmation screen, select Restart the destination server automatically if required and click Install.
- When the installation completes, the wizard reflects the installation status on the Results screen.
- Click Close to exit the wizard.
To configure the SMTP Server, you should follow these steps:
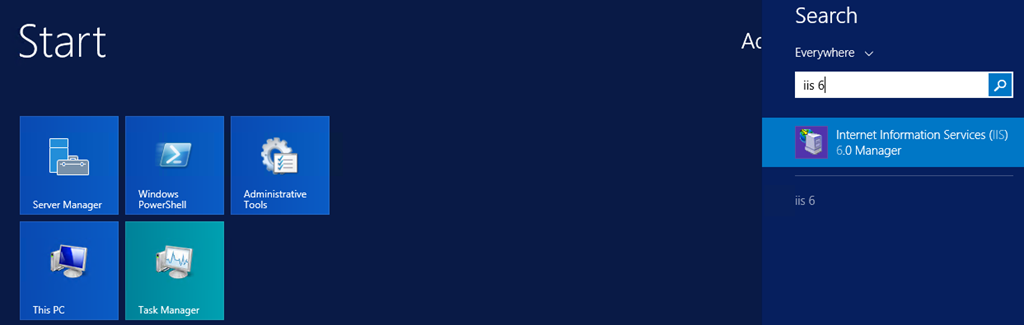
- Press the Windows key to switch to the Start screen and type IIS 6.0 Manager in the Start Search box, and click on the Internet Information Services (IIS) 6.0 Manager option.
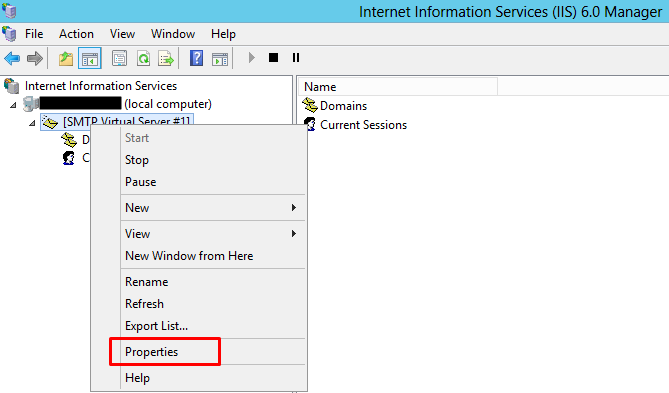
- Right-click on the SMTP Server ([SMTP Virtual Server #1]) and select Properties to open the properties window.
Note: For the purpose of this installation, we will assume that email only can be generated from this machine. If the application that generates the email runs on a separate server, you need to grant relaying access for that server in IIS SMTP.
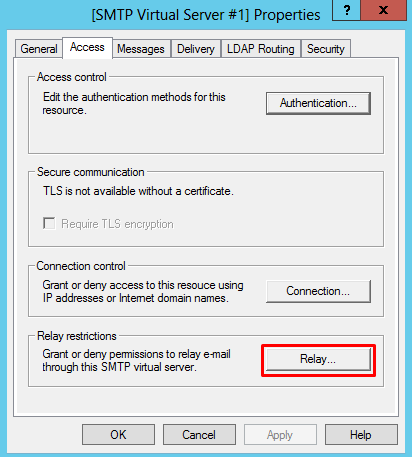
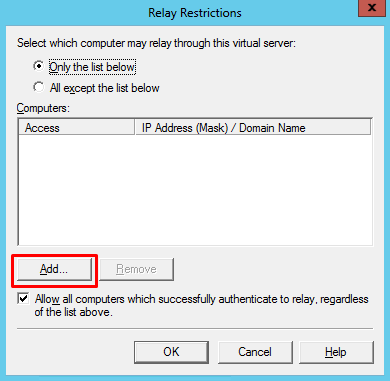
- On the Properties window, click on the Access tab and click Relay… under Relay restrictions.
- On the Rely Restrictions window, click Add…
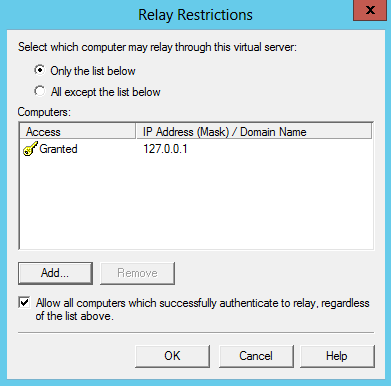
- On the Computer window, enter 127.0.0.1 for the address and then click OK.
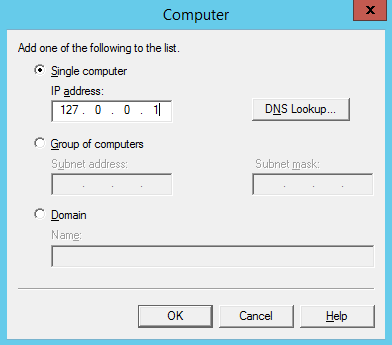
- The Connection setting controls which computers can connect to the SMTP server and send mail. By granting only localhost (127.0.0.1) access, it limits only the server itself to connect to the SMTP server. This is a requirement for security; it prevents the SMTP server from being an open relay and being used to send unsolicited spam email by other computers on the internet, which could lead to the SMTP server being blacklisted.
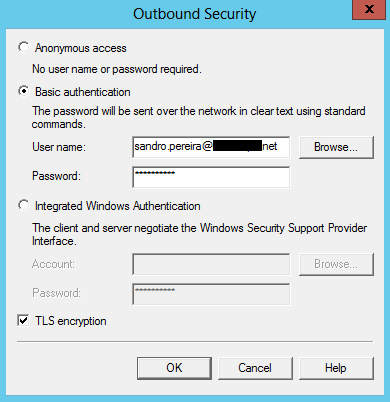
- On the Properties window, click on the Delivery tab and click Outbound Security…
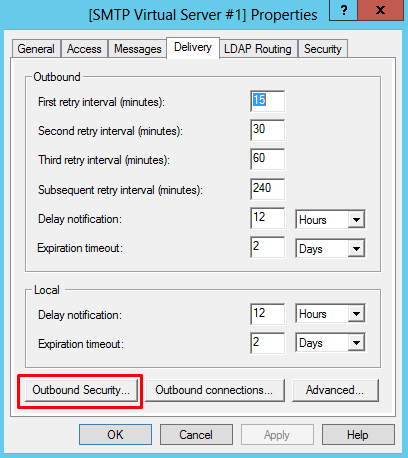
- On the Outbound Security window, select Basic authentication and enter the login credentials you use for your Exchange or personal account (Gmail, Live, and so on). Click OK to continue.
- If required, enable TLS encryption.
- This will be the account that sends the emails.
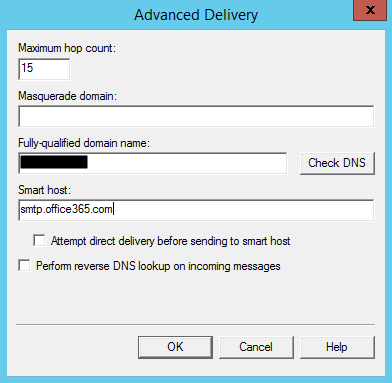
- On the Outbound Security window, click Advanced…. Enter the SMTP server URL you got in the previous step in the Smart host edit box and then click OK to continue.
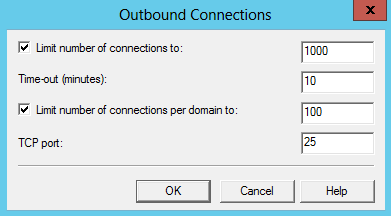
- On the Outbound Security window, click on Outgoing connections… and set the port of your server
- Limit number of connections to: When the checkbox is selected, this option specifies the total number of simultaneous outbound connections to all remote domains that can exist at one time. The default is 1,000 connections. The minimum is 1.
- Time-out (minutes): Specifies the time allowed before an inactive connection is closed. The default is 10 minutes.
- Limit number of connections per domain to: When the checkbox is selected, this option limits connections to any single remote domain. The default is 100 connections. This number should be less than or equal to the value for the Limit number of connections to option.
- TCP port: Designates the TCP port used for outgoing transmissions. The default is port 25. The outgoing port setting can be the same as that for incoming transmissions, or it can be different.
- Click Ok twice to apply the settings on the SMTP local server.
- Right-click SMTP Virtual Server #1 again, and then restart the service to pick up the new configuration.
Verify Your Installation
The next step is to verify if the SMTP is successfully configured by using the simple Telnet Client.
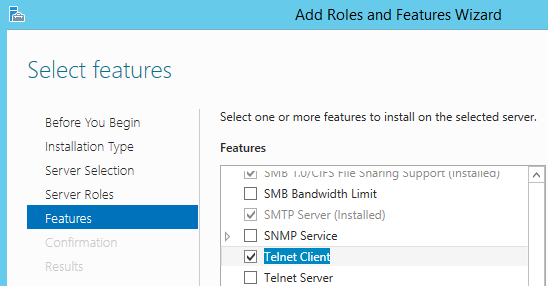
If you don’t have Telnet Client installed, then you need to:
- Start by running the “Server Manager”, if it is not already open, from either:
- On the Windows taskbar, click the Server Manager button.
- On the Start screen, click the Server Manager.
- Under the Manage menu, select Add Roles and Features (or press Add roles and features under the Dashboard panel).
- In the Features Summary section, click Add features.
- In the Add Features Wizard, select Telnet Client, and then click Next.
- On the Confirm Installation Options page, click Install.
- When installation finishes, on the Installation Results page, click Close.
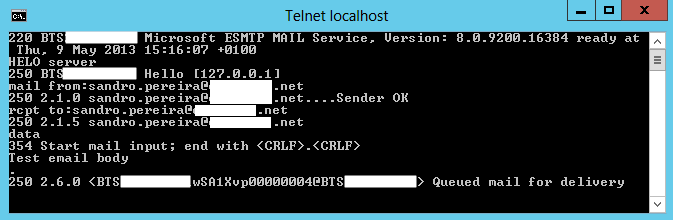
To send a test email:
- Open a command prompt window by pressing the Windows key to switch to the Start screen, typing cmd, and then clicking on the Command Prompt option from the Search menu.
- Type the following sequence of commands:
telnet localhost 25
Helo serevr
mail from:email
rcpt to:email
data
put the body of the email message
Related links
- BizTalk Server 2013 R2: Installation and Configuration – Important considerations before set up the server (Part 1)
- BizTalk Server 2013 R2: Installation and Configuration – Enable Internet Information Services (Part 2)
- BizTalk Server 2013 R2: Installation and Configuration – Install Windows Identity Foundation (WIF) (Part 3)
- BizTalk Server 2013 R2: Installation and Configuration – Install Microsoft Office Excel 2013 (Part 5)
- BizTalk Server 2013 R2: Installation and Configuration – Install Visual Studio 2013 (Part 6)
- BizTalk Server 2013 R2: Installation and Configuration – Install SQL Server 2014 (Part 7)
- BizTalk Server 2013 R2: Installation and Configuration – Configure SQL Server Database Mail feature (Part 8)
- BizTalk Server 2013 R2: Installation and Configuration – Install and Configure BizTalk Server 2013 R2 (Part 9)
- BizTalk Server 2013 R2: Installation and Configuration – Configure SQL Server Network Configuration protocols (Part 10)
- BizTalk Server 2013 R2: Installation and Configuration – Validate Mail account used by BizTalk to send BAM Alerts (Part 11)
- BizTalk Server 2013 R2: Installation and Configuration – Installing BizTalk Adapter Pack (Part 12)
- BizTalk Server 2013 R2: Installation and Configuration – Install and Configure Microsoft UDDI Services (Part 13)
- BizTalk Server 2013 R2: Installation and Configuration – Install and Configure the Microsoft BizTalk ESB Toolkit (Part 14)
- BizTalk Server 2013 R2: Installation and Configuration – Configure BizTalk Server SQL Jobs (Part 15)
- BizTalk Server 2013 R2: Installation and Configuration – Optimize the BizTalk Server 2013 R2 environment (Part 16)
- BizTalk Server 2013 R2: Installation and Configuration – Optimize the BizTalk Server 2013 R2 environment (Part 17)
- BizTalk Server 2013 R2: Installation and Configuration – Optimize the BizTalk Server 2013 R2 environment (Part 18)
- BizTalk Server 2013 R2: Installation and Configuration – Install additional Developer tools (Part 19)
Hope you find this helpful! If you liked the content or found it useful and would like to support me in writing more, consider buying (or helping to buy) a Star Wars Lego set for my son.

