
In a previous post, Azure Files: A Step‑by‑Step Guide to Manual Drive Mounting on a Virtual Machine, we explained how to map a network drive on a virtual machine to connect to an Azure File Share. Today, we build on that foundation with a quick proof of concept (POC). We will see how BizTalk Server reads from and writes to that mounted drive, or more precisely, how it communicates with an Azure File Share.
Consider a scenario in which a BizTalk Server application receives files, processes them (optionally via an orchestration), and then saves the output to a target location. In this case, the target location is an Azure File Share.
📝 One-Minute Brief
Configure BizTalk Server to communicate with Azure File Share by correctly setting up storage access, authentication, and connectivity to enable reliable hybrid file‑based integrations.
For example, in our previous blog post, we explained how to mount a drive for an Azure File Share on your local virtual machine. Does that mean that BizTalk Server can use it like this?

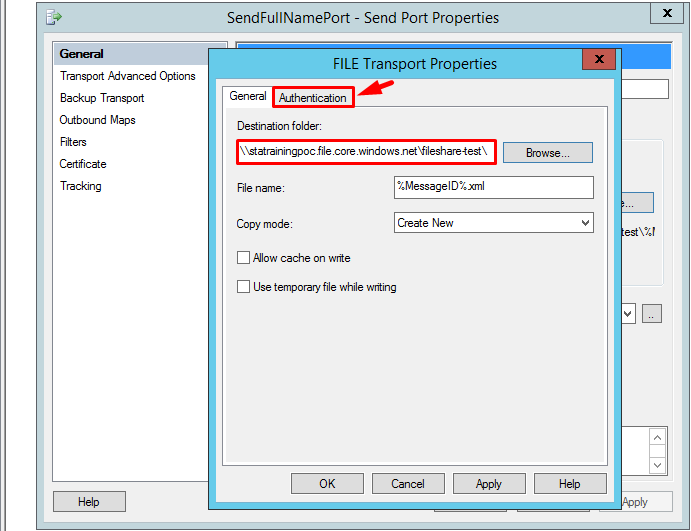
As you can see here, specifying the drive’s path as the destination folder gives you the direct path to it.

But unfortunately, employing BizTalk to write to this location poses a challenge. Messages become “dehydrated,” essentially remaining idle as if no subscribers are available to consume them.
That means the BizTalk Server wouldn’t work with the mounted drive because Mapped network drive letters cannot be used in the file path, as they are user-session-based.
With that said, how can we turn this around? Actually, it is quite simple.
In the Azure Portal, access the File Share overview page to obtain the File Share URI. Subsequently:
- Modify the URI to emulate a standard drive path. (If in doubt, check the related post) from this:
- https://statrainingpoc.file.core.windows.net/fileshare-test
- To this:
- \\statrainingpoc.file.core.windows.net\fileshare-test\
- Proceed with configuring the Send Port, incorporating the adjusted URI as the Destination Folder:
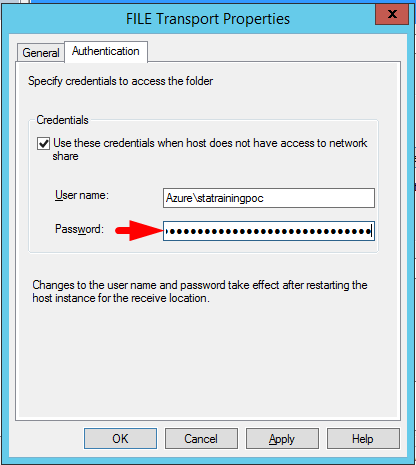
- Next, navigate to the Authentication section.
- Here, set your username, which should begin with Azure\name-of-your-storage_account. For example:
- Azure\statrainingpoc.
- Here, set your username, which should begin with Azure\name-of-your-storage_account. For example:

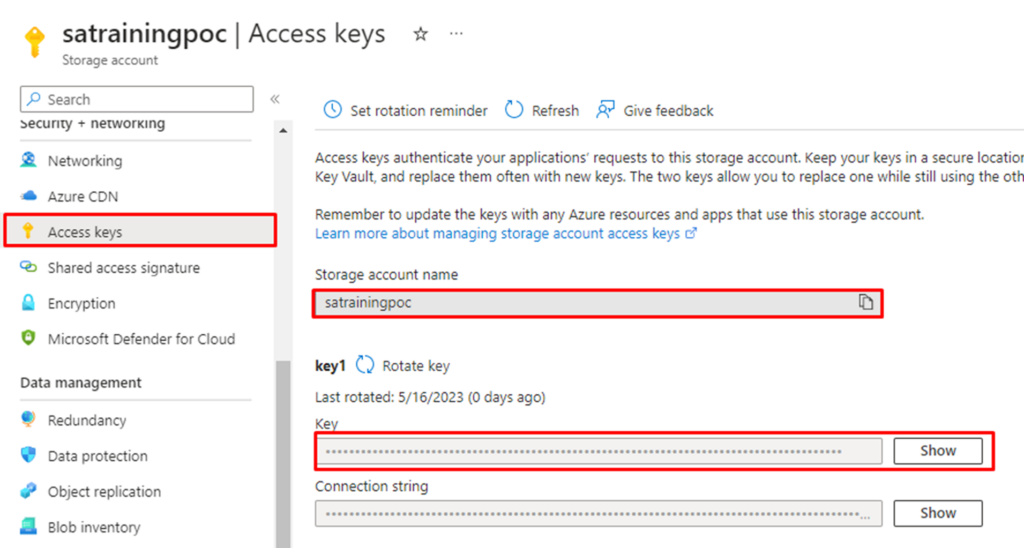
- Next, retrieve the password from your storage account. To do this:
- Navigate to your Azure Portal, locate your Storage Account, and click on Access Keys.”
- Then, click on Show to reveal the access key and copy it into the password field.
Following the authentication setup, confirm the connection’s integrity, enabling BizTalk to seamlessly compose messages directly onto the file share drive.
To see this working, you can now access the mounted drive on the virtual machine, and there, you can observe the messages being successfully written.

Finally, you’ll notice that the File Share contains the same content as what we’ve written on the virtual machine and vice versa.

By following these steps, you can configure BizTalk to write messages to a mounted drive on a virtual machine. This setup enables bidirectional data exchange between the virtual environment and the Azure File Share. As a result, it supports efficient data management and workflow automation.
I hope you enjoyed this proof of concept. We’ll see you in the next one. If you found this content useful and would like to support our work, you can help by contributing toward a Star Wars Lego set for Sandro’s son!

