Azure Service Bus has a REST API exposed that you can use to send, read, manage messages from and to, but it requires Authentication. To use this API, you’ll need to get a SAS Token to add to your request headers, which is an operation not allowed to all users/developers in your or your clients organization.
Therefore, it can be helpful to connect to your Service Bus and expose some methods with API Management Service.
For this post, I will only approach how to create the API, create your SAS Token and setting up your policies. I will not write on how to create the APIM instance or Service Bus instance.
Creating the SAS Token to access Service Bus
A shared access signature (SAS) provides secure delegated access to resources in your storage account. With a SAS, you have granular control over how a client can access your data. For example:
- What resources the client may access.
- What permissions they have to those resources.
- How long the SAS is valid.
From <https://docs.microsoft.com/en-us/azure/storage/common/storage-sas-overview>
After having your Service Bus created, this step will be fairly simple and quick.
In your SB configurations, go to Shared Access Policies and “Add” new ones. You may not need or want selective access policies, but it’s a good standard to have Send Only and a SendListen policy, instead of a generic Manage key. This allows you to share these keys with a bit more security in mind, because you can restrict your apps/users access. Generally, you don’t want everyone to have a full access.
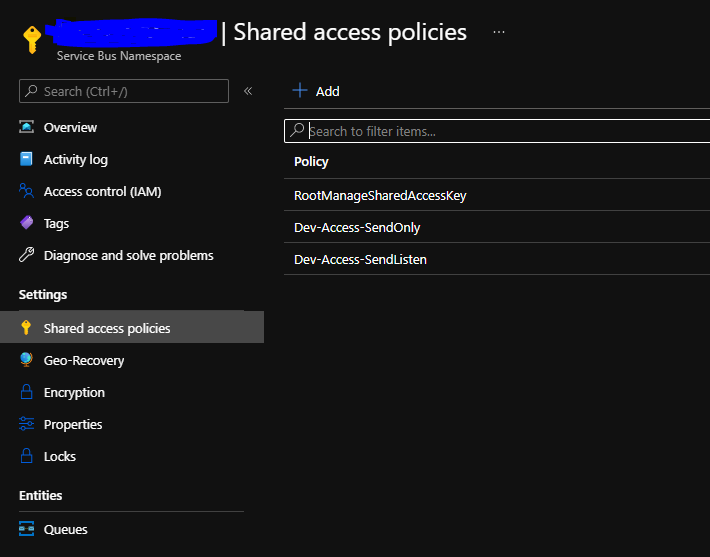
Creating these policies will generate Keys and ConnectionStrings. You can use these with your Service Bus Explorer to access the Queues and Topics.
For our needs, we want the Primary Key.
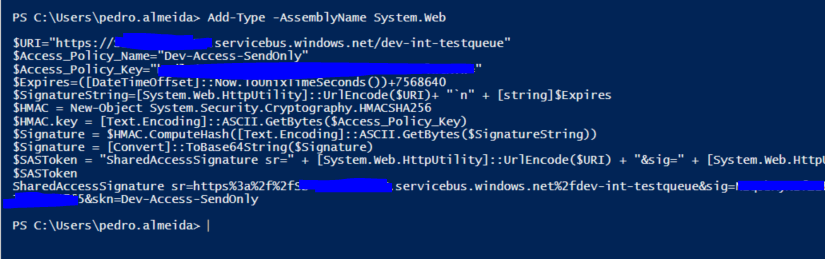
After having this, you want to generate the SAS Token, using this Powershell script. Remember to replace the highlighted values with yours.
Also, in this example, the “Expires In” property is set to 365.6 days, but you can change this. This value is to be set in Seconds.
$URI="https://{{service-bus-name-here}}.servicebus.windows.net/{{queue-name-here}}"
$Access_Policy_Name="{{access-policy-name-here}}"
$Access_Policy_Key="{{access-policy-key-here}}"
$Expires=([DateTimeOffset]::Now.ToUnixTimeSeconds())+31587840
$SignatureString=[System.Web.HttpUtility]::UrlEncode($URI)+ "`n" + [string]$Expires
$HMAC = New-Object System.Security.Cryptography.HMACSHA256
$HMAC.key = [Text.Encoding]::ASCII.GetBytes($Access_Policy_Key)
$Signature = $HMAC.ComputeHash([Text.Encoding]::ASCII.GetBytes($SignatureString))
$Signature = [Convert]::ToBase64String($Signature)
$SASToken = "SharedAccessSignature sr=" + [System.Web.HttpUtility]::UrlEncode($URI) + "&sig=" + [System.Web.HttpUtility]::UrlEncode($Signature) + "&se=" + $Expires + "&skn=" + $Access_Policy_Name
$SASToken
The script execution result should be the SAS you will need.
Now that you have the SAS Token created, your will need to set it somewhere. Since Azure APIM allows you to store secrets, we will make use of it and store it there.
In the Menu, select the “Named values” option. Here you can create your variables, with a Type. Being a Secret or Key Vault it will not show the value. The Key Vault option will make you select the Key Vault Secret that will be retrieved.
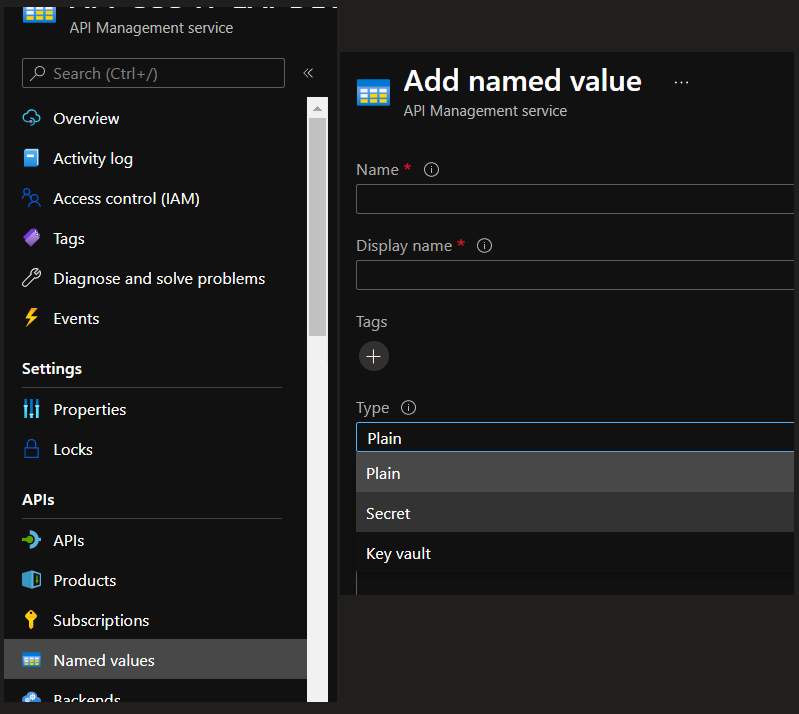
You can choose to create a KV Secret and store it there, but if you’re not willing to pay for another service, you can just store it as the Secret type. Remember the Display name, because it will be the value that we will be using later on.
Tracing messages and monitoring Azure Service Bus across multiple Queues and Topic Subscriptions get powerful toolsets and actionable insights to troubleshoot messaging issues.
Creating the API
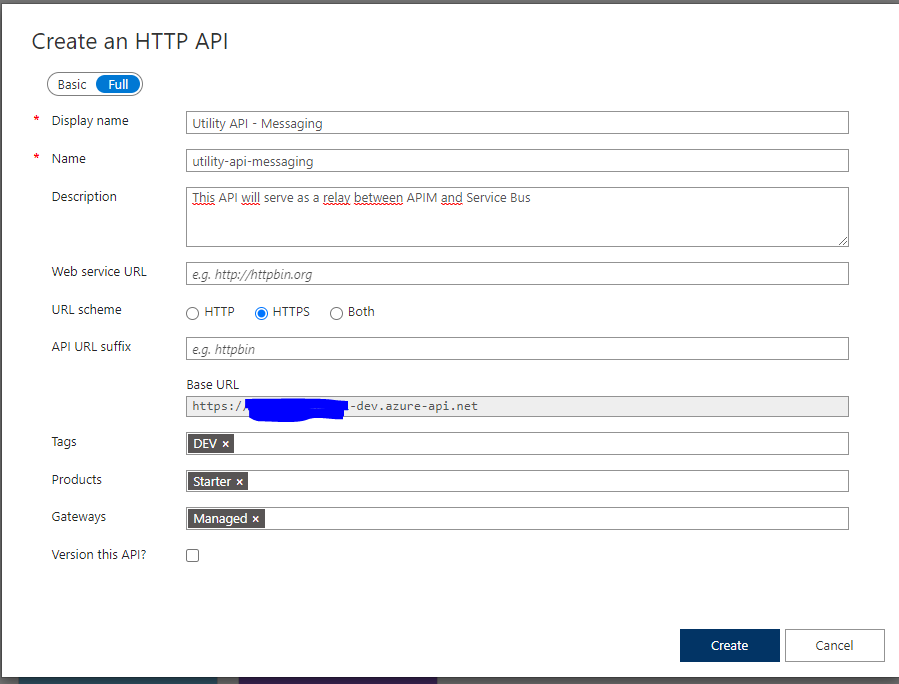
Since you already have the APIM instance created, add a new API to use as your Utility API.
Setting the URL scheme as HTTPS is very advisable, since this is a secure endpoint and you want to have lots of security embedded. The API suffix will act as a route, so you might want to define this as integration/utility/messaging.
End result should be similar to this snapshot.
After this, you can now create your methods and prepare to expose them.
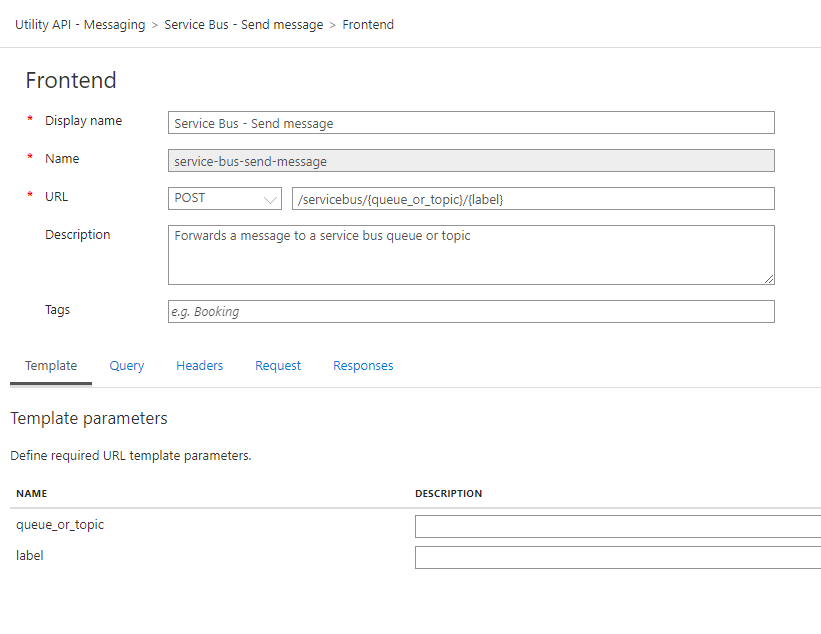
We will only set a Send Message operation, but you can add as many as you need and also, you can add different versions of this API, where you can expose selected operations, instead of all.
Set the method as POST and parameters like shown below. This will allow you to rewrite the URL later, with these values. When making the request, if the Queue/Topic doesn’t exist, it will fail. This adds a bit more security, because in the event someone gets your subscription key, they will not know the Topic/Queue name.
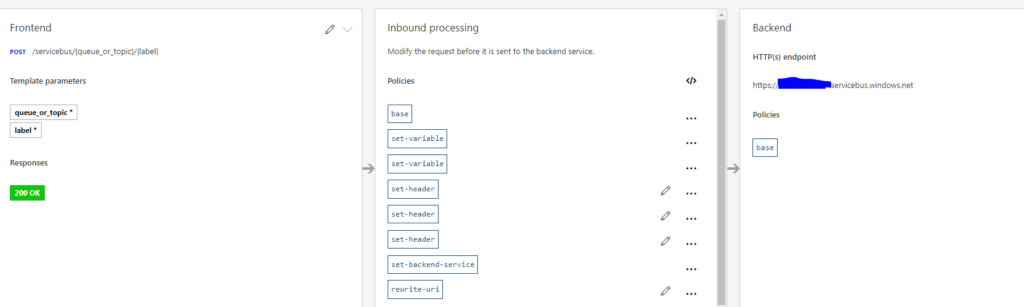
Having this step completed, you’re now ready to set the policies and back-end URI.
Setting the API Policies
The policies can be set and an API level or Operation level. How is this different?
API level means that every operation contained within this API will be obeying to the parent policy. If you believe that all operations should abide by the same policies, then you should create them here.
Operation level policies will only apply to the current operation. However, if you do not specify the “Override” flag, they will be replaced with the parent policy. For example, the Set headers policy.
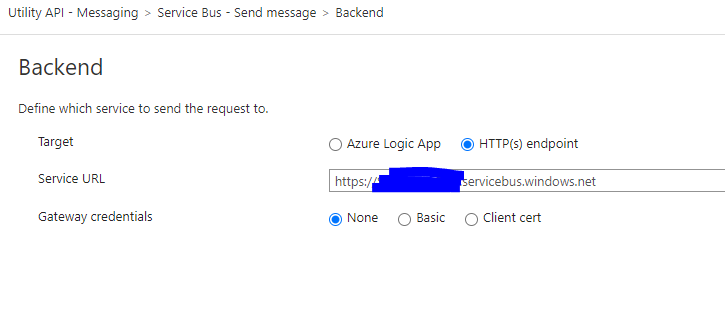
For the Backend HTTP Endpoint, you should set your Service Bus URL. This is very simple task. In the gateway credentials, you should select None, as it is not using a Gateway. In other APIs, that are routed through a OPDG (On-Premises Data Gateway) this should be populated with the needed value.
The Inbound Policy is the tricky one. You can use some snippets to build this policy, but it will come to a point where you will have to write something.
The most important thing you will spot here is the Authorization header. As you can see, it’s set to search for the variable Named Value “ServiceBusAccessKey”. If it doesn’t exist, in the execution you will see errors stating that the value was not found.
<policies>
    <inbound>
        <base />
        <!-- Gets the Logic App Info from Headers automatically provided -->
        <set-variable name="queue_or_topic" value="@(context.Request.MatchedParameters["queue_or_topic"])" />
        <set-variable name="label" value="@(context.Request.MatchedParameters["label"])" />
        <set-header name="Authorization" exists-action="override">
            <value>{{ServiceBusAccessKey}}</value>
        </set-header>
        <set-header name="BrokerProperties" exists-action="override">
            <value>@{
                     var json = new JObject();
                     json.Add("MessageId", context.RequestId);
                     json.Add("Label", (string)context.Variables["label"]);
                     return json.ToString(Newtonsoft.Json.Formatting.None);
            }</value>
        </set-header>
        <set-backend-service base-url="https://{{SERVICEBUS_URL}}.servicebus.windows.net" />
        <rewrite-uri template="@("/" + (string)context.Variables["queue_or_topic"] +"/messages" )" copy-unmatched-params="false" />
    </inbound>
    <backend>
        <base />
    </backend>
    <outbound>
        <base />
    </outbound>
    <on-error>
        <base />
        <set-variable name="errorMessage" value="@{
            return new JObject(
                new JProperty("EventTime", DateTime.UtcNow.ToString()),
                new JProperty("ErrorMessage", context.LastError.Message),
                new JProperty("ErrorReason", context.LastError.Reason),
                new JProperty("ErrorSource", context.LastError.Source),
                new JProperty("ErrorScope", context.LastError.Scope),
                new JProperty("ErrorSection", context.LastError.Section)

            ).ToString();
        }" />
        <return-response>
            <set-status code="500" reason="Error" />
            <set-header name="Content-Type" exists-action="override">
                <value>application/json</value>
            </set-header>
            <set-body>@((string)context.Variables["errorMessage"])</set-body>
        </return-response>
    </on-error>
</policies>
With this example you should be able to create your API that directly connects you to service bus without having to get a SAS Token everytime you need to use the Service Bus REST API.
Following the above steps, you can easily relay messages between Service Bus And APIM. But, to ensure these Azure services are performing as expected, check out the top 5 Azure Monitoring tools.
I’ve been using a similar technique in our integrations for about 6 months but now have a requirement to allow one of the Service Bus Topics to receive larger messages. We’ve upgraded our SB to Premium and set the single topic we want to 500mb (overkill but needs to be larger then the 1mb) but it is still failing with Entity to Large. It now accepts greater then 256 but not 1mb. I think it could be down to the Transport Type but can’t figure out how to handle that in the APIM policies.