

To close this sequence of posts about BizTalk Server 2016 Feature Pack 1: How to publish BizTalk operational data on Power BI – Step-by-step configuration, we will see how to connect the Power BI BizTalkOperationalData dataset to our on-premises BizTalk environment.
📝 One-Minute Brief
The final step in the Feature Pack 1 analytics setup focuses on connecting Power BI to an on‑premises BizTalk environment by installing and configuring the Power BI On‑premises Data Gateway, ensuring operational data stays synchronized and up to date.
Step-by-step Configuration to Enable BizTalk Server 2016 Operational Data Feed
Fourth step: Connect the Power BI BizTalkOperationalData dataset with your on-premise BizTalk environment
The final step is to install and configure a Power BI Gateway to connect your on-premise BizTalk Server environment.
With the On-premises data gateway, you can keep your data fresh by connecting to your on-premises data sources without the need to move the data. Because it installs and runs on your computer, it is best to install it on a machine that can be left running continuously.
Here are a few things to consider before installing the gateway.
- If you are installing on a laptop that is turned off, not connected to the internet, or asleep, the gateway won’t work, and the data in the cloud service will not be synchronized with your on-premises data.
- If your machine is connected to a wireless network, the gateway may run more slowly, causing it to take longer to synchronize your on-premises data with the cloud service.
(source: https://powerbi.microsoft.com/en-us/documentation/powerbi-gateway-onprem/)
Install Power BI Gateway
To do that, we need to:
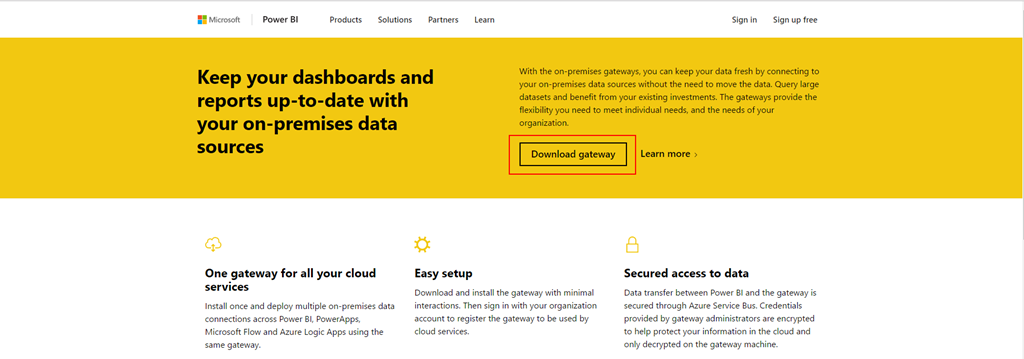
- Browse to Power BI Gateway and download the gateway installation file.
- Run the downloaded .EXE file – PowerBIGatewayInstall.exe – from your hard drive.
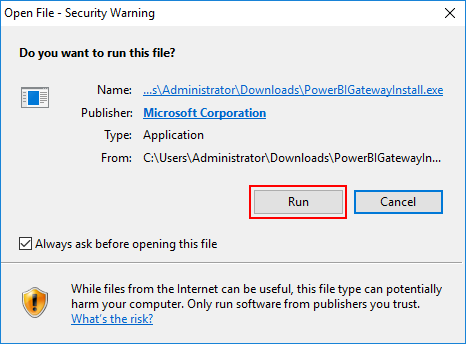
- In the Security Warning screen, click Run.
- In the Start your on-premises data gateway installation screen, click Next.

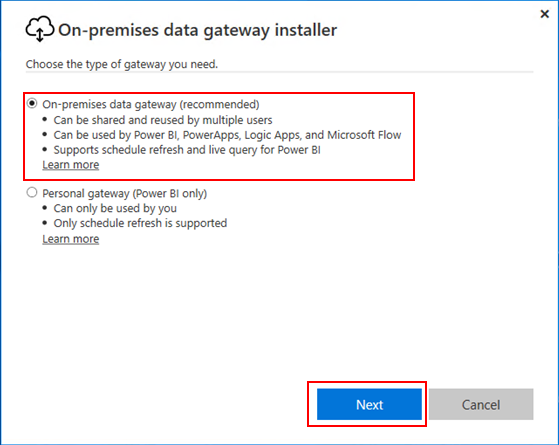
- · In the Choose the type of gateway you need screen, select On-premises data gateway (recommended) and then click Next.
- On-premises data gateway: Multiple users can share and reuse a gateway in this mode. This gateway can be used with Power BI, Power Apps, Flow, or Logic Apps. For Power BI, this includes support for both schedule refresh and DirectQuery.
- Personal: This is for Power BI only and can be used as an individual without any administrator configuration. This can only be used for on-demand refresh and scheduled refresh. This will launch the installation of the personal gateway.
- In the Reminder before you install screen, click Next.
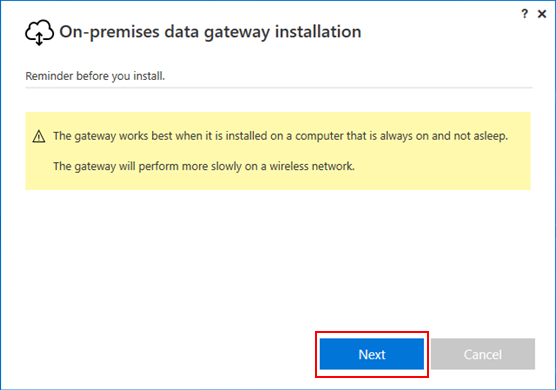
- In the Getting ready to install the on-premises data gateway screen, review or change the installation path, select the option I accept the terms of use and privacy statement, and then click Install.

- If the installation is successful, the Almost done screen will appear. The next step is to sign in to your Power BI account to complete the gateway configuration. Enter your email account and then click Sign in.
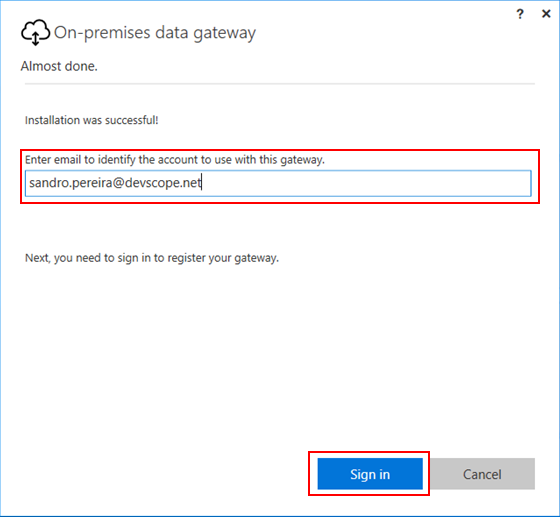
- The next step is to specify that we want to register a new gateway to our environment.
- Select the option Register a new gateway on this computer and then click Next.
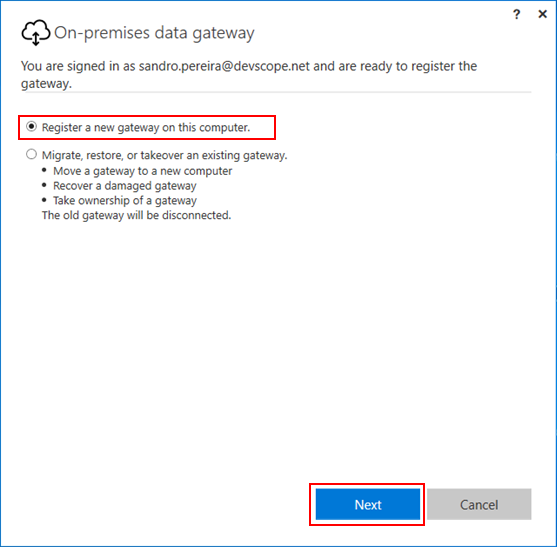
- Finally, the last step is to configure the Gateway settings by defining a Gateway name and recovery key. To finalize the configuration, click Configure.
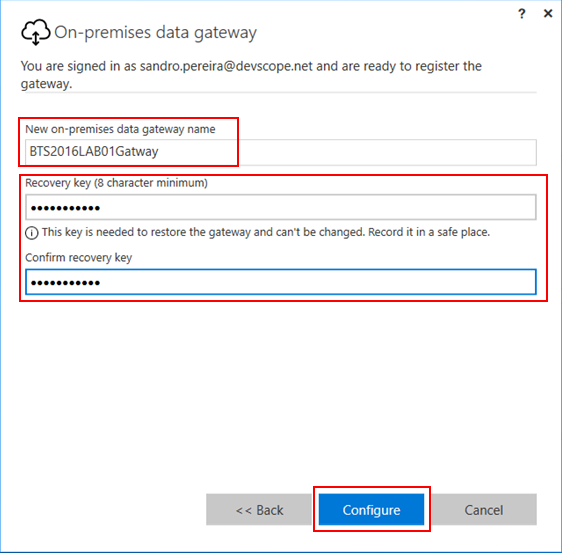
When we click configure, the Gateway is confirmed and added to the PowerBI setup for our account.
Power BI: Manage gateways
The only thing missing to finalize the process is to add a data source to the gateway we just created on the https://app.powerbi.com portal. For that, we need to:
- Log in to https://app.powerbi.com portal.
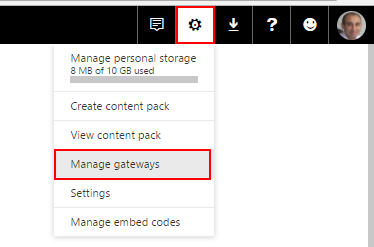
- Select the gear icon in the upper-right corner and then click Manage gateways.
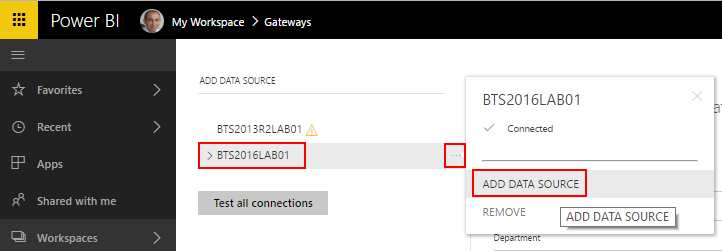
- You can add a new data source by selecting a gateway and clicking the “…” (3 dots) button and then clicking Add data source.
- In the Data Source Setting panel, set the following configuration:
- Data Source Name: Set a name for your data source, for example: BizTalkOperationalDataSource.
- Data Source Type: From the Data Source Type list, you must select OData.
- URL: set the URL that we defined on the BizTalkOperationalData.pbit template:
- http://localhost/BizTalkOperationalDataService.
- Authentication Method: This can either be Windows or Basic. You would want to choose Basic if you are going to use SQL Authentication instead of Windows Authentication. Then enter the credentials that will be used for this data source.
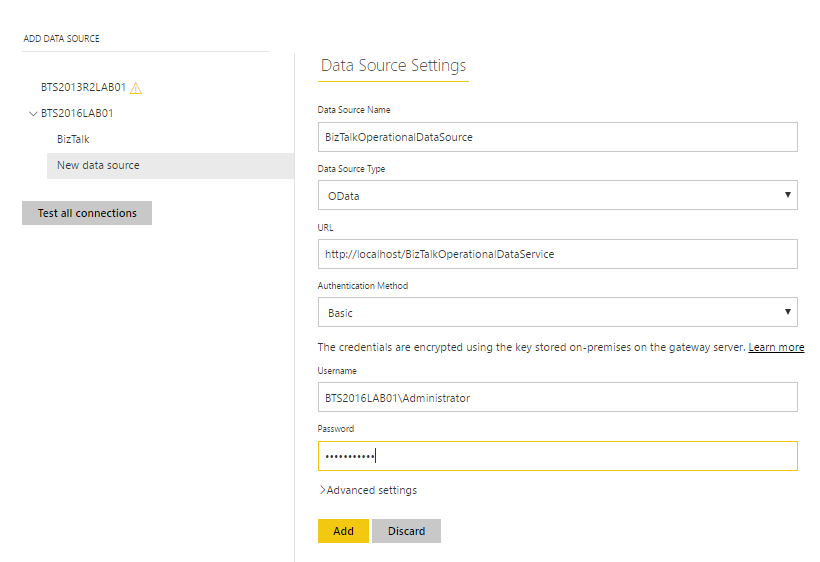
- And then click Add.
Now, let’s associate this gateway and data source with our BizTalkOperationalData dataset. To do that, you need to:
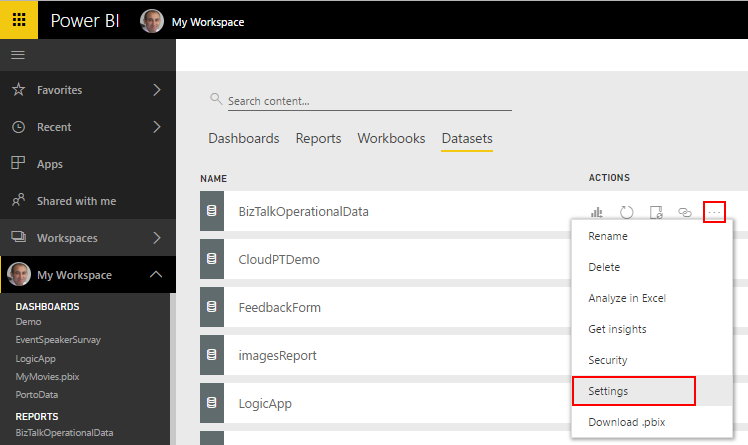
- Select your Workspace, in my case My workspace, and then select the tab dataset.
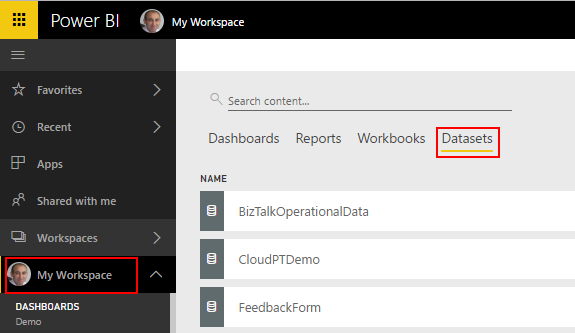
- On our BizTalkOperationalData dataset, click “…” (3 dots) button and then select Settings.
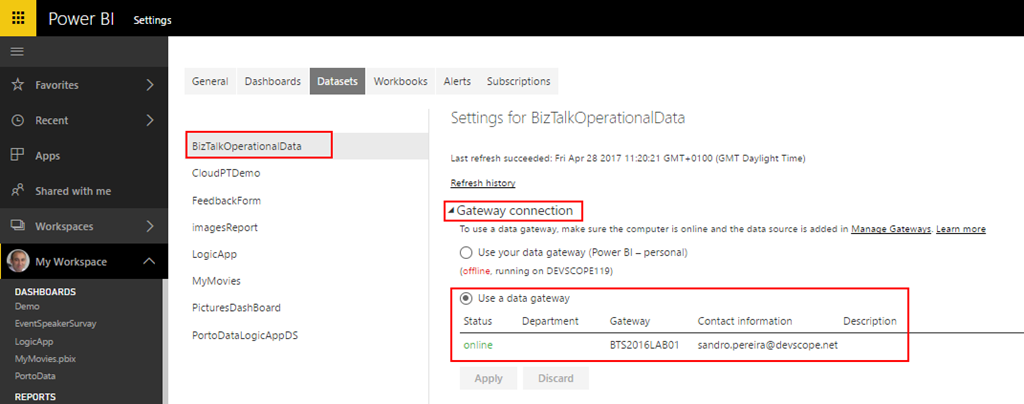
- In our BizTalkOperationalData dataset, expand the gateway connection tab. There, you will be able to see a gateway available under Use a data gateway.
- Select the option Use a data gateway and click Apply.
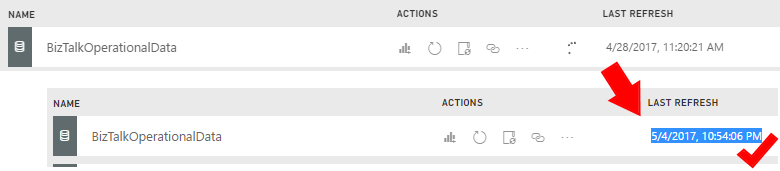
And now you will be able to successfully manually refresh your dataset or specify a scheduling refresh mechanism.
Related Links
- BizTalk Server 2016 Feature Pack 1: How to publish BizTalk operational data on Power BI – Step-by-step configuration (Part 1)
- BizTalk Server 2016 Feature Pack 1: How to publish BizTalk operational data on Power BI – Step-by-step configuration (Part 2)
Hope you find this helpful! If you liked the content or found it useful and would like to support me in writing more, consider buying (or helping to buy) a Star Wars Lego set for my son.



If I get it right, the Gateway is a service that runs locally and provides access to the OData feed. Essentially it’s a proxy. Why does it need to be attached to a specific PowerBI account? What if I would like to provide access to the same feed to multiple PowerBI accounts?