This next posts will focus on installing the BizTalk prerequisites and perform the necessary configuration on the BizTalk Server machine.
Before installing BizTalk Server or its prerequisites, make sure you have installed the latest critical Windows updates from Microsoft.
Install Visual Studio 2013
The BizTalk Server development tools are based on Visual Studio and it provides a development environment for building BizTalk Server applications. Ultimate Edition is recommended, but Premium and Professional are also supported. Like previous versions of the product, at a minimum, you must have the Microsoft Visual C#® .NET component of Visual Studio installed on your computer if you wish to install the BizTalk Server Developer Tools and SDK component. However, like the previous versions of Visual Studio (VS 2012) with Visual Studio 2013, you cannot customize the features that you want to install to the point of only install Visual C#, at least that I know of.
Note: Visual Studio 2013 is not required if you are installing BizTalk Server on a production environment (runtime only), on which it is not required to do application development and/or application debugging.
Important Note: The BizTalk Server runtime components require .NET Framework 4.5. In addition, the .NET Framework 3.0 is required if the Windows Communication Foundation (WCF) adapter or WCF Interceptor are planned to be installed.
Additional Note: If you install Visual Studio before installing BizTalk Server, and then upgrade to Visual Studio Team Explorer, you may need to repair your BizTalk Server installation from the Control Panel / Programs option.
To install Visual Studio 2013:
- Insert the Visual Studio 2013 installation disk into the DVD-ROM drive.
- On the Start page, accept the license agreement by selecting “I agree to the License terms and conditions” and then click “Next”.

- In Optional features to install, select the options you need and then select Install. BizTalk Server does not require any of the optional features. however, I think that is important at least to install “Microsoft Web Developer Tools“. Add the following features to your installation:
- Microsoft Web Developer Tools
- Microsoft Office Developer Tools (not required)

- And then click “Install”
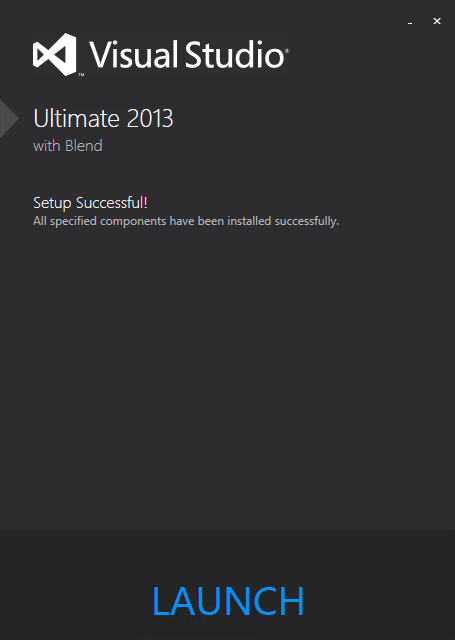
- On the Finish page, close the window or click “Launch”.

Important Note: Because we cannot customize the Visual Studio 2013 installation, your version of Visual Studio will include Microsoft SQL Server Express or compact as an optional feature that will be automatically installed. This feature is not used by BizTalk Server and may cause BizTalk Server setup to fail. As a best practice, uninstall Microsoft SQL Server Express or/and Compact.
Remove Microsoft SQL Server Express
As I say previous your version of Visual Studio will include Microsoft SQL Server Express or compact as an optional feature that will be automatically installed. This feature may cause BizTalk Server setup to fail and should not be installed but as we cannot customize the Visual Studio 2013 installation, so it’s very important that we remove these features.
To avoid futures complications I choose to uninstall these two features:
- Microsoft SQL Server 2012 Express LocalBd
- Microsoft SQL Server Compact 4.0 SP1 x4 ENU: Microsoft SQL Server Compact 4.0 is a free, embedded database that software developers can use for building ASP.NET websites and Windows desktop applications. SQL Server Compact 4.0 has a small footprint and supports the private deployment of its binaries within the application folder, easy application development in Visual Studio and WebMatrix, and seamless migration of schema and data to SQL Server
To uninstall these features:
- Press the “Windows key” to switch to the Start screen.
- Type “Programs and Features” and click on “Programs and Features” option from the Search menu.

- Select “Microsoft SQL Server 2012 Express LocalBd” and click “Uninstall”.

- Repeat the process, select “Microsoft SQL Server Compact 4.0 SP1 x4 ENU” and click “Uninstall”.
Related links
- BizTalk Server 2013 R2: Installation and Configuration – Important considerations before set up the server (Part 1)
- BizTalk Server 2013 R2: Installation and Configuration – Enable Internet Information Services (Part 2)
- BizTalk Server 2013 R2: Installation and Configuration – Install Windows Identity Foundation (WIF) (Part 3)
- BizTalk Server 2013 R2: Installation and Configuration – Install and configure SMTP Server Feature (optional) (Part 4)
- BizTalk Server 2013 R2: Installation and Configuration – Install Microsoft Office Excel 2013 (Part 5)
- BizTalk Server 2013 R2: Installation and Configuration – Install SQL Server 2014 (Part 7)
- BizTalk Server 2013 R2: Installation and Configuration – Configure SQL Server Database Mail feature (Part 8)
- BizTalk Server 2013 R2: Installation and Configuration – Install and Configure BizTalk Server 2013 R2 (Part 9)
- BizTalk Server 2013 R2: Installation and Configuration – Configure SQL Server Network Configuration protocols (Part 10)
- BizTalk Server 2013 R2: Installation and Configuration – Validate Mail account used by BizTalk to send BAM Alerts (Part 11)
- BizTalk Server 2013 R2: Installation and Configuration – Installing BizTalk Adapter Pack (Part 12)
- BizTalk Server 2013 R2: Installation and Configuration – Install and Configure Microsoft UDDI Services (Part 13)
- BizTalk Server 2013 R2: Installation and Configuration – Install and Configure the Microsoft BizTalk ESB Toolkit (Part 14)
- BizTalk Server 2013 R2: Installation and Configuration – Configure BizTalk Server SQL Jobs (Part 15)
- BizTalk Server 2013 R2: Installation and Configuration – Optimize the BizTalk Server 2013 R2 environment (Part 16)
- BizTalk Server 2013 R2: Installation and Configuration – Optimize the BizTalk Server 2013 R2 environment (Part 17)
- BizTalk Server 2013 R2: Installation and Configuration – Optimize the BizTalk Server 2013 R2 environment (Part 18)
- BizTalk Server 2013 R2: Installation and Configuration – Install additional Developer tools (Part 19)

