

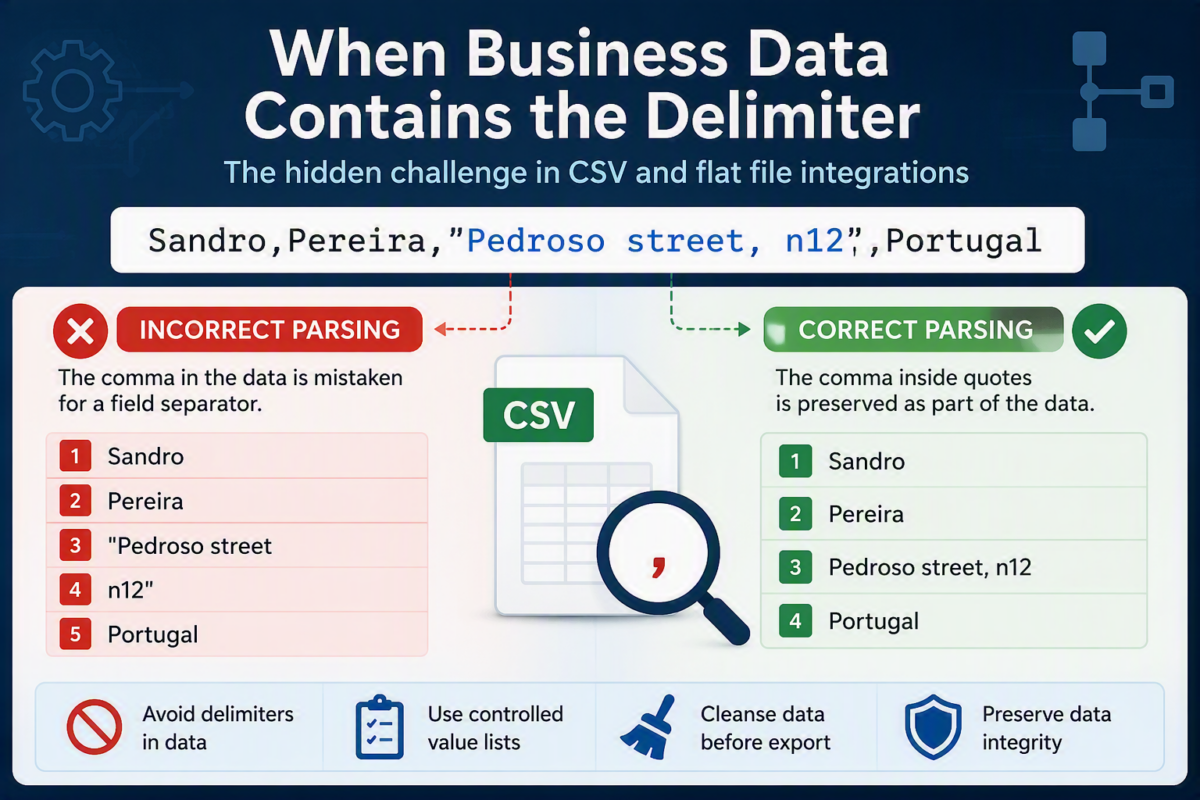
In the previous articles of this series, I explained why flat file parsers in BizTalk Server and Logic Apps struggle when business data contains the same character used as the field delimiter. I also demonstrated the issue in practice and shared a common workaround using custom code. While that approach works well, it adds complexity that many projects prefer to avoid.
Fortunately, the Flat File Schema engine already provides a simpler, cleaner solution for many CSV scenarios. By using the Wrap Character property, BizTalk Server and Logic Apps can distinguish between delimiters that separate fields and delimiters that belong to the business data. In this article, we will create a flat file schema from scratch and configure the required settings. We will then show how to process CSV files that contain delimiters inside quoted values without preprocessing, custom pipeline components, or additional code.
📝 One-Minute Brief
CSV files frequently contain field delimiters as part of the business data, such as commas inside addresses or product descriptions. While many developers resort to custom code or preprocessing techniques to solve this problem, BizTalk Server and Logic Apps already include a built-in capability designed for this scenario. In this article, we demonstrate how to create a Flat File Schema and configure the Wrap Character property to correctly parse delimited files containing quoted values, providing a clean, maintainable, and code-free solution.
How to create the flat file schema
For this exercise, we will use a sample CSV file that does not contain delimiters inside the business data:
Sandro,Pereira,Pedroso Street,4415-345,Pedroso,Portugal
After generating the flat file schema, we will fine-tune it with additional settings to support scenarios where business data contains the delimiter.
To create a schema that recognizes the Persons text file, open your BizTalk solution in Visual Studio. Alternatively, open a Logic App Consumption Integration Account solution in Visual Studio 2019. Then perform the following steps:
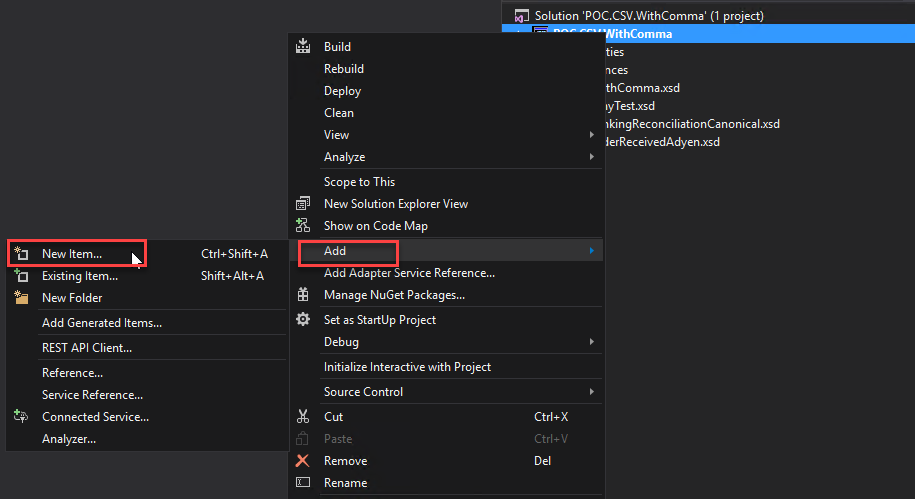
- Right-click the project in Solution Explorer and select the option Add > New Item…
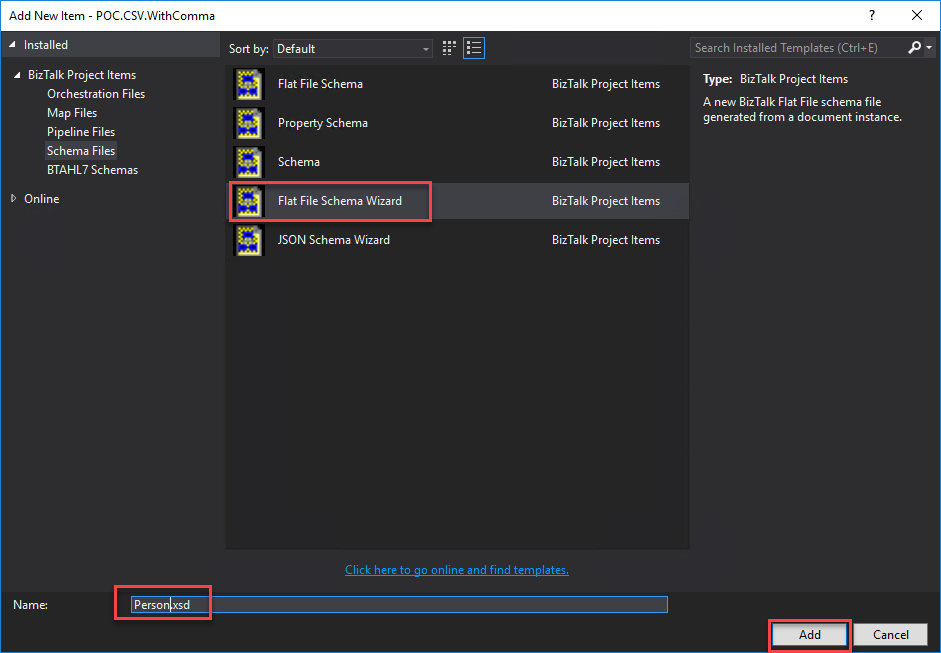
- On the Installed Templates menu in the Add New Item window, select the option Schema Files, and then select the option Flat File Schema Wizard. Then provide the name you want to give the schema in this example: Person.xsd.
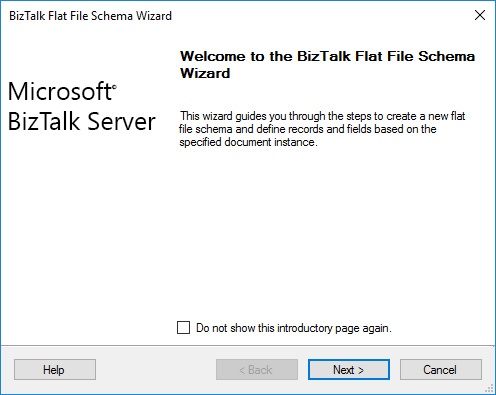
Selecting this option launches the BizTalk Flat File Schema Wizard, which guides to through creating a Flat File Schema and defining its data structure (records, elements, attributes, …) based on the specified text file.
- On the Welcome to the BizTalk Flat File Schema Wizard window, click Next to continue.
- In the Flat File Schema Information window, we will have to:
- Select an instance of the text file that will serve as the model of the structure that we want to transform.
- Although it is not necessary, it is good practice to rename the Record name Root.
- In this case, we will rename it to Persons.
- Finally, assign a Target namespace to the schema and define the input file encoding.
- Click Next to continue.
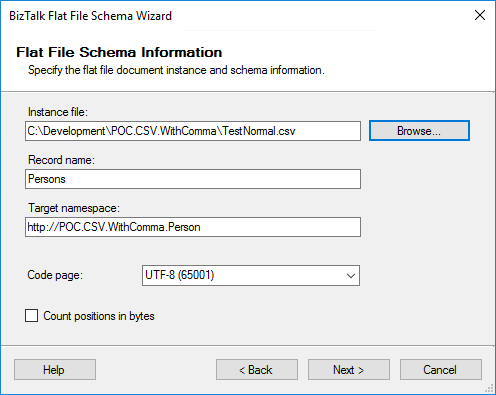
Note: The wizard will load the text file so we can split it and map it to the desired structure. In this step, we need to define how the records or rows are differentiated. The structure of the example is: FirstName;LastName;Address;PostalCode;City;Country{CR}{LF}
- Since each Person record that we want to create is defined in a single line, in the Select Document Data, we can select only the data portion of the document that will set the record, i.e., the whole first line. Click Next to continue.
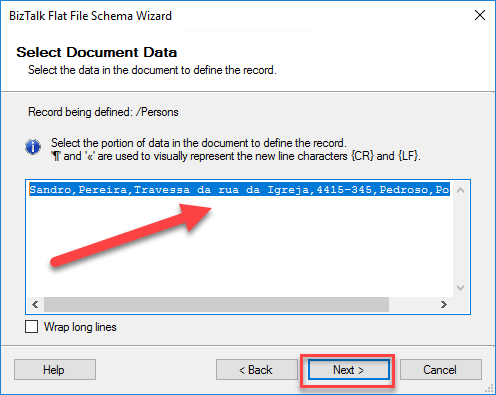
Note: Alternatively, we could select all the data in the file. With this approach, we need to treat the data differently, a few steps ahead in the Child Elements window.
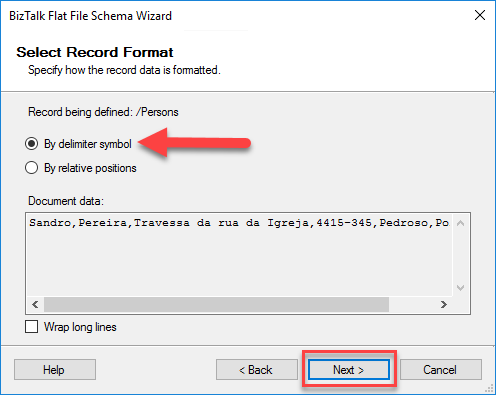
- In the Select Record Format window, we will define whether we are dealing with a Flat File Delimited by symbols or positional. In our case, we will select the By delimiter symbol because each record is delimited by a return Carriage Return/Line Feed ({CR}{LF}). Click Next to continue.
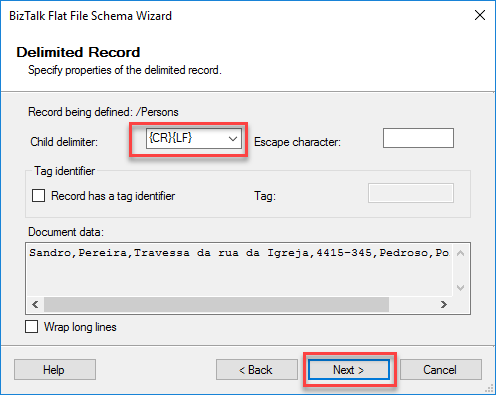
- In the Delimited Record window, we will provide the record delimiter; in this case, since we want to define the structure of a person (i.e., each row is a person), our delimiter is {CR}{LF} (Carriage Return/Line Feed). The Child delimiter combo box includes, by default, the following options: {CR}, {LF}, {TAB}, {SPACE}, {0x1A}, {}, {.}, {;}, and {CR}{LF}. You can provide your own symbol.
- Click Next to continue.
- In the Child Elements window, we define the element type we want to assign to the registry. As we are defining the Person structure and the file contains multiple elements, we have to select the Element Type as Repeating record. If we do not do this step, we will not be able to split the record into multiple elements/attributes.
- Note: If you do not define the element as a Repeating record (or Record), you will not have the ability to break down your record into individual elements or attributes.
- Click Next to continue.

Note: Earlier, I said that we could select all the data inside the flat file and that we would need to treat the information differently in this step. So if you see several similar lines being present in this window, because we want to have an Array of Persons, in this step we need to select the Element Type of the first element as Repeating record and the rest of the set as Ignore (You set this to Ignore because you have already specified Repeating Record for the Person element)
At this point, I have defined what the element Record looks like, but I have not broken down the various elements that make up the record itself. We have just mapped that each line of the text file corresponds to a Person record.
- In the Schema View window, click Next to continue processing the message. Click Next to continue.
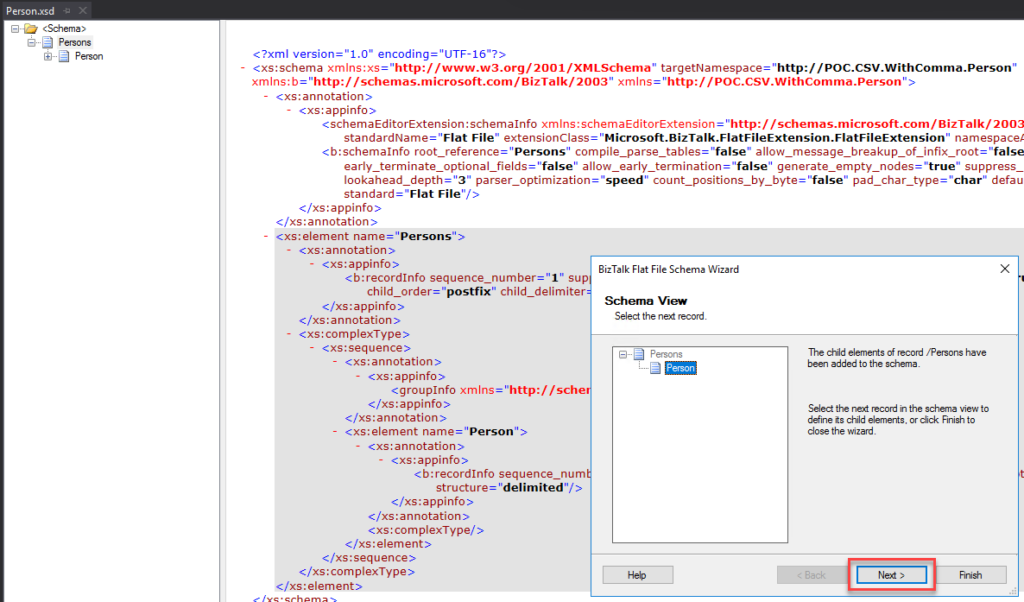
In this phase, the wizard restarts the whole process described above, but if you noticed, the wizard no longer selects all information contained in the text file, but only what was selected to define the Person record.
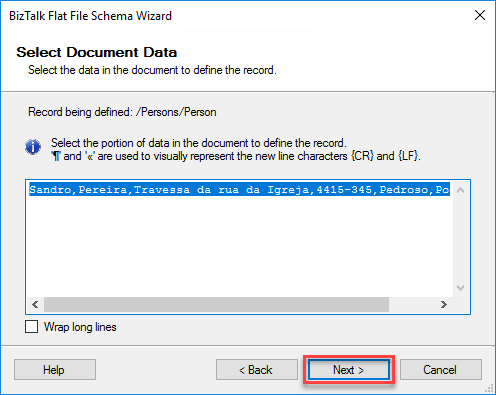
- Now we will split the Person record information into different elements. To do that, select only the required information, leaving out the Carriage Return/Line Feed. Click Next to continue.
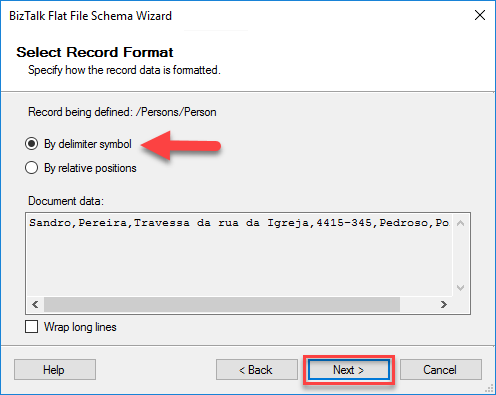
- Again, our structure is delimited by a symbol, in this case a comma (,). For that reason, we will need to select the option By delimiter symbol and then click Next to continue.
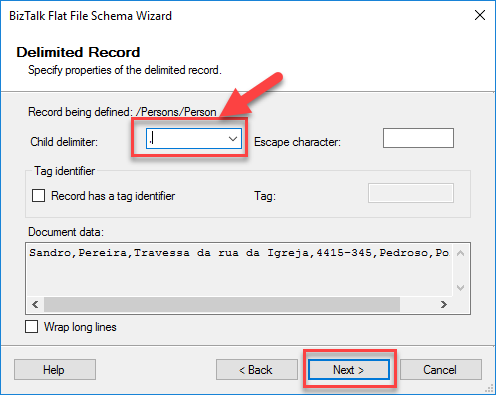
- As we can see, all elements are separated by the comma (,), which is our delimiter; then, in the Delimited Record window, we must change the Child delimiter option to “,” (comma).
- In the Child Elements window, we will define the different elements/attributes in the Person record structure. This operation is similar to any XSD, where we define the names and data types. Adjust the values according to the table below:
| Element Name | Element Type | Date Type |
| FirstName | Field element | String |
| LastName | Field element | String |
| Address | Field element | String |
| PostalCode | Field element | String |
| City | Field element | String |
| Country | Field element | String |
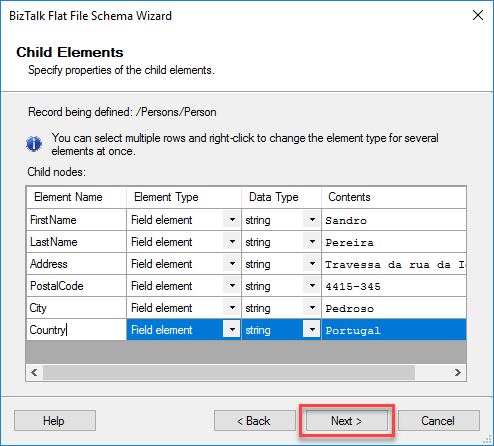
Note: You should rename the parent node, each record, element, or attribute in the BizTalk Flat File Schema Wizard, mainly in this step, by modifying the Element Name field to your desired name. If you forgot to do that or make a mistake defining one of them, you can always fix it in the Schema Editor. The same applies to the Data Type.
- Click Next to continue.
- Finally, the wizard shows the equivalent XML structure your text file document will have. Once you select the option Finish, the schema will be available for you to use in your BizTalk solution.

After we create the Flat File Schema and define the transformation rules, we can test the CSV translation directly in Visual Studio. We do not need to deploy the solution or leave the development environment.
If you have been following this blog series, you may now be thinking: “But Sandro, these are the same steps you described in part 2, and they did not handle business data containing delimiters.”
You are absolutely right. So far, we have only created the basic schema structure. Next, we will apply advanced Flat File Schema settings. These settings let BizTalk Server and Logic Apps to handle delimiters in business data without custom code, preprocessing, or extra tasks.
Advanced configurations: Configure the Wrap Character property
The Flat File Schema Wizard applies the basic and most used features or rules to parse most types of flat files; however, there are a lot of extra properties/configurations that you can later fine-tune to support different types of scenarios that are not available to be configured with the wizard. One of those properties is Wrap Character.
The Wrap Character property in a BizTalk or Logic Apps Flat File Schema defines a character that encloses a field value, indicating that everything between the opening and closing wrap characters belongs to the same field. Any delimiter characters found inside the wrapped value are treated as part of the data rather than as field separators.
A common example is the double quote ("), frequently used in CSV files, is the address, like in our sample:
Sandro,Pereira,"Pedroso Street, n12",4415-345,Pedroso,Portugal
In this case, the value contains a comma. However, BizTalk and Logic Apps recognize that the comma is inside the wrap characters. Therefore, they preserve the entire content as a single field:
Pedroso Street, n12
Without a configured Wrap Character, BizTalk or Logic Apps treats an embedded comma as a delimiter. As a result, the parser incorrectly splits the data into multiple fields.
The Wrap Character allows a flat file schema to process delimited data correctly. It treats delimiters inside wrapped values as part of the business data, not as field separators.
How to configure the Wrap Character property
To configure the Wrap Character, we need to:
- Open the flat file schema (in our case, Person.xsd) and select the Address element.
- After you select the Address element, the Properties window should appear, focused on its properties.
- There, in the Properties window, you will find a property called Wrap Character.
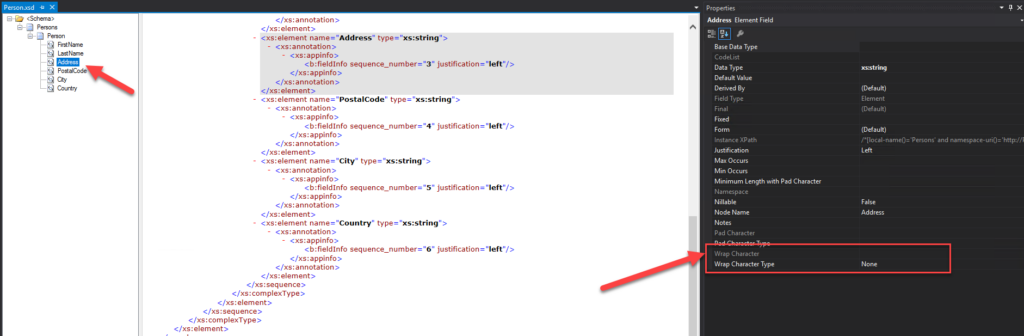
- You will notice that the Wrap Character property is disabled. This happens because the Wrap Character Type property is set to None by default.
- First, we need to define the Wrap Character Type property to be Character. This will enable the Wrap Character property.
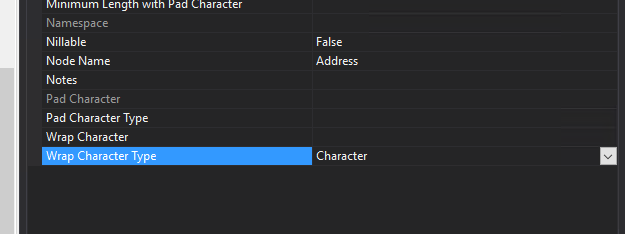
- Then, on the Wrap Character property, we need to define it as a double quote (“)
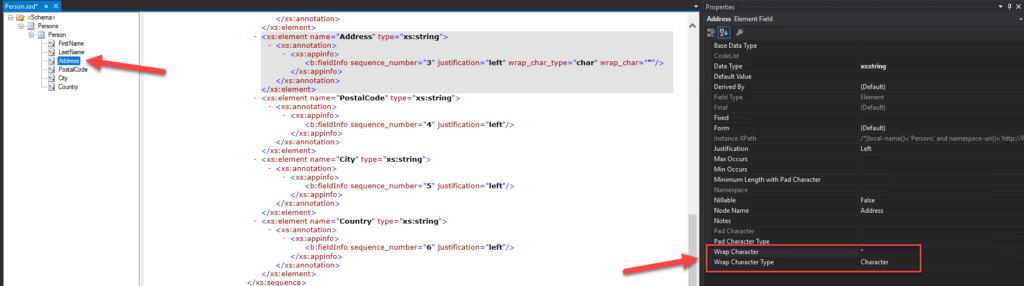
- Save the changes
How to test the flat file schema
After the creation of the flat file schema, we can easily test our CSV translation without having to get out of our development tool (Visual Studio) and without having to deploy our solution into BizTalk or to Azure.
For that, we just need to:
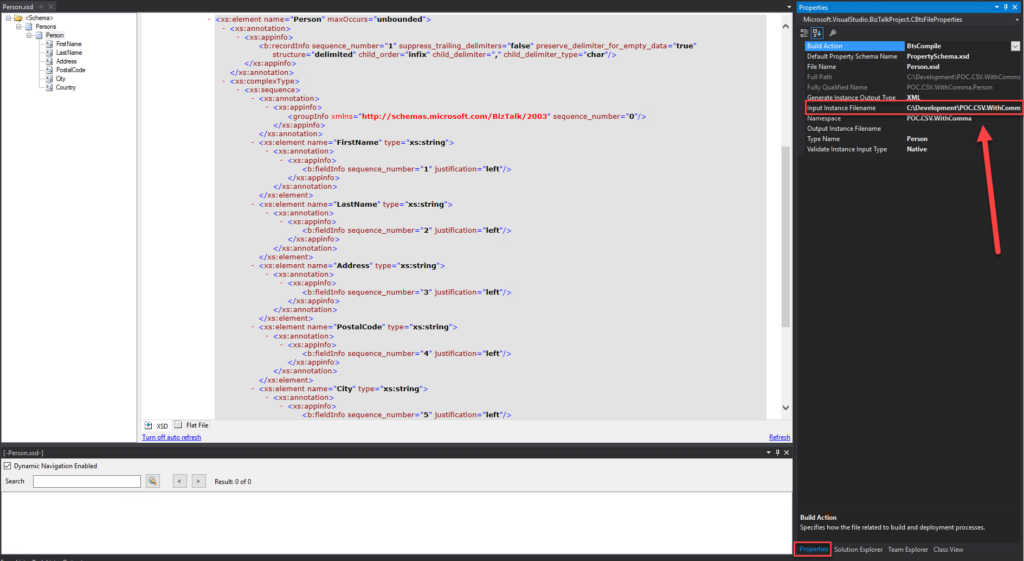
- If you check the Person.xsdProperties window, you will see that the CSV file we have used to generate our flat file schema is automatically defined as our Input Instance Filename.
- Notice that the file does not contain delimiters inside the business data.
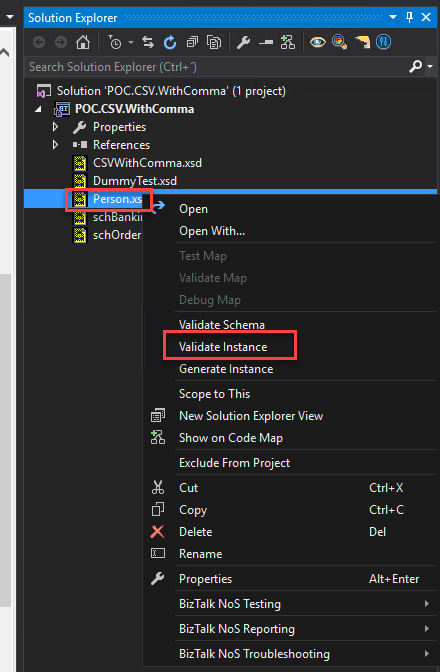
- In the Solution Explorer, right-click on the Person.xsd file and select the Validate Instance option. This will take the CSV file defined in the previous property and try to parse it to XML.
- In the Output window, you will see errors if a problem occurs, or an output link with the result of the CSV parsing.
- Press the Ctrl key + left-click on the mouse.

- This opens the CSV parsing output (in XML format) in a dedicated window, and as you can see below, it parses the file correctly.
<Persons xmlns="http://POC.CSV.WithComma.Person">
  <Person xmlns="">
    <FirstName>Sandro</FirstName>
    <LastName>Pereira</LastName>
    <Address>Pedroso Street</Address>
    <PostalCode>4415-345</PostalCode>
    <City>Pedroso</City>
    <Country>Portugal</Country>
  </Person>
</Persons>
Now, if we take the second sample file containing the delimiter inside the business data:
Sandro,Pereira,"Pedroso Street, n12",4415-345,Pedroso,Portugal
You will notice it also parses correctly!
<Persons xmlns="http://POC.CSV.WithComma.Person">
  <Person xmlns="">
    <FirstName>Sandro</FirstName>
    <LastName>Pereira</LastName>
    <Address>Pedroso Street, n12</Address>
    <PostalCode>4415-345</PostalCode>
    <City>Pedroso</City>
    <Country>Portugal</Country>
  </Person>
</Persons>
Without extra effort, without preprocessing files with custom code. Basically, it creates a global solution to this problem, handling both scenarios with or without strings inside double quotes, and it is very easy to read and maintain.
Conclusion
Handling delimiters inside business data is one of the most common challenges when processing CSV and other delimited files. At first glance, the problem may seem to require custom parsing logic, preprocessing steps, or bespoke pipeline components. However, BizTalk Server and Logic Apps already include a built-in feature that solves this scenario: the Wrap Character property.
By configuring the flat file schema correctly, the parser recognizes delimiters enclosed in quotation marks as data rather than field separators. This simple configuration allows the same schema to process files with or without wrapped values. As a result, the solution becomes more robust, easier to maintain, and far less complex than custom code alternatives.
When you work with CSV files, especially those generated by third-party systems, check whether they use wrap characters before exploring more advanced workarounds. In many scenarios, a small schema configuration change can turn a difficult parsing challenge into a straightforward, elegant solution.
I hope you find this helpful! If you liked the content or found it useful and want to help me write more, you can consider buying (or helping to buy) my son a Star Wars LEGO set.