
Azure API Management can now publish messages directly to Azure Service Bus queues or topics using the <send-service-bus-message> policy and a managed identity, which enables a simple, secure, serverless “fire‑and‑forget” pattern at the API edge.
📝 One-Minute Brief
You can configure APIM to send HTTP payloads straight to a Service Bus queue or topic using the send-service-bus-message policy.
How: Authentication is performed by APIM’s Managed Identity + Azure RBAC (assign Azure Service Bus Data Sender).
When: To accept REST calls and hand off processing asynchronously without extra backend glue.
The <send-service-bus-message> policy allows an API (or operation) in APIM to publish messages directly into a Service Bus queue or topic. This removes the need for a dedicated intermediary service to receive an HTTP call and then forward an AMQP message to Service Bus. It keeps governance (auth, throttling, logging, policies) in APIM and decouples callers from downstream processing.
Requirements and Demo Preview
For this demo, the following resources are required:
– Resource Group;
– Service Bus namespace + queue (in this demo, it is called orders);
– API Management instance (in this demo, a POST endpoint was used for testing).
I enabled a managed identity on APIM and gave that identity the Azure Service Bus Data Sender role on the Service Bus queue. In APIM, I created a POST operation and added an inbound policy using <send-service-bus-message> that reads the incoming body and sends it to the orders queue. The policy also returns 201 Created immediately to the caller.
Step 1: Enable Managed Identity on APIM
Enable system‑assigned (or user‑assigned) Managed Identity for the APIM instance. This identity is what APIM will use to authenticate to Service Bus.

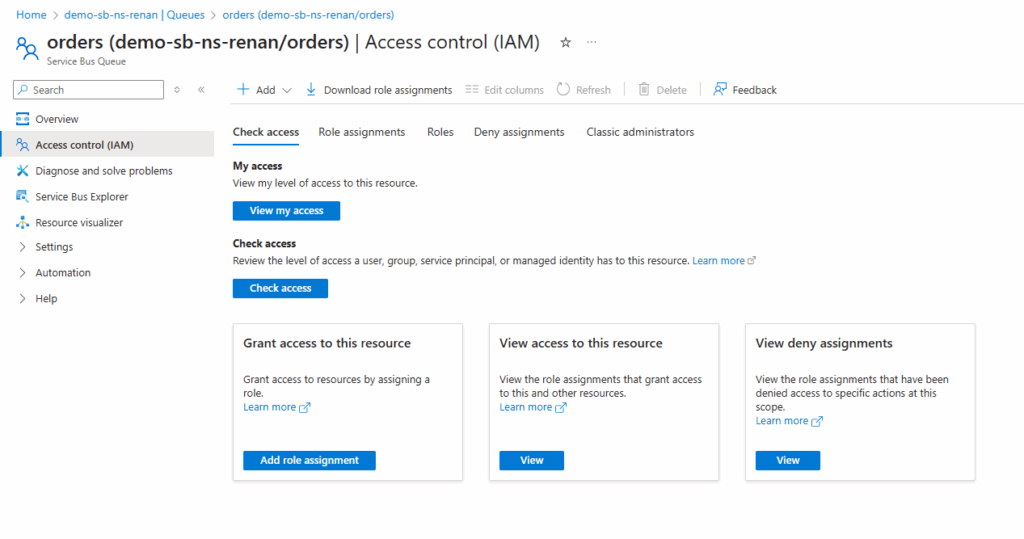
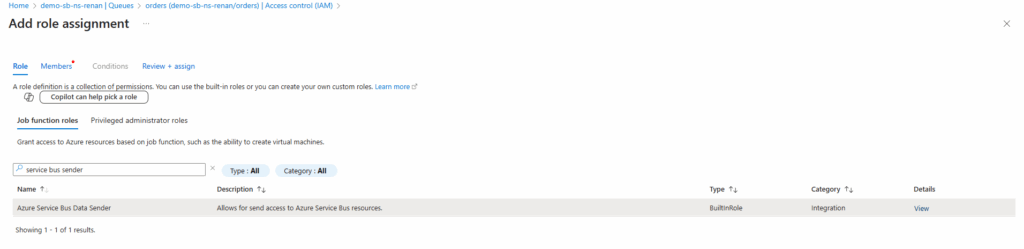
Step 2: Assign role: Azure Service Bus Data Sender
Go to the Service Bus queue (or namespace) > Access control (IAM) > Add role assignment and assign Azure Service Bus Data Sender to the APIM Managed Identity.

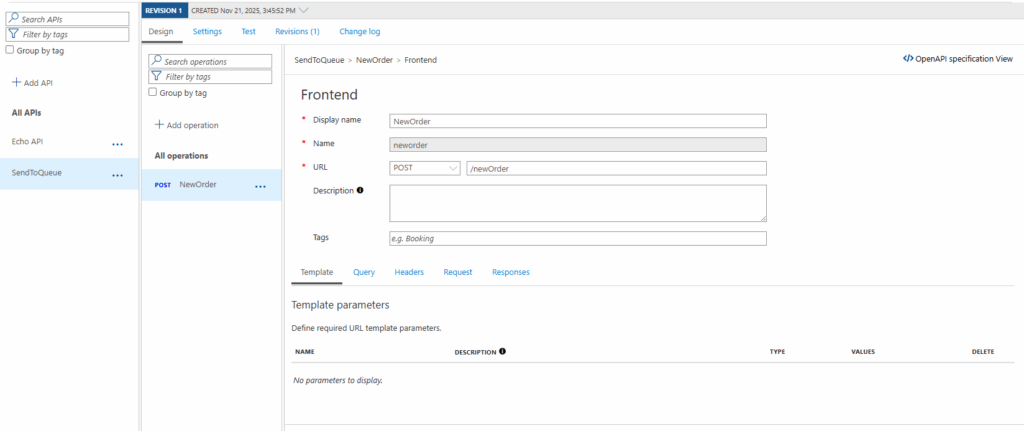
Step 3: Create the API + HTTP POST operation in APIM
Create a new API (or update an existing one) and add the HTTP POST operation that will accept the payload you want to enqueue. This is the endpoint your clients will call.
Step 4: Add the inbound policy that allows messaging to SB
Edit the inbound policy for the API or operation and insert the send-service-bus-message policy. Example:
<policies>
    <!-- Throttle, authorize, validate, cache, or transform the requests -->
    <inbound>
        <send-service-bus-message topic-name="orders" namespace="my-sb-namespace.servicebus.windows.net">
            <payload>@(context.Request.Body.As<string>(preserveContent: true))</payload>
        </send-service-bus-message>
        <return-response>
            <set-status code="201" reason="Created!" />
        </return-response>
    </inbound>
    <!-- Control if and how the requests are forwarded to services  -->
    <backend>
        <forward-request timeout="60" />
    </backend>
    <!-- Customize the responses -->
    <outbound>
        <base />
    </outbound>
    <!-- Handle exceptions and customize error responses  -->
    <on-error>
        <base />
    </on-error>
</policies>

queue-namemust match the existing queue.namespaceis the Service Bus namespace FQDN (e.g.my-sb-namespace.servicebus.windows.net).payloadcan be any expression (you can build JSON, wrap properties, or use a base64 body if you prefer).- You can add any message properties under
<message-properties>to help downstream consumers route or filter messages.
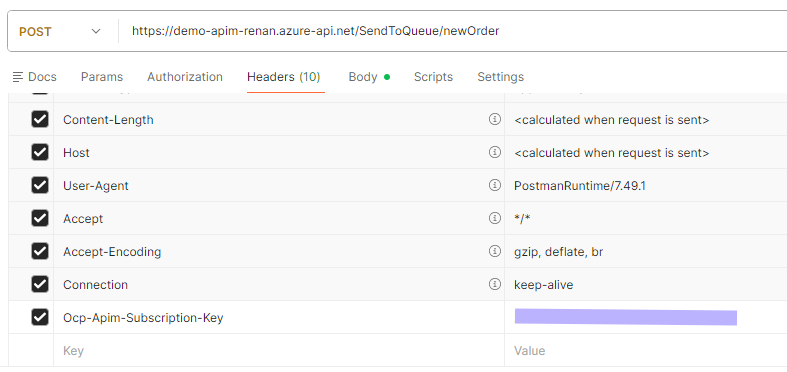
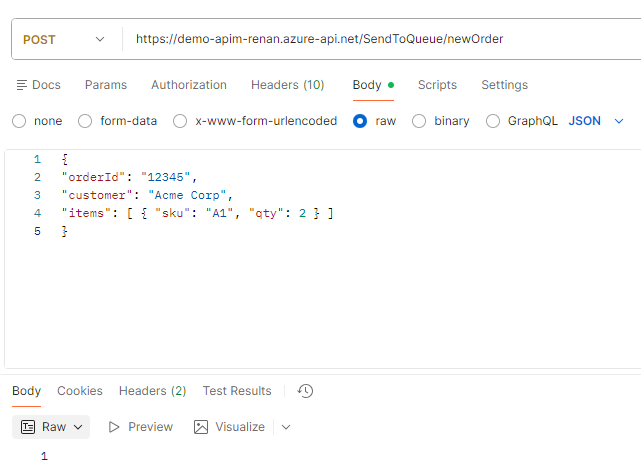
Step 5: Test the endpoint and check SB’s queue
Use Postman (or curl) to POST your sample order payload to the APIM URL. Because the policy returns 201 immediately, your client will get a quick acknowledgment while the real processing happens downstream. Note that you will need your APIM’s Ocp-Apim-Subscription-Key, which must be one of the request’s headers. There are other authentication methods, but this is the simplest one for testing.
In the Service Bus queue (Azure Portal), check the messages or use Service Bus Explorer to confirm the message arrived and inspect properties & body.

Why this matters
- Less glue: no need for an intermediate web job/function purely to forward HTTP → Service Bus;
- Faster ack: clients receive immediate confirmation while work is processed asynchronously;
- Centralized governance: APIM still enforces auth, quotas, logging, and policies;
- Flexible payload handling: You can transform or enrich the message in APIM before enqueueing
Friday Fact Takeaway
This tiny policy can simplify many architectures: everything from order intake to telemetry ingestion benefits from a simple HTTP endpoint that hands off to a queue. If your team has any endpoints that simply forward payloads to queues, try moving that responsibility into APIM — fewer moving parts, centralized controls, and faster client responses.
Pro tips:
- Add
message-propertyentries forcorrelationId,content-type,source, or business tags to simplify filtering on the consumer side. - Consider using a user‑assigned identity if you want the same identity reused across multiple APIM instances or for easier management.
- If you need to send to topics, change the policy to target the topic name instead, and confirm your Service Bus tier supports topics.
To lazy to read? We’ve got you covered! Check out our video version of this content!
Hope you find this helpful! If you enjoyed the content or found it useful and wish to support our efforts to create more, you can contribute towards purchasing a Sauron’s Action Figure for Sandro’s son, yep, not for me!

