
Ever wondered how to create reusable, multi-input functions in Azure Logic Apps Data Mapper? Custom Functions let you build your own functoids that appear right in the toolbox—perfect for complex calculations requiring multiple source fields while keeping your map visually clean and maintainable.
📝 One-Minute Brief
If you’ve ever needed to combine multiple source fields into a single calculated output, Custom Functions are your solution then this post will help you.
When: Multi-field calculations; reusable business logic; complex formatting that requires several inputs.
Azure Logic Apps Data Mapper supports custom functions that accept multiple specific inputs and produce a single output. Unlike Run XSLT functions that can process entire documents, custom functions work with discrete parameters—making them perfect for calculations, formatting, and business rules that need several source fields.
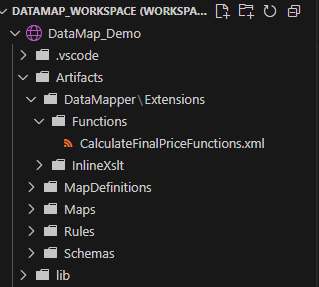
Setting Up Your Custom Functions
To use this feature, you need to place your function definitions in a specific location:
YourProject/Artifacts/DataMapper/Extensions/Functions/YourFunctions.xml
Custom functions are defined using a simple XML format with typed parameters and return values.
Demo: Product Pricing Calculator
Consider a common business scenario: calculating final pricing from multiple factors. Our source schema has three fields:
- BasePrice: The product’s base cost;
- TaxRate: Tax percentage to apply;
- DiscountPercent: Discount percentage to apply.
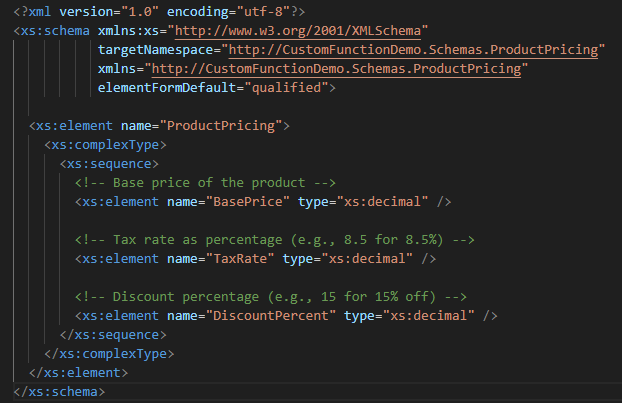
The target schema needs a single **FinalPrice** field with a formatted result like: `”$92.22 (8.5% tax, 15% discount applied)”`

Without custom functions, this would require multiple functoids chained together—discount calculation, tax calculation, formatting—making the map cluttered and hard to maintain. With a custom function, it becomes a single, clean connection from three source fields to one target field.
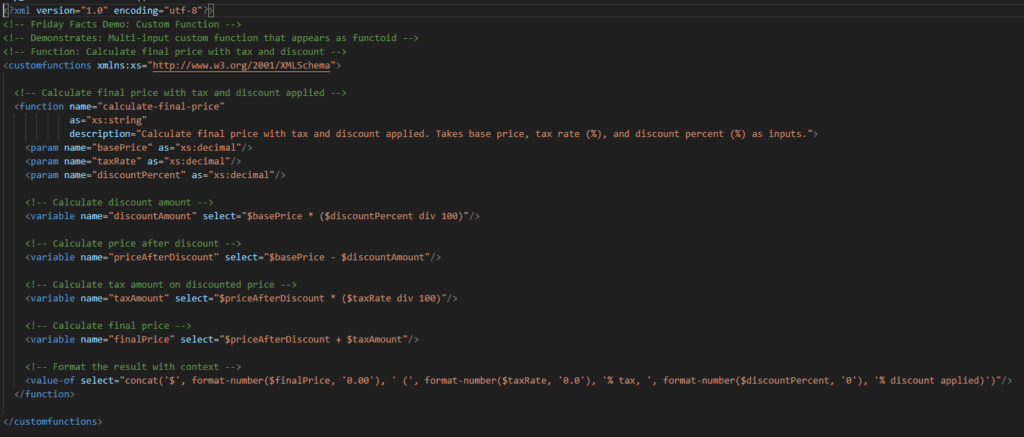
The custom function handles the complex logic: apply the discount first, calculate the tax on the discounted amount, and then format the result with context. The visual map stays simple while the business logic is encapsulated and reusable.
How to Use
To use custom functions, they automatically appear as functoids in your toolbox once defined. Simply drag the function onto your map, connect the required input parameters from your source schema, and connect the output to your target field. The Data Mapper handles parameter validation and type checking.

When to Use
Custom functions excel in these scenarios:
- Multi-field calculations requiring several source inputs;
- Reusable business logic that appears across multiple maps;
- Complex formatting that combines data with context;
- Parameter validation: and type safety requirements;
- Clean visual maps to avoid clutter caused by chained functoids.
Friday Fact Takeaway
Custom Functions provide the perfect balance between visual simplicity and functional complexity—letting you encapsulate sophisticated multi-input logic into clean, reusable functoids that keep your maps readable and maintainable.
Pro tip: Use custom functions for any logic requiring 3+ source fields or complex calculations you’ll reuse across multiple maps.
To lazy to read? We’ve got you covered! Check out our video version of this content!
Hope you find this helpful! If you enjoyed the content or found it useful and wish to support our efforts to create more, you can contribute towards purchasing a Sauron’s Action Figure for Sandro’s son, yep, not for me!

