
Challenges of Deploying BizTalk Server Solutions
Deploying BizTalk Server solutions across multiple environments has never been a trivial task. The level of complexity often depends on how advanced the solution is and how many artifacts it includes.
Over the years, teams have used several approaches to deploy BizTalk artifacts across environments.
Common BizTalk Deployment Approaches
One common approach relies on the Deployment Wizard, which imports BizTalk applications from an .msi file. Another widely used option is BTSTask.exe, which many teams consider the default deployment mechanism for moving solutions between environments.
Some teams prefer PowerShell scripts to replace or extend BTSTask, especially when automation becomes a priority. Developers usually deploy artifacts directly from Visual Studio during development, as this method provides faster feedback and easier debugging.
Deployment Framework for BizTalk (BTDF)
Over time, the BizTalk Server community created an open‑source deployment framework known as the Deployment Framework for BizTalk (BTDF) (https://github.com/BTDF/DeploymentFramework).
BTDF provides a structured and repeatable way to deploy and configure BizTalk solutions. Under the hood, it uses MSBuild projects with custom MSBuild tasks, which makes it highly flexible and suitable for automated deployments. This framework brings new capabilities and advantages to deploying BizTalk Server solutions, but it also has limitations or disadvantages.
📝 One-Minute Brief
Automating BizTalk Server deployments with Azure DevOps requires a properly prepared build agent. This article explains how to create and configure a custom Azure DevOps build agent tailored for BizTalk Server, enabling reliable CI/CD pipelines and repeatable deployment automation.
Azure DevOps and Azure Pipelines
Microsoft introduced automated deployment for BizTalk applications in BizTalk Server 2016 Feature Packs by integrating with Azure DevOps (formerly Visual Studio Team Services – VSTS). With BizTalk Server 2016 Feature Pack 1, Microsoft added automatic deployment capabilities and improved the application lifecycle management (ALM) experience.
Later, Feature Pack 2 enhanced the deployment process even further by adding refinements and additional automation capabilities. However, Microsoft made these features available only in the Enterprise edition of BizTalk Server 2016.
BizTalk Server 2020 brings all these functionalities out-of-the-box across all editions: Enterprise, Standard, Development, or Branch.
To accomplish this, we need basically 3 steps:
- BizTalk Server: Add a BizTalk Server Application project in your Visual Studio solution.
- We will not address this topic today.
- DevOps: Create a build agent.
- DevOps: Create a Build and Release Azure Pipeline.
Today, we will talk about starting to configure your Azure Pipeline to create a BizTalk Server Build Agent.
Create a Personal Access Token
A personal access token (PAT) is created in DevOps. This token is your password and is used by the DevOps build agent to authenticate. The token is only shown when you create it. After that, it isn’t shown anymore. Once you create it, you should save it to another file in a re-memberable location.
To accomplish that:
- Sign in to the Azure DevOps Portal (https://app.vsaex.visualstudio.com/) using your work or school account.
- If you do not have an account, select Create new account, and enter a name. To manage your code, choose your preferred version control system: Git or Team Foundation Version Control. When finished, your new account is created, and you will be able to access the Azure DevOps Portal.
- Select your DevOps organization and then click the top second right-side corner icon – User settings – and select User settings > Personal access tokens.

- The Personal Access Tokens page will present a list of all existing personal access tokens.
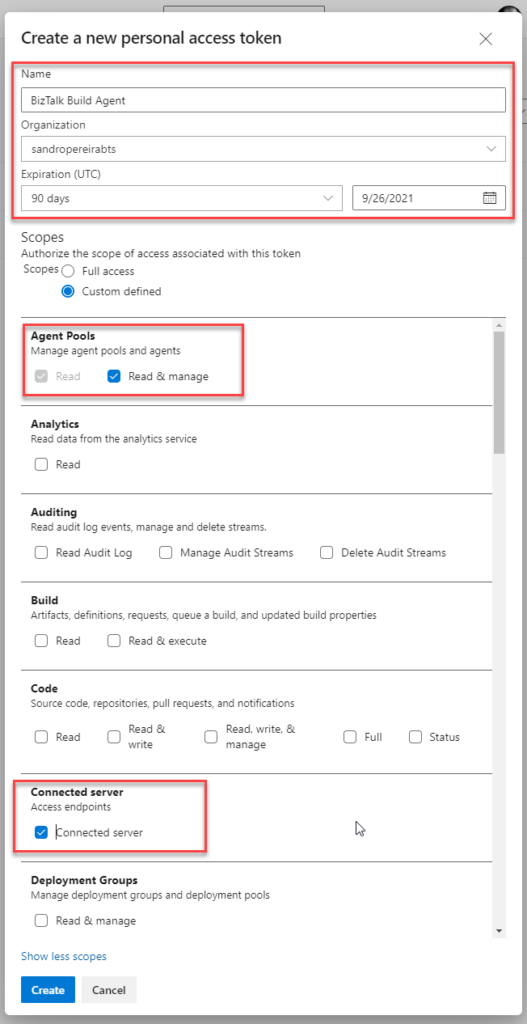
- If you don’t have an existing PAT for your agent, select Add, and on the Create a new personal access token page, enter the following configuration:
- On the Name property, enter a name for your PAT, for example, BizTalk Build Agent.
- On the Organization property, leave the default organization.
- On the Expiration (UTC) property, set an expiration date, for example, 90 days.
- In Scopes, select Show all scopes, and then select Agent Pools – Read & manage option and Connected server – Connected server.
- If you don’t have an existing PAT for your agent, select Add, and on the Create a new personal access token page, enter the following configuration:
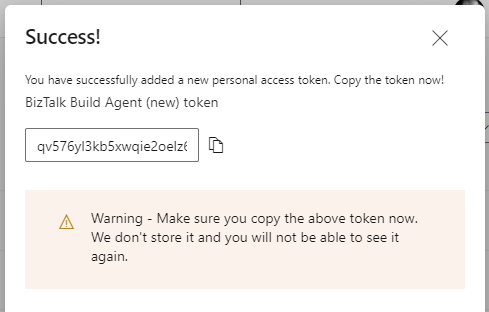
- Select Create to finish the PAT creation.
- Important Note: You need to save the token value. You need it in future steps. If you don’t know the access token value and haven’t noted it anywhere, it cannot be retrieved. In this case, you need to create a new PAT.
Install the Build Agent
The build agent is installed on the BizTalk development computer. If using deployment groups, the build agent is installed on all the BizTalk servers you want to deploy to. Also, use these same steps to add a build computer, which might be different than the BizTalk development computer.
The following steps show you how to install the build agent on a single computer:
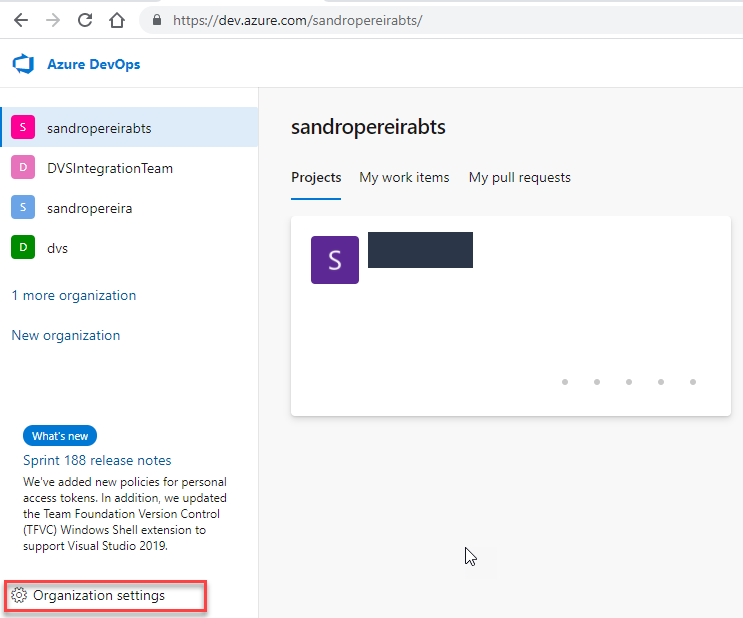
- Open your Azure DevOps organization, select the Organization settings icon, then Agent Pools.
- Optionally, you can choose a Project inside your Organization, select the Project settings icon, and select Agent Pools.
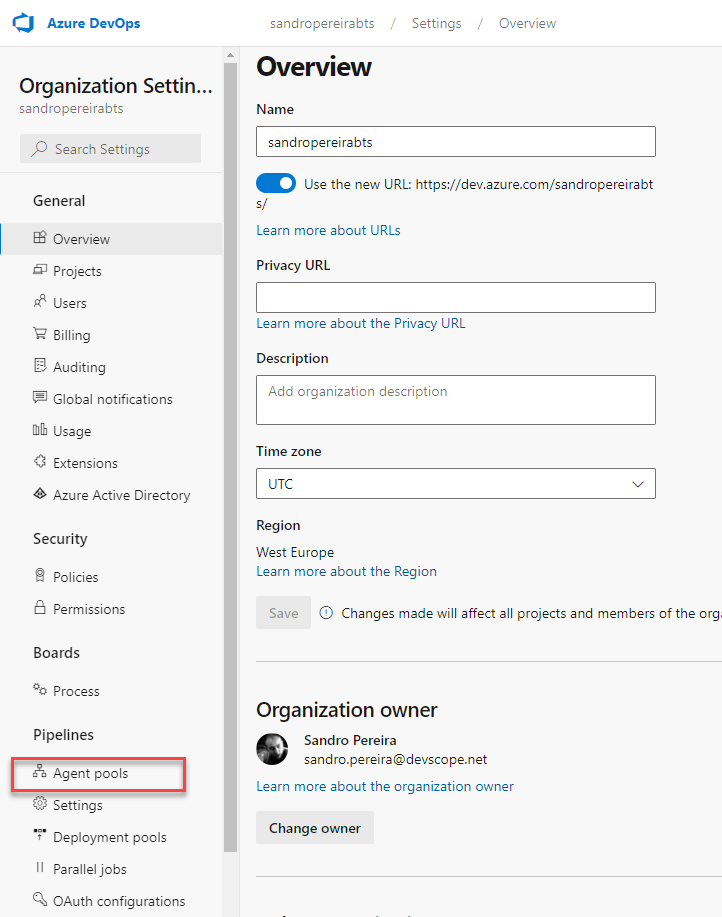
- Open the Agent pools page, select the Default (Azure Pipelines) agent.
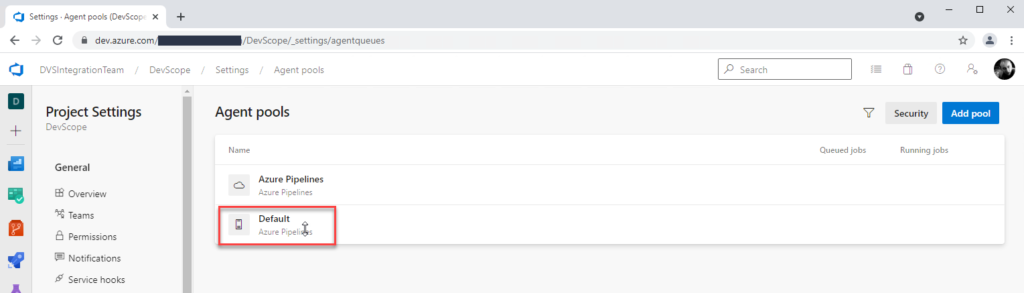
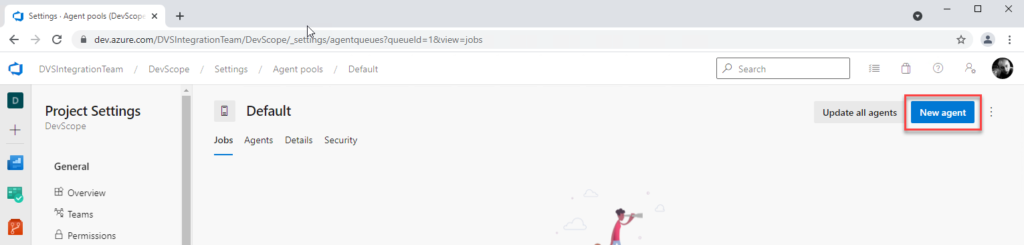
- On the Default agent page, select New agent.
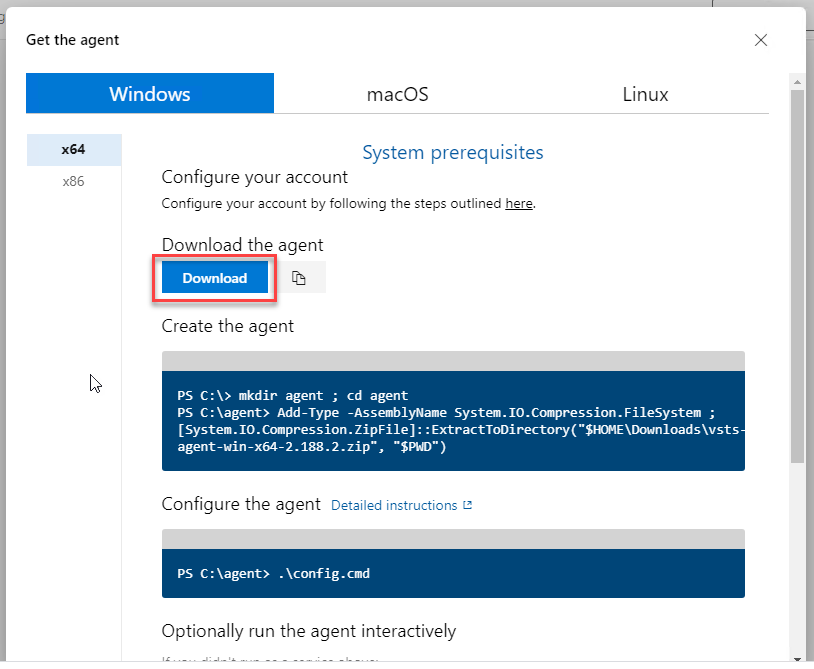
- In the Get the agent pop-up window, select your SO, and in the Download the agent section, select Download.
- It is important for you to save the file to your Downloads folder on your BizTalk Server Development machine, since the scripts will reference that folder.
- Depending on your SO, this will download a zip file, for example, vsts-agent-win-x64-2.188.3.zip, that you will need to create the agent on the BizTalk Server Development machine.
- The first step is to create the agent on your BizTalk Server Development machine. To do that, open Windows PowerShell as Administrator and type the following command:
PS C:\> cd /

PS C:\> mkdir agent ; cd agent

PS C:\agent> Add-Type -AssemblyName System.IO.Compression.FileSystem ; [System.IO.Compression.ZipFile]::ExtractToDirectory("$HOME\Downloads\vsts-agent-win-x64-2.188.3.zip", "$PWD")
- Note: The vsts-agent file version changes. Make sure the zip file name is the correct one.
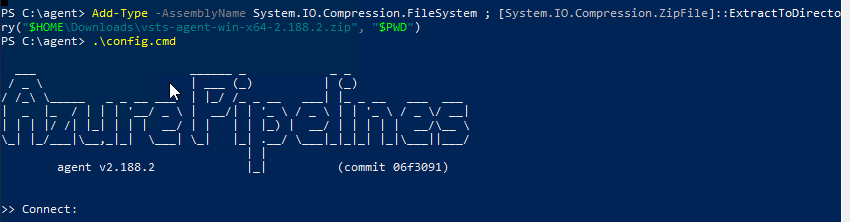
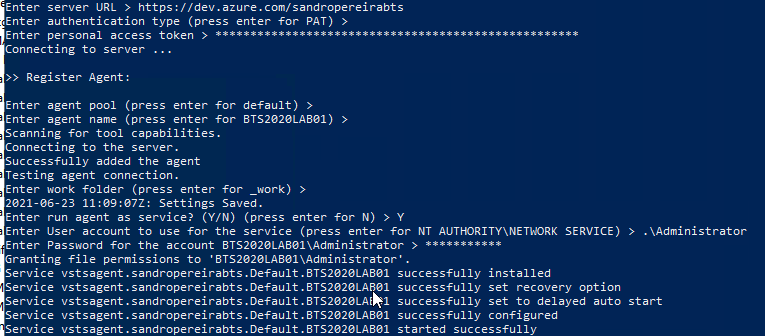
- The second step, as you also see in the picture, is to configure the agent. To do that, type the following command:
PS C:\agent> .\config.cmd
- Enter the following details:
- Server URL: Type https://dev.azure.com/{your-organization}.
- Authentication Type: Enter PAT.
- Personal access token: Paste your Azure DevOps token.
- Agent pool: Click Enter to assume the default value.
- Agent name: Click Enter to assume the default value.
- Replace: Only displays if you have an existing agent.
- Work folder: Click Enter to assume the default value.
- Run agent as a service: Enter Y.
- User account: This value is up to you, but you may run into a permissions issue. Consider entering your current logged-on account, which is a local admin.
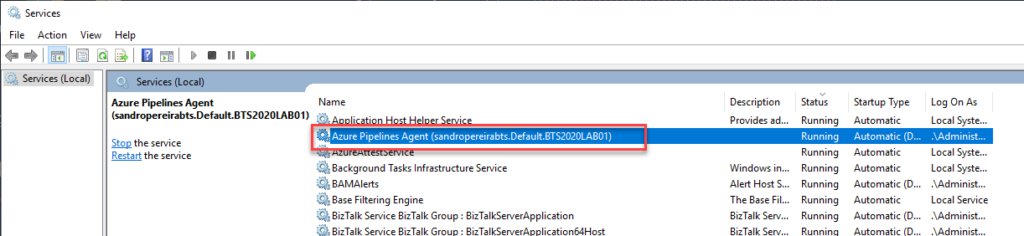
- To validate if the agent was properly installed, Open services.msc to see the new service called Azure Pipelines Agent (<organization>.<agent pool>.<server>). The job should be running; otherwise, type the following command:
PS C:\agent> .\run.cmd
Now, if we go back to our DevOps organization > Organization settings > Agent pools > Default (Azure Pipelines) > Agents, you will see your BizTalk Server Development server on the list:


Hope you find this helpful! If you liked the content or found it useful and would like to support me in writing more, consider buying (or helping to buy) a Star Wars Lego set for my son.


How do I add a application referece with Azure DevOps to one of my applications deployed?
We have a generic pipeline application that I want to access but I dont find what to do.