
This part will focus on installing and configuring Microsoft BizTalk 2013 R2 Accelerator for RosettaNet.
Make sure that you have installed all the prerequisites and prepared your environment for the RosettaNet accelerator.
📝 One-Minute Brief
This third part of the guide provides a step-by-step walkthrough for the actual installation and configuration of the BizTalk 2013 R2 Accelerator for RosettaNet (BTARN). It covers running the setup from the BizTalk ISO, selecting installation options, and navigating the Configuration Wizard. Crucially, it highlights critical fixes for the “WebApp” object failure and common configuration pitfalls related to IIS and database naming.
Install Microsoft BizTalk 2013 R2 Accelerator for RosettaNet
BizTalk Accelerator for RosettaNet is available in the BizTalk Server installation disk (ISO) under the BizTalk Accelerators folder.
- Access to the BizTalk Accelerators folder in the BizTalk Server ISO, and then run the Setup.exe file.

- On the Start page, click Microsoft BizTalk 2013 R2 Accelerator for RosettaNet.

- On the Installation Wizard screen for Microsoft BizTalk Accelerator for RosettaNet, click Install.

- On the Customer Information page, type your user name, organization, and the product key, and then click Next.

- On the License Agreement page, read the End User License Agreement, and then click Accept.

Note: If you do not accept the license agreement, you cannot continue with the installation.
- On the Installation Options page, select Complete for a full installation and ensure the installation path is correct, and then click Next.
- Or, if you wish, you can also customize the features that you want to install or perform a partial installation by selecting the Custom option.
- Note: If you select Custom, select the components to install from the Custom Installation page. If you select to install SDK or Documentation components only, you must have .NET Framework 4.5 installed before running the setup program.
- Or, if you wish, you can also customize the features that you want to install or perform a partial installation by selecting the Custom option.

- On the Summary page, review the components you are installing, and then click Install.
- The Installation Progress screen displays the progress of the installation procedure.

- On the Installation Completed page, ensure the Run Configuration Wizard box is selected, and then click Finish.

- The BTARN Configuration Wizard opens. Next, you configure BTARN.
Important:
- If you perform a custom installation to install only the BTARN HTTP Front End feature, BTARN configuration may fail after setup is complete, displaying the error message “Failed to create object for feature: WebApp”. If this occurs, you need to copy two files (Microsoft.VC80.ATL.manifest and atl80.dll) from a computer with BizTalk Server 2013 R2 installed on it to the computer where you installed the BTARN HTTP Front End feature.
- If Visual Studio 2012 is installed on the same computer as BizTalk Server, the source folder for the two files is <drive>:\Program Files\Microsoft Visual Studio 11.0\VC\redist\x86\Microsoft.VC100.ATL. If Visual Studio 2012 is not installed on the BizTalk server, the source folder for the two files on the BizTalk server is a folder under <drive>:\WINDOWS\WinSxS. The version of the files should be 8.0.50727.42. The destination folder on the computer where you have installed the HTTP Front End feature is the BTARN installation directory (by default, <drive>:\Program Files (x86)\Microsoft BizTalk 2013 R2 Accelerator for RosettaNet).
- After you have copied these files to the computer with the HTTP Front End feature installed, rerun Configuration.exe.
Configure Microsoft BizTalk 2013 R2 Accelerator for RosettaNet
Note: Before configuring BTARN, make sure that you have installed all the prerequisites and prepared your environment for the RosettaNet accelerator. In particular:
- Make sure you map .NET Framework 4.0 under Handler Mappings in IIS.
- Also, when configuring BTARN on Windows 8.1, Windows Server 2012, and Windows Server 2012 R2, you must create the IIS_WPG group manually.
To configure BTARN using Basic Configuration:
- Press the Windows key to switch to the Start screen, type RosettaNet, right-click the BizTalk 2013 R2 Accelerator for RosettaNet Configuration option from the Search menu, and then click Run as Administrator.
- On the “Microsoft BizTalk 2013 R2 Accelerator for RosettaNet” Wizard page:
- Select the Basic configuration option to configure the server with default settings.
- Or the Custom configuration option to configure the server using advanced configuration settings.
- In the Database server name text box under Database properties, verify that the server name displayed is correct.
- In the Service credential properties, type the User name and Password for the account that the configured BTARN will run under.
- Select the Basic configuration option to configure the server with default settings.

- Click Configure.
- If your account has administrative privileges, click Yes to proceed with the configuration.

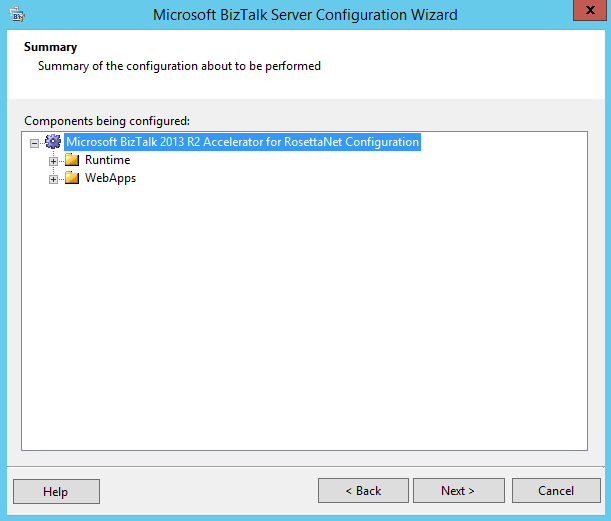
- On the Summary page, review the components you are installing, and then click Next.
- On the Configuration Completed page, click Finish.
Note:
- If you selected Custom configuration in step 1, perform the following steps:
- To configure the runtime, in the Microsoft BTARN Configuration dialog box, click Runtime in the left pane:
- In the right Runtime pane, click Enable the Runtime feature on this computer.
- To join an existing database group, clear Do you want to create a new database group.
- Select the appropriate Web server name, port number, data stores, Application Pool service account, and BizTalk HTTP Receive virtual folder.
- To configure the WebApps feature, in the Microsoft BTARN Configuration dialog box, click WebApps in the left pane:
- In the right WebApps pane, click Enable the Runtime feature on this computer.
- Enter the appropriate BizTalk Server name and port number, or select the defaults.
- Select the appropriate Web application virtual folder.
- Click Apply Configuration.
- To configure the runtime, in the Microsoft BTARN Configuration dialog box, click Runtime in the left pane:
Note: BTARN configuration will fail if you use a special character in the name of any of the BTARN databases.
Related links:
- How to Install and Configure Microsoft BizTalk 2013 R2 Accelerator for RosettaNet: Important considerations before you install BTARN (Part 1)
- How to Install and Configure Microsoft BizTalk 2013 R2 Accelerator for RosettaNet: Preparing your BizTalk Server 2013 R2 environment for BTARN (Part 2)
- How to Install and Configure Microsoft BizTalk 2013 R2 Accelerator for RosettaNet: Additional Configurations of BizTalk 2013 R2 Accelerator for RosettaNet (Part 4)
- How to Install and Configure Microsoft BizTalk 2013 R2 Accelerator for RosettaNet: Troubleshooting Your Installation (Part 5)
Hope you find this helpful! If you liked the content or found it useful and would like to support me in writing more, consider buying (or helping to buy) a Star Wars Lego set for my son.

