The next posts focus on installing the BizTalk prerequisites and performing the required configuration on the BizTalk Server machine.
Before installing BizTalk Server or any of its prerequisites, make sure you install the latest critical Windows updates from Microsoft.
📝 One-Minute Brief
This article explains how to configure SQL Server Database Mail for BizTalk Server 2013 R2. Database Mail is required for SQL Agent job notifications and BizTalk alerts. The guide walks through enabling and configuring Database Mail to ensure monitoring emails and backup alerts function correctly.
Why Database Mail Is Required for BizTalk
If you plan to configure BAM Alerts in your BizTalk Server 2013 R2 environment, you must configure SQL Server Database Mail first. Otherwise, the BizTalk Basic Configuration will ignore BAM Alerts.
Starting with SQL Server 2012 and SQL Server 2014, BAM Alerts rely on Database Mail instead of SQL Notification Services (used in SQL Server 2008 R2 and earlier).
Database Mail provides an enterprise solution for sending e-mail messages directly from the SQL Server Database Engine. Using Database Mail, database applications can:
- Send e-mail notifications
- Include query results
- Attach files from network resources
You can read more in the official documentation:
https://docs.microsoft.com/en-us/sql/relational-databases/database-mail/database-mail
Note: You can use BAM Portal with activities and aggregations without alerts. However, Database Mail is mandatory if you want to enable BAM Alerts.
Configure SQL Server Database Mail Account
Before we begin, we need to determine the server name and port number for the Simple Mail Transfer Protocol (SMTP) server that we will use to send e-mails (If the SMTP server requires authentication, determine the username and password for the SMTP server). In our case, it will be the local SMTP Server that we previously installed and configured.
To Configure SQL Server Database Mail Account:
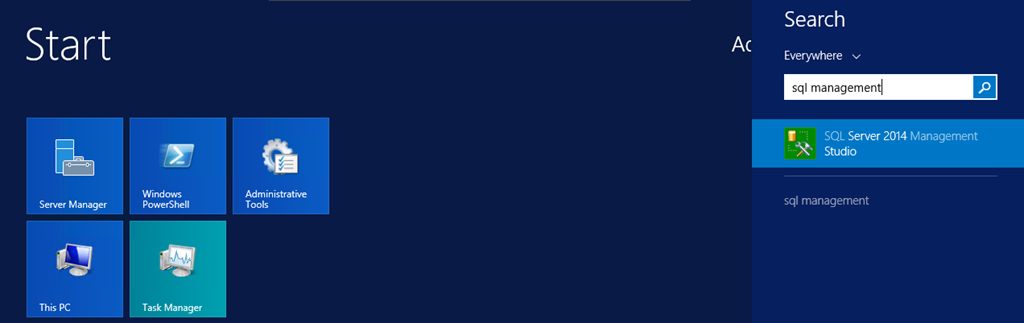
- Press the Windows key to switch to the Start screen, type SQL Management or SQL, and click on the SQL Server Management Studio option from the Search menu.
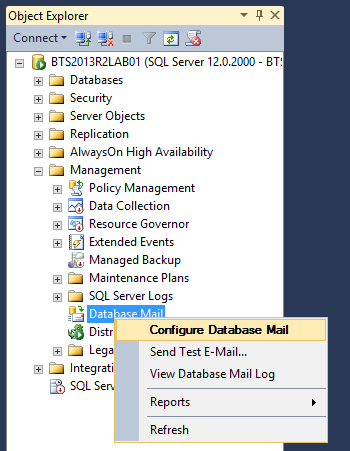
- In the Object Explorer panel, connect to the SQL Server instance you want to configure Database Mail on. And then expand the server tree.
- Expand the Management node.

- Double-click Database Mail to open the Database Mail Configuration Wizard.
- Or right-click under Database Mail and select the option Configure Database Mail.
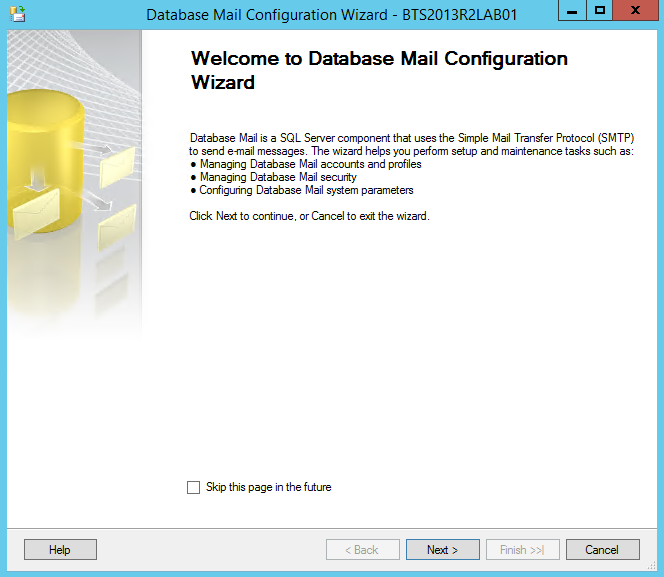
- On the Welcome to Database Mail Configuration Wizard page, click Next to continue.
- On the Select Configuration Task page, select Set up Database Mail by performing the following tasks: and click Next to continue.
- Set up Database Mail by performing the following tasks: Perform all of the tasks required to set up Database Mail for the first time. This option includes all of the other three options.
- Manage Database Mail accounts and profiles: Create new Database Mail accounts and profiles or to view, change, or delete existing Database Mail accounts and profiles.
- Manage profile security: Configure which users have access to Database Mail profiles.
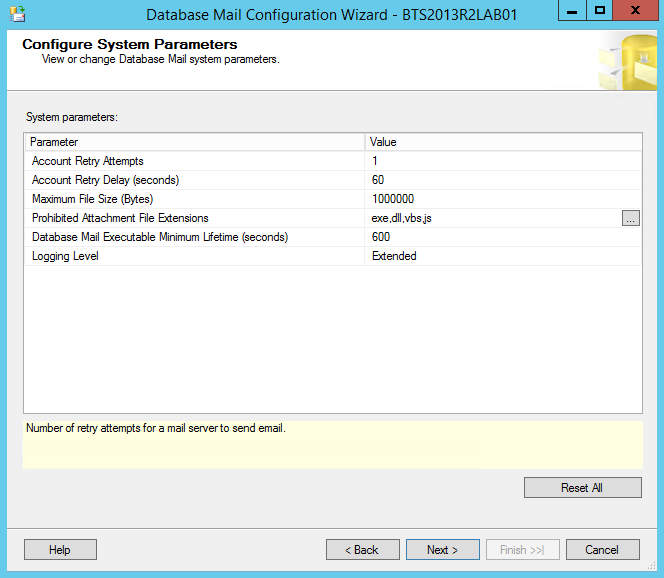
- View or change system parameters: Configure Database Mail system parameters, such as the maximum file size for attachments.

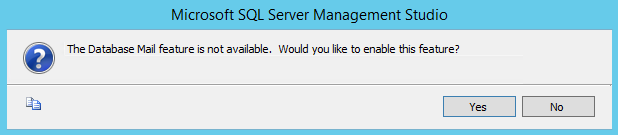
- If Database Mail has not been enabled, you will receive the message: The Database Mail feature is not available. Would you like to enable this feature? Click Yes to continue.
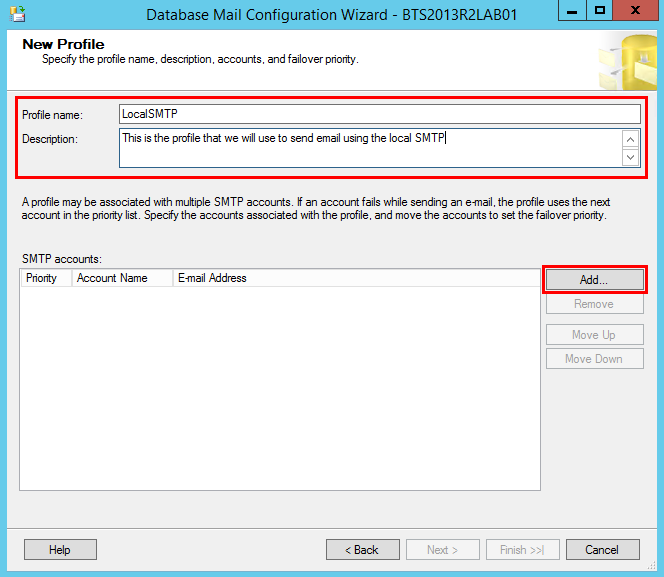
- On the New Profile page, specify the Profile name and Description to be included in the profile, and click Add… to specify an account
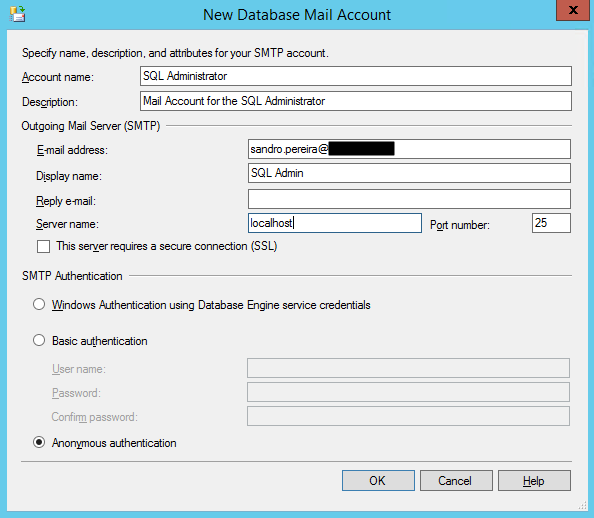
- On the New Database Mail Account page, specify the account name, description, mail server information, and authentication type. Click OK.
- A Database Mail account contains the information that SQL Server uses to send e-mail messages to an SMTP server. Each account contains information for one e-mail server and doesn’t correspond to a SQL Server account or a Microsoft Windows account. Database Mail can be sent using the credentials of the SQL Server Database Engine, using other credentials that you supply, or anonymously. When using basic authentication, the username and password in a Database Mail account are only used for authentication with the e-mail server. An account need not correspond to a SQL Server user or a user on the computer running SQL Server.
- Account name: Type the name of the new account.
- Description: Type a description of the account. The description is optional.
- E-mail address: Type the name of the e-mail address for the account. This is the e-mail address that the e-mail is sent from. For example, an account for SQL Server Agent may send an email from the address SqlAgent@Adventure-Works.com.
- Display name: Type the name to show on e-mail messages sent from this account. The display name is optional. This is the name displayed on messages sent from this account. For example, an account for SQL Server Agent may display the name SQL Server Agent Automated Mailer in e-mail messages.
- Reply e-mail: Type the e-mail address that will be used for replies to e-mail messages sent from this account. The reply e-mail is optional. For example, replies to an account for SQL Server Agent may go to the database administrator, danw@Adventure-Works.com.
- Server name: Type the name or IP address of the SMTP server the account uses to send an e-mail. Typically, this is in a format similar to smtp.<your_company>.com. For help with this, consult your mail administrator. As I said earlier, we will use our local SMTP Server, which means that the server name will be localhost.
- Port number: Type the port number of the SMTP server for this account. Most SMTP servers use port 25.
- This server requires a secure connection (SSL): Encrypts communication using Secure Sockets Layer.
- Windows Authentication using Database Engine service credentials: Connection is made to the SMTP server using the credentials configured for the SQL Server Database Engine service.
- Basic Authentication: Specify the username and password required by the SMTP server.
- Anonymous authentication: Mail is sent to the SMTP server without login credentials. Use this option when the SMTP server does not require authentication.
- A Database Mail account contains the information that SQL Server uses to send e-mail messages to an SMTP server. Each account contains information for one e-mail server and doesn’t correspond to a SQL Server account or a Microsoft Windows account. Database Mail can be sent using the credentials of the SQL Server Database Engine, using other credentials that you supply, or anonymously. When using basic authentication, the username and password in a Database Mail account are only used for authentication with the e-mail server. An account need not correspond to a SQL Server user or a user on the computer running SQL Server.
- Back on the New Profile page, click Next to continue.

- On the Manage Profile Security page, you will be able to set the Public, Private, and Default Profiles, select our profile as public and default, and click Next.

- On the Configure System Parameters page, leave the default values and click Next.
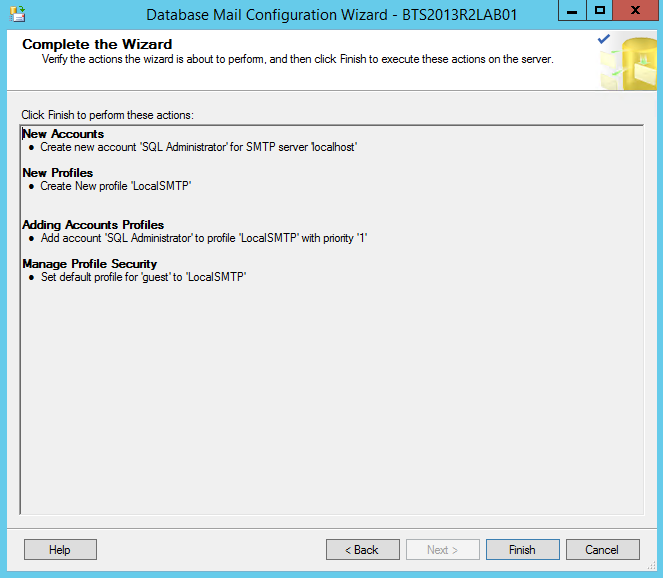
- On the Complete the Wizard page, review the actions to be performed and click Finish to complete creating the new account.
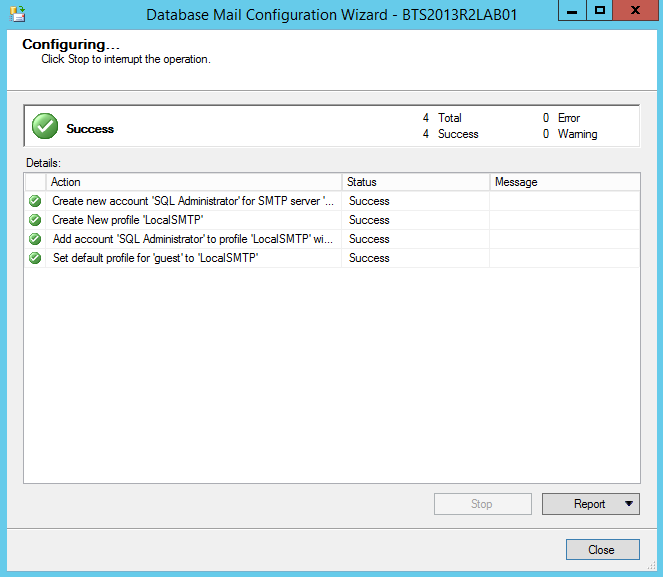
- On the Configuring… page, ensure that all actions succeed and then click Close.
The Database Mail should now be configured successfully, and all should be correctly set up to send emails, but we must make sure by testing it. So we will send a test email and confirm the reception. To do that:
- Right-click on Database Mail and select Send Test E-Mail…

- On the Send Test E-mail from window, specify a To: email and click Send Test E-Mail.

The Database Mail Test E-Mail dialog box confirms that Database Mail attempted to send the test message and provides the mailitem_id for the test e-mail message. Check with the recipient to determine if the e-mail arrived. Normally e-mail is received in a few minutes or seconds. If you have received the email, you have been able to configure Database Mail successfully, but the e-mail can be delayed because of slow network performance, a backlog of messages at the mail server, or if the server is temporarily unavailable. Use the mailitem_id for troubleshooting.
Related links
- BizTalk Server 2013 R2: Installation and Configuration – Important considerations before set up the server (Part 1)
- BizTalk Server 2013 R2: Installation and Configuration – Enable Internet Information Services (Part 2)
- BizTalk Server 2013 R2: Installation and Configuration – Install Windows Identity Foundation (WIF) (Part 3)
- BizTalk Server 2013 R2: Installation and Configuration – Install and configure SMTP Server Feature (optional) (Part 4)
- BizTalk Server 2013 R2: Installation and Configuration – Install Microsoft Office Excel 2013 (Part 5)
- BizTalk Server 2013 R2: Installation and Configuration – Install Visual Studio 2013 (Part 6)
- BizTalk Server 2013 R2: Installation and Configuration – Install SQL Server 2014 (Part 7)
- BizTalk Server 2013 R2: Installation and Configuration – Install and Configure BizTalk Server 2013 R2 (Part 9)
- BizTalk Server 2013 R2: Installation and Configuration – Configure SQL Server Network Configuration protocols (Part 10)
- BizTalk Server 2013 R2: Installation and Configuration – Validate Mail account used by BizTalk to send BAM Alerts (Part 11)
- BizTalk Server 2013 R2: Installation and Configuration – Installing BizTalk Adapter Pack (Part 12)
- BizTalk Server 2013 R2: Installation and Configuration – Install and Configure Microsoft UDDI Services (Part 13)
- BizTalk Server 2013 R2: Installation and Configuration – Install and Configure the Microsoft BizTalk ESB Toolkit (Part 14)
- BizTalk Server 2013 R2: Installation and Configuration – Configure BizTalk Server SQL Jobs (Part 15)
- BizTalk Server 2013 R2: Installation and Configuration – Optimize the BizTalk Server 2013 R2 environment (Part 16)
- BizTalk Server 2013 R2: Installation and Configuration – Optimize the BizTalk Server 2013 R2 environment (Part 17)
- BizTalk Server 2013 R2: Installation and Configuration – Optimize the BizTalk Server 2013 R2 environment (Part 18)
- BizTalk Server 2013 R2: Installation and Configuration – Install additional Developer tools (Part 19)
Hope you find this helpful! If you liked the content or found it useful and would like to support me in writing more, consider buying (or helping to buy) a Star Wars Lego set for my son.


I am getting an error could not connect to mail server. no connection could be made because the target machin actively refused it 127.0.01:25 while sending a test mail.