

Welcome again to another Decoding Logic App Dilemmas: Solutions for Seamless Integration! This time, we start by noting that, unfortunately, the Logic App connector for Azure Blob Storage does not include any action that allows you to detect deleted files in a storage account container.

Also, creating an Azure Function that listens to the container and detects when a file is deleted will not work, but why?
This is mainly due to an Azure Functions Blob Trigger Limitation: Azure Functions supports triggers for blob storage, such as when a blob is added or updated, but there’s no native trigger for blob deletions. This is, of course, a significant limitation.
But not all news is bad. There is another way to achieve that! But let us introduce the requirements first.
📝 One-Minute Brief
Detect deleted files in an Azure Storage Account by using Event Grid events and trigger a Logic App to react instantly, enabling audit, recovery, or downstream processing scenarios.
Problem: The Logic App connector for Azure Blob Storage does not have any action that allows you to detect deleted files in a storage account
We want to trigger a Logic App whenever a file is deleted in a specific storage container (in a Storage Account) and provide the name of the deleted file.
Solution: Using Event Grid
At least one possible solution to achieve these is using Event Grid!
So how can we achieve this?
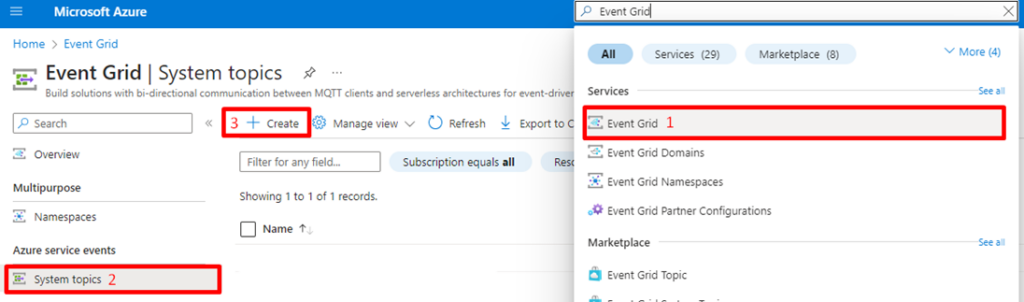
- First, in the Azure Portal Search bar, search for Event Grid.
- Click on System Topics.
- Click on Create.
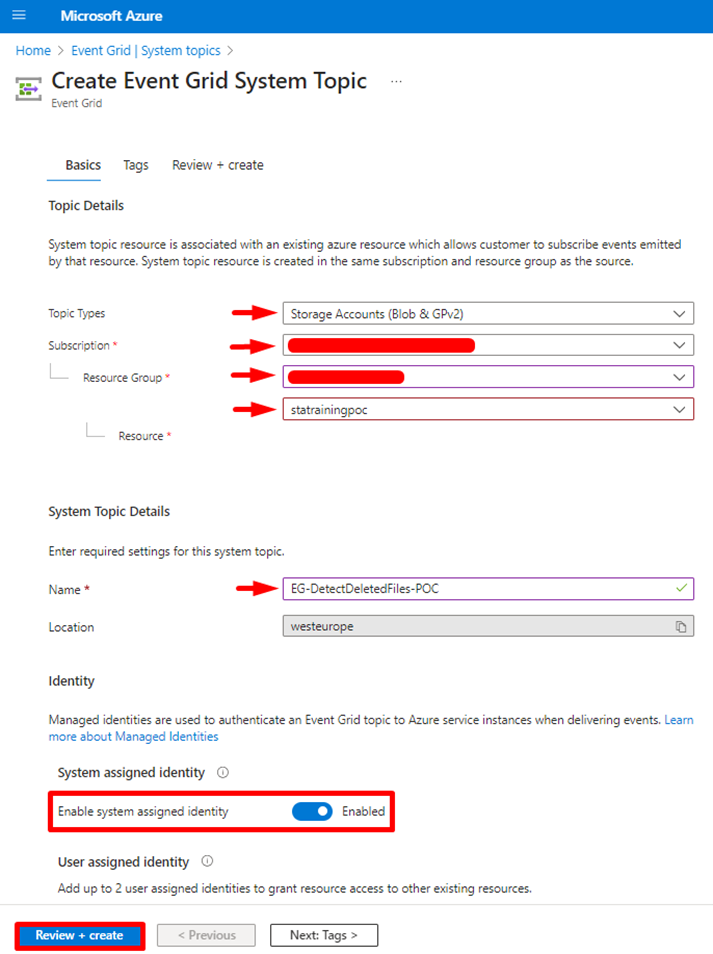
- Next, you will need to populate the following fields:
- Topic Types: Storage Accounts (Blob & GPv2)
- Subscription: <your-subscription>
- Resource Group: <your-resource-group>
- Resource: <storage-account-name>
- Resource Group: <your-resource-group>
- Name: <system-topic-name>
- Also, enable the Enable system assigned identity option.
- Next, click on Review + create to create this resource.
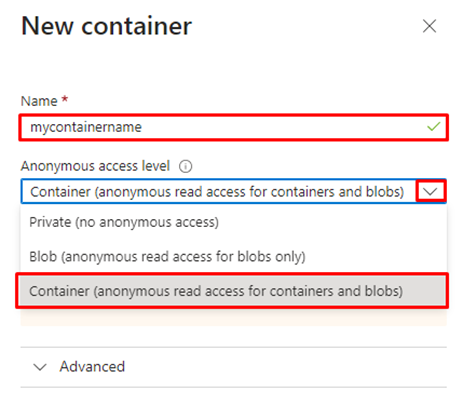
Also, we will be using a Storage Account on this solution, so we assume that you have already created one. Otherwise, you will need to create one. Once you have accessed your Storage account, we need to create a new Container. For that, you will need to:
- On the overview page, click on Containers next to + Container to add a container.

- A new window will open. You should choose your container name and, in the anonymous access level drop-down, select Container (anonymous read access for containers and blobs).
- Next, click on Create.
- In our case, we added one container (as you should) and named it:
- demo – (This is where we upload all our files.)
Following from where we left off, we now need to create a Logic App. To do so, let’s create the first Logic App:
- In the Azure Portal, in the search bar, search for Logic App, and click on it

- Next, click on +Add.

- Next, you will have some fields to populate:
- Your Subscription
- Your Resource Group
- Your Logic App Name
- Your Region
- Plan Type (we recommend standard)
- Next, click Review + Create, wait for validation, then click Create.

Before we move into the Designer, let’s first configure the managed identity in our Logic App. To do so:
- On the Logic App page, click on the Identity option under the Settings section.
- Next, set the Status property to On, and then click on Azure role assignments.

- Next, click on Add role assignment.

- Here, choose the Scope. In this case:
- We are dealing with Storage.
- Make sure you select your subscription and the resource name.
- As for the role for this POC, choose the Owner role. Next, click on Save

Now, it is time to create the Logic App workflow logic in the designer. To do so:
- On your Logic App page, click on Edit.

- Next, you need to choose a template to start your Logic App, but since we want to do something more customized to our scenario, let’s click on Blank Logic App.

- Now, it’s time to choose the trigger: we will select When a resource event occurs.
- Here select:
- On the Subscription property, set your subscription.
- On the Resource Type property, you must set it to Microsoft.Storage.StorageAccounts
- On the Resource Name property, select the name of your Storage Account
- On the Event Type property, you must set it to Microsoft.Storage.BlobDeleted

- Now, if you need to, you can change your connection to a Managed Identity connection. (For us, this works without having the need to, so I will leave this as optional)
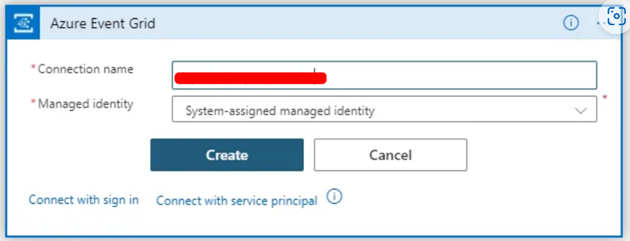
- Next, save your Logic App.
Testing the solution
Now, to test this solution, you can upload some files to the Storage Account container we have previously created:

And next, select one of the files, for example, the Order_003.xml, and delete it.
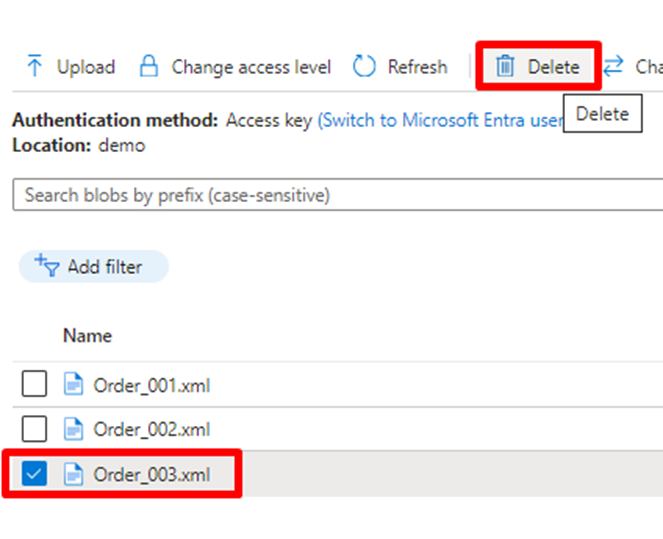
Now, if we move back to our Logic App, we will see that we have a new run:
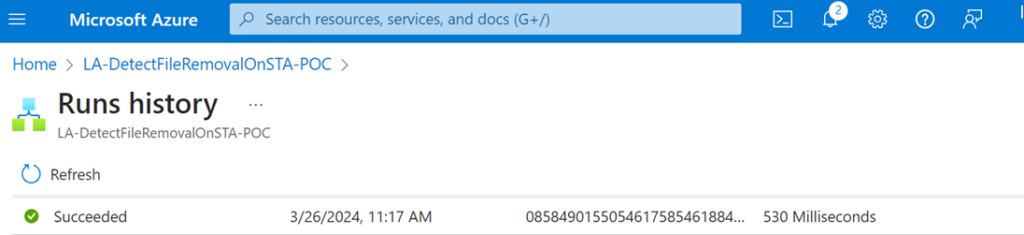
Next, click on this run and inspect the trigger. As you can see, you now have information about the deleted file.
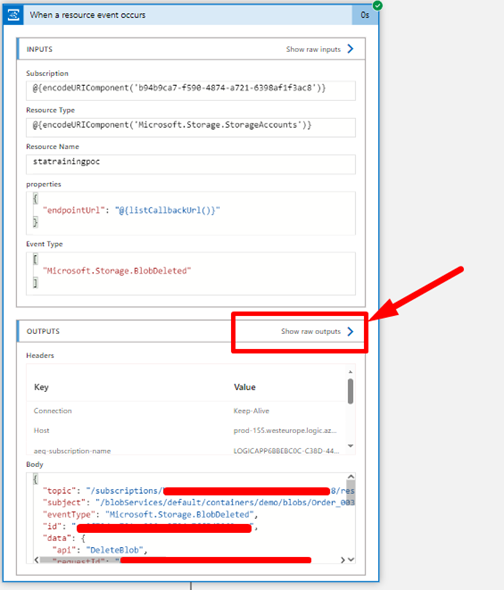
Next, click on Show raw outputs.
{
    "headers": {
        "Connection": "Keep-Alive",
        "Host": "prod-155.westeurope.logic.azure.com",
        "aeg-subscription-name": "LOGICAPP6BBEBC0C-C38D-449D-966F-F0888C230887",
        "aeg-delivery-count": "0",
        "aeg-data-version": "",
        "aeg-metadata-version": "1",
        "aeg-event-type": "Notification",
        "Content-Length": "775",
        "Content-Type": "application/json; charset=utf-8"
    },
    "body": {
        "topic": "/subscriptions/xxxxxx/resourceGroups/xxxxxx/providers/Microsoft.Storage/storageAccounts/statrainingpoc",
        "subject": "/blobServices/default/containers/demo/blobs/Order_003.xml",
        "eventType": "Microsoft.Storage.BlobDeleted",
        "id": "cc9f72de-701e-006c-3794-7ff5d5062aea",
        "data": {
            "api": "DeleteBlob",
            "requestId": "cc9f72de-701e-006c-3794-7ff5d5000000",
            "eTag": "0x8DC4D8C3E49E345",
            "contentType": "text/xml",
            "contentLength": 307,
            "blobType": "BlockBlob",
            "url": "https://statrainingpoc.blob.core.windows.net/demo/Order_003.xml",
            "sequencer": "000000000000000000000000000196DF0000000000049aed",
            "storageDiagnostics": {
                "batchId": "xxxxxx"
            }
        },
        "dataVersion": "",
        "metadataVersion": "1",
        "eventTime": "2024-03-26T15:41:26.0583745Z"
    }
}
As you can see, we can access some information, and this is exactly what we will do, but in another action, this time one Send an email (V2), from the Office 365 Outlook connectors.

For this, we will use the following expressions.
- storageAccount:
- This expression takes the value of the ‘topic’ field from the input.
- It splits the value by ‘/’ characters.
- Then it takes the last part of the split result, which is the storage account name.
- This expression takes the value of the ‘topic’ field from the input.
last(split(triggerBody()?['topic'], '/'))
- containerName:
- This expression extracts the container name from the URL provided in the input.
- It splits the URL by ‘/’ characters.
- Then, it takes all parts of the split except the last one, which represents the container name.
- This expression extracts the container name from the URL provided in the input.
last(take(split(triggerBody()?['data']?['url'], '/'), sub(length(split(triggerBody()?['data']?['url'], '/')), 1)))
- fileName:
- This expression extracts the file name from the URL provided in the input.
- It splits the URL by ‘/’ characters.
- Then, it takes the last part of the split, which represents the file name.
- This expression extracts the file name from the URL provided in the input.
last(split(triggerBody()?['data']?['url'], '/'))
- content-type:
- This expression simply retrieves the content type from the input data.
triggerBody()?['data']?['contentType']
- timeOfDeletion:
- This expression retrieves the time of deletion from the input data.
- It splits the ‘eventTime’ field by ‘.’ characters.
- Then, it takes the first part of the split (before the ‘.’), which represents the timestamp.
- It replaces the ‘T’ character in the timestamp with a space to make it more readable.
- This expression retrieves the time of deletion from the input data.
replace(first(take(split(triggerBody()?['eventTime'], '.'), sub(length(split(triggerBody()?['data']?['url'], '.')), 1))),'T',' ')
In the end, you should receive an email like this:

In terms of Logic App workflow logic, by the end, your Logic App should look as simple as this:

With this simple configuration, you can now use the event grid to detect deleted files in a storage account and trigger a Logic App when those events occur.
I hope you have enjoyed this POC, and we will see you in the next one! If you enjoyed the content or found it useful and wish to support our efforts to create more, you can contribute towards purchasing a Star Wars Lego for Sandro’s son!