This part of the article will focus on installing the SQL Server machine and all necessary requirements and components
Important considerations before setting up the servers
Check if all the considerations described above are implemented:
- Join the BizTalk Administrator Group to Local Administrators Group
- Install Critical Windows Updates
- Disable IPv6
- Turn off Internet Explorer Enhanced Security Configuration
- Disable User Account Control
- Install .NET Framework 3.5 SP1
- Configure Microsoft Distributed Transaction Coordinator (MS DTC)
- Enable Network COM+ access
Install SQL Server 2008 R2
In this step, we will install SQL Server 2008 R2 on the machine that will host the BizTalk databases
The steps are described in my blog:
The only recommendation that I made is to change the user running the SQL services to a domain account in step 11, Microsoft recommends that you use a separate account for each SQL Server service (see SQL Server Service Accounts topic described earlier).
Note: Using SQL Server Express Edition in a production environment is not recommended. The Express edition does not include certain features needed by BizTalk Server.
Install Service Pack 1 for Microsoft SQL Server 2008 R2
Service Pack 1 for Microsoft SQL Server 2008 R2 can be found here.
SQL Server 2008 R2 service packs are cumulative updates and upgrade all service levels of SQL Server 2008 R2 to SP1. This service pack contains the cumulative updates of SQL Server 2008 R2 cumulative update packages 1 thru 6. You can use these packages to upgrade any of the following SQL Server 2008 R2 editions:
- SQL Server 2008 R2 Datacenter Edition
- SQL Server 2008 R2 Enterprise Edition and Developer Edition
- SQL Server 2008 R2 Standard Edition
- SQL Server 2008 R2 Web Edition
- SQL Server 2008 R2 Workgroup Edition
- SQL Server 2008 R2 Express Edition
You should install this Service Pack.
SQL Reporting Services Note
One of the changes in the SQL Server Reporting 2008 Reporting Services is the removal of Internet Information Services (IIS) dependency.
The first reason Microsoft moved away from IIS is for better configuration. IIS was built several years ago to do lots of things, including serving up web pages from the file system, host ISAPIs, Internet printing, etc. SSRS 2005 uses very little of IIS, mainly as a port 80 listener, client authentication, and process hosting. But when you install IIS, you got a bunch of stuff that RS really doesn’t need at all. It turns out that all of the parts of IIS that we didn’t use got configured in very strange ways and made RS not work.
This is especially true in the case where there were other IIS applications on the same server as RS. Not only did other application settings conflict with RS, any application running under the same Application Pool identity is granted full access to the RS catalog. By moving out of IIS, so Microsoft has actually significantly reduced the surface area that you to configure and secure.
The second reason for the change is a need for better resource management. IIS has a pretty simple model for thread, memory, and state management. This works well for most applications that are serving up static or dynamic HTML pages. However, it wasn’t really built to host an enterprise server responsible for serving up reports with gigabytes of data in multiple formats to thousands of users simultaneously. By hosting the service engine ourselves, Microsoft gains much more control over resource management. For example, RS 2008 has a new on-demand processing model to ensure that no report executions will run out of memory. It does this by paging and releasing allocated memory to the disk when it gets memory pressure notifications. This would have been very difficult to implement using the IIS hosting model.
Reference:
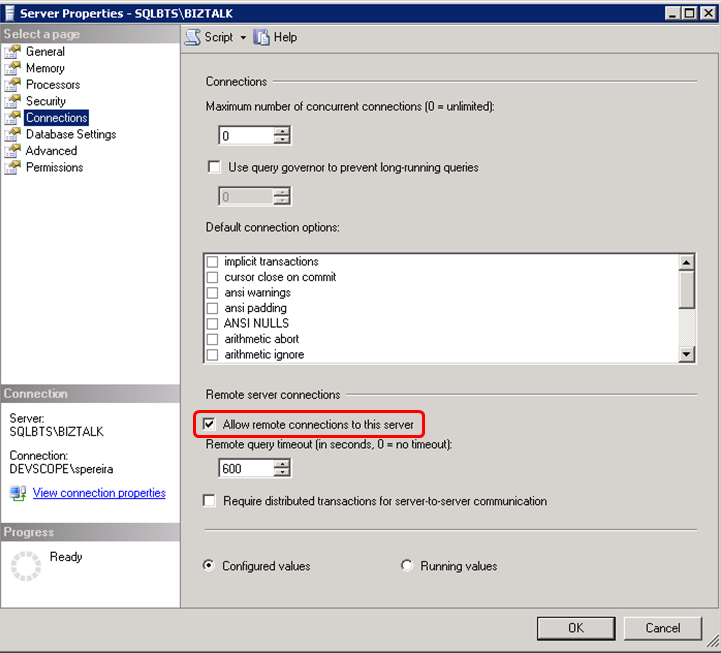
Configure SQL Server for Remote Connections
In order for the BizTalk servers to connect to SQL Server, remote connections need to be enabled.
To do so you need to:
- Run Microsoft SQL Server Management Studio and connect to the right instance.
- Once the tool opens, right click over the instance name and select Properties
- Go to Connections page and select the option “Allow remote connections to this server”
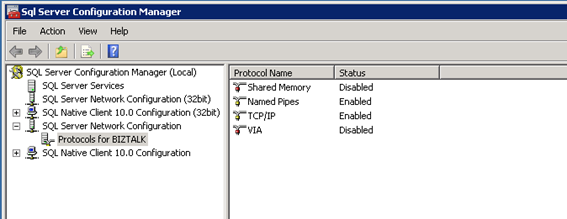
Configured SQL Server protocols – Disable the Shared Memory Protocol, Enable TCP/IP and Named Pipes
The steps are described in my blog:
Click ‘Start’, ‘All Programs’, click ‘Microsoft SQL Server 2008 R2’, click ‘Configuration Tools’, then click ‘SQL Server Configuration Manager’
In the SQL Server Configuration Manager, click on the ‘SQL Server Network Configuration’ node and expand it, under ‘Protocols for MSSQLSERVER’ right-click the ‘Shared Memory’ protocol and disable it. Right-click the TCP/IP protocol and enable it and repeat the process for Named Pipes.
Configure a Server to Listen on a Specific TCP Port
This is one request of my client.
If enabled, the default instance of the SQL Server Database Engine listens on TCP port 1433. Named instances of the Database Engine and SQL Server Compact 3.5 SP2 are configured for dynamic ports. This means they select an available port when the SQL Server service is started. When you are connecting to a named instance through a firewall, configure the Database Engine to listen on a specific port, so that the appropriate port can be opened in the firewall.
To assign a TCP/IP port number to the SQL Server Database Engine
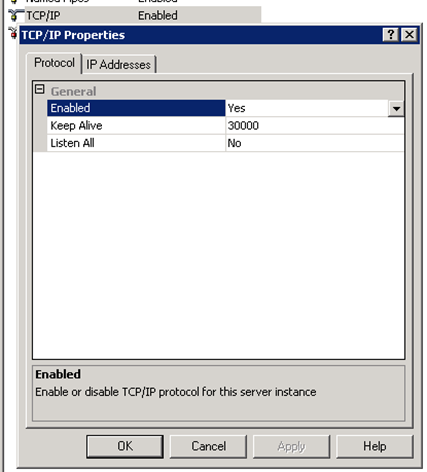
- In SQL Server Configuration Manager, in the console pane, expand SQL Server Network Configuration, expand Protocols for <instance name>, and then double-click TCP/IP.
- In the TCP/IP Properties dialog box, on the Protocol tab, change the property “Listen All” to “No”(This is one request of my client – just want to listen in one IP set in the machine)
- In the TCP/IP Properties dialog box, on the IP Addresses tab, several IP addresses appear in the format IP1, IP2, up to IPAll. One of these is the IP address of the loopback adapter, 127.0.0.1. Additional IP addresses appear for each IP Address on the computer. Right-click each address, and then click Properties to identify the IP address that you want to configure.
- If the TCP Dynamic Ports dialog box contains 0, indicating the Database Engine is listening on dynamic ports, delete the 0.
- In the IPn Properties area box, in the TCP Port box, type the port number you want this IP address to listen on, and then click OK.

- In the console pane, click SQL Server Services.
- In the details pane, right-click SQL Server (<instance name>) and then click Restart, to stop and restart SQL Server.
After you have configured SQL Server to listen on a specific port, there are three ways to connect to a specific port with a client application:
- Run the SQL Server Browser service on the server to connect to the Database Engine instance by name.
- Create an alias on the client, specifying the port number.
- Program the client to connect using a custom connection string.
Reference: How to: Configure a Server to Listen on a Specific TCP Port (SQL Server Configuration Manager)
Configure SQL Analysis Server to Listen on a Specific TCP Port
This is one request of my client.
You will be able to configure the port that SQL Analysis Server is listening by:
- Opening the SQL Server Management Console
- Connect to Analysis Server

- Right Click on SQL instance and select “Properties” option
- On the “General” tab, go to “Port” and set the port that you want to configure, in my case “2382”.
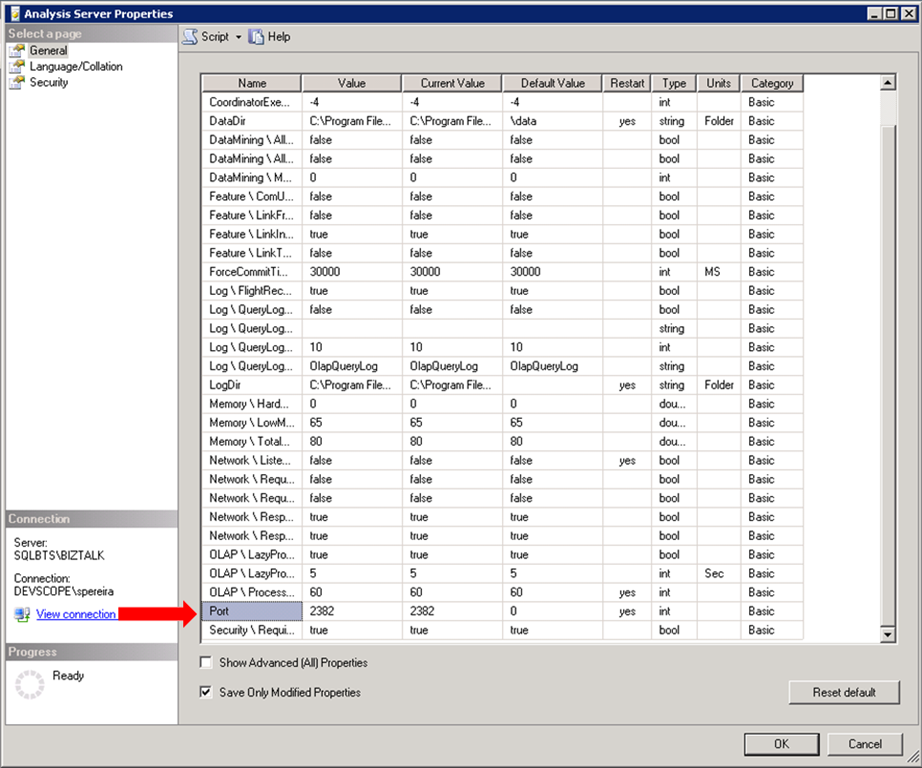
- Click “Ok” and restart the service.
Configuring Microsoft Distributed Transaction Coordinator (DTC) to work through a firewall or network address translation firewalls
DTC uses Remote Procedure Call (RPC) dynamic port allocation. By default, RPC dynamic port allocation randomly selects port numbers above 1024.
You can configure DTC to communicate through firewalls, including network address translation firewalls, just follow these steps:
- Go to Component Services
- On Component Services console, expand “Component Services
- Right-click on “My Computer” and select Properties option
- Go to “Default Protocols” tab select “Connection-oriented TCP/IP” option in DCOM protocols
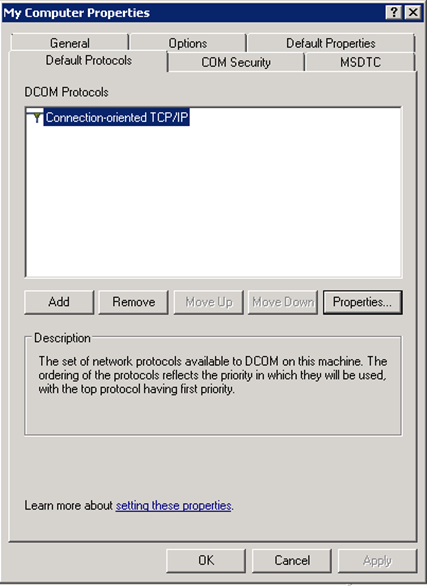
- Click the “Properties” button
- On “Properties for COM Internet Services” windows, click the “Add” button to set a port range
- Specify the range of ports you want to use, I set the following range: “5000-8976”
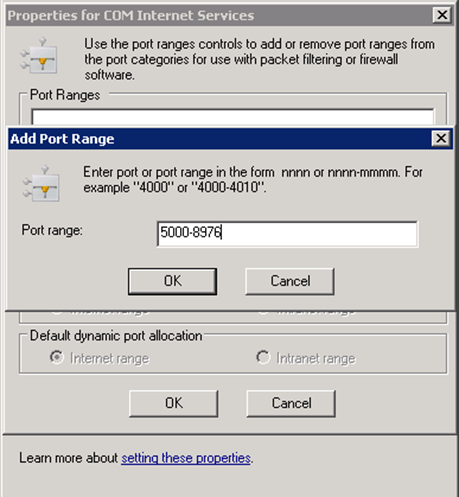
- Click “Ok”
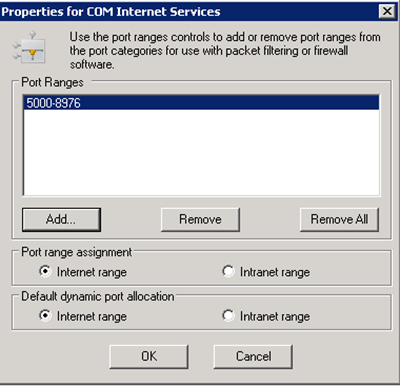
- Ensure that “Internet range” is check-in both options: “Port range assignment” and “Default dynamic port allocation”
List of ports between BizTalk Server and SQL Server
The following table lists the ports that we need to configure in firewall or request ACLs to network IT.
Direction:
- Source Host: BizTalk Server
- Destination Host: SQL Server
| Port No. | Protocol /Service | Description of Service |
| 135 | TCP | RPC: Transacted connection to SQL ServerTransacted connection to SQL Server for SQL adapter |
| 5000-8976(you may extend more ports for performance) | TCP | Secondary RPC ports Secondary RPC ports for SQL adapter |
| 1433 | TCP | Microsoft SQL Server port used typically for remote connections to the database. For the Enterprise Single Sign-On service to connect to the SSO database. To create and configure the MessageBox database. To create and configure the Tracking database. |
| 1434 | UDP | Microsoft SQL Monitor uses in monitoring Microsoft SQL Databases. |
| 2382 | TCP | To update and retrieve information from the BAM Analysis database |
| 445 | TCP | To create the OLAP data file (.mdb) on the remote computer |
| 2725 | TCP | For data retrieval for analysis (PivotTable® reports) |
| 80 | TCP | Reporting Services |
Reference:
Configure Firewall on SQL Server machine
Inbound Rules
In order to make DCOM applications work in Windows Server 2008 R2 you need to add the COM+ network access as shown below:
- Open “Server Manager” console and expand “Configuration” option in the left tree.
- Expand “Windows Firewall with Advanced Security” and select “Inbound Rules” option.
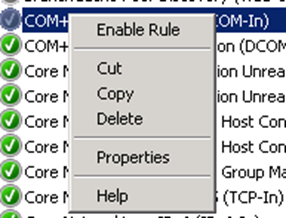
- Enable the following inbound rules by select them and right-click and select the option “Enable Rule” option
- COM+ Network Access (DCOM-in)
- COM+ Remote Administrator (DCOM-In)

Also, we enable Microsoft Distributed Transaction Coordinator (MS DTC) to communicate through a firewall with another MS DTC.
Repeat the previous steps and Enable the followings rules:
- Distributed Transaction Coordinator (RPC)
- Distributed Transaction Coordinator (RPC-EPMAP)
- Distributed Transaction Coordinator (TCP-In)

Now we need to create new rules for each of port described in topic “List of ports between BizTalk Server and SQL Server” to allow BizTalk Server to communicate with SQL Server machine. To create a new Inbound Rule, follow these steps:
- Right-click on “Inbound Rules” on the left tree and select the option “New Rule”
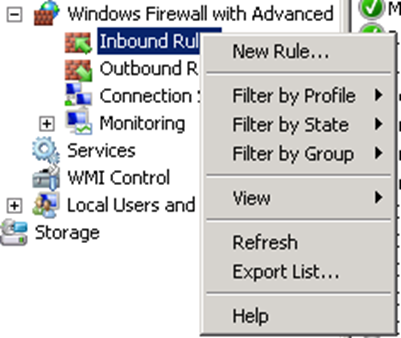
- On “New Inbounded Rule Wizard” windows in step “Rule Type” select “Port” option
- In step “Protocol and Ports” select the protocol requested and specify the port or list of ports
- In step “Action” select “Allow the connection” option
- In step “Profile” leave the default options
- In step “name” set the name and description of the rule
Outbound Rules
The first thing is to enable the following outbound rules:
- Distributed Transaction Coordinator (TCP-Out) – this will allow Outbound traffic for the Distributed Transaction Coordinator.

To do this follow the steps described in Inbound Rules, the steps are the same the only difference is that we are dealing with Outbound Rules
The second is to create a new outbound rule for RPC ports:
- Right-click on “Outbound Rules” on the left tree and select the option “New Rule”
- On “New Outbounded Rule Wizard” windows in step “Rule Type” select “Port” option
- In step “Protocol and Ports”
- Select the protocol: TCP
- Specify the range of ports: 5000-8976
- In step “Action” select “Allow the connection” option
- In step “Profile” leave the default options
- In step “name” set the name and description of the rule

Related Links
- Installing BizTalk Server 2010 in a Basic Multi-Computer Environment – Installation scenario (Part 1)
- Installing BizTalk Server 2010 in a Basic Multi-Computer Environment: The need for a Domain Controller – Windows Groups and Service Accounts (Part 2)
- Installing BizTalk Server 2010 in a Basic Multi-Computer Environment: Preparing Computers for Installation – Important considerations before setting up the servers (Part 3)
- Installing BizTalk Server 2010 in a Basic Multi-Computer Environment: Preparing and install prerequisites on BizTalk Server 2010 machine (Part 5)
- Installing BizTalk Server 2010 in a Basic Multi-Computer Environment: Testing environment connectivity’s (Part 6)
- Installing BizTalk Server 2010 in a Basic Multi-Computer Environment: Install and configure BizTalk Server 2010 machine (Part 7)

Great post! But just as a remark, there is a typo, the default port where SSAS is running is 2383, not 2382.